I. Hardware Bag Contents and Tool List
IMPORTANT: Please verify that you have received all of the contents listed. Do not proceed with assembly if any parts are missing; contact Burley immediately for replacement parts.
Hardware Bag Contents
(1) Cub Brake Assembly | (1) Brake Hardware Bag | ||
(3) | #10 x 5/8 Philips pan bolts | (3) | #10 split washers |
(3) | #10 x 1” fender washers | (1) | 4 x 6 plastic bag |
(1) | 6 x 18 plastic bag |
|
|
Tool List
7/16” wrench | Torque wrench | Extension |
7/16” socket | Two no. 2 Phillips screwdrivers | |
1/4” pin punch and hammer, or 1/4” drill bit and hand drill (see page 8)
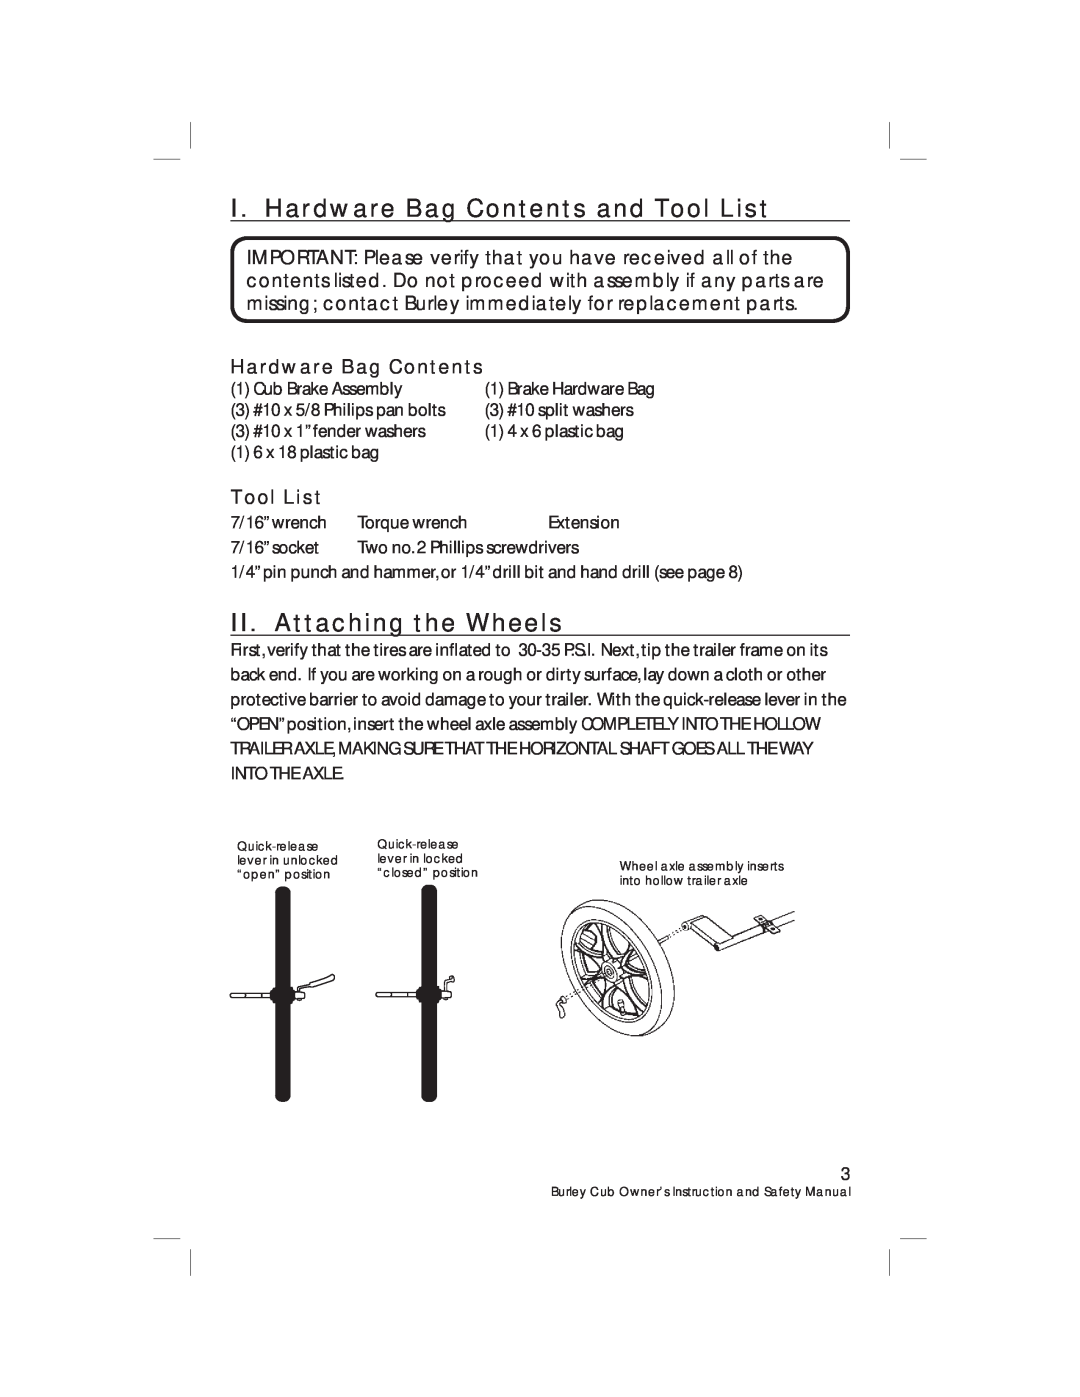
II. Attaching the Wheels
First, verify that the tires are inflated to
| |||
lever in unlocked | lever in locked | Wheel axle assembly inserts | |
“open” position | “closed” position | ||
into hollow trailer axle | |||
|
|
3
Burley Cub Owner’s Instruction and Safety Manual
