PSC23MGS
GE Profile CustomStyle™ 22.6 Cu. Ft.
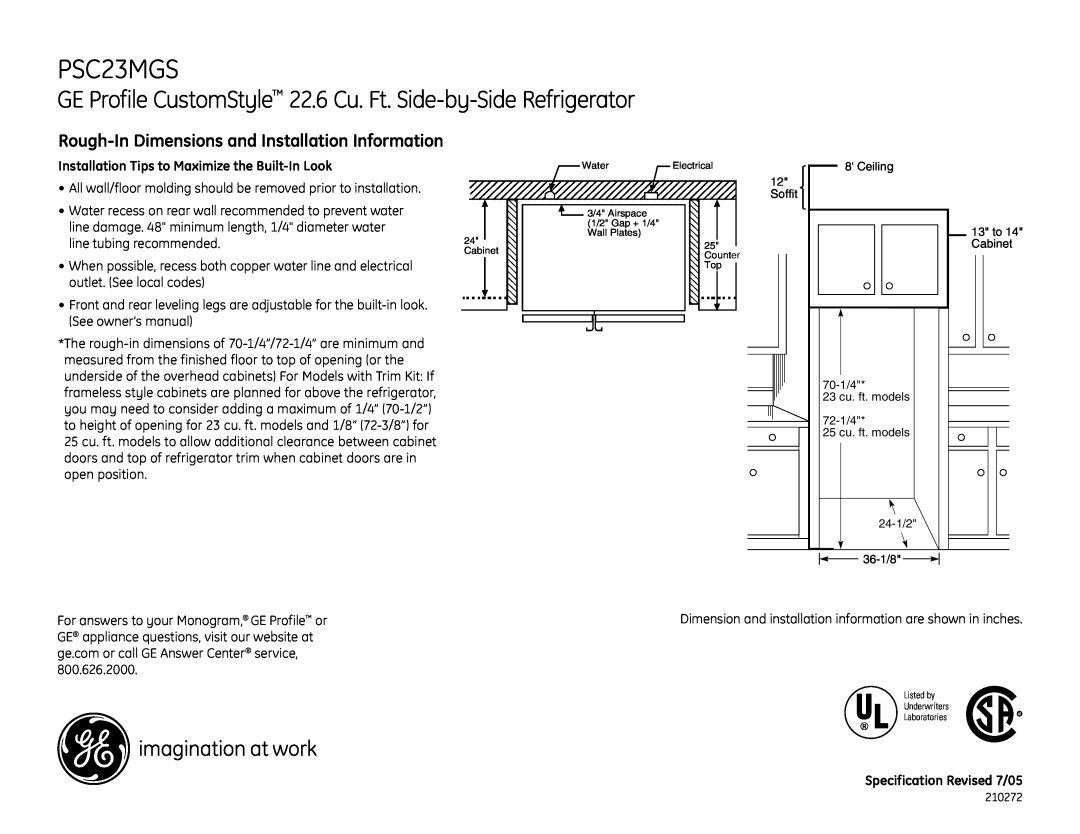
Rough-In Dimensions and Installation Information
Installation Tips to Maximize the Built-In Look
•All wall/floor molding should be removed prior to installation.
•Water recess on rear wall recommended to prevent water line damage. 48" minimum length, 1/4" diameter water line tubing recommended.
•When possible, recess both copper water line and electrical outlet. (See local codes)
•Front and rear leveling legs are adjustable for the
*The
24" Cabinet
![]() Water
Water ![]() Electrical
Electrical
![]() 3/4" Airspace
3/4" Airspace
(1/2" Gap + 1/4"
Wall Plates)
25"
Counter
Top
12" Soffit
8' Ceiling
23 cu. ft. models
25 cu. ft. models
![]()
![]()
![]()
![]()
13" to 14" Cabinet
For answers to your Monogram,® GE Profile™ or GE® appliance questions, visit our website at ge.com or call GE Answer Center® service, 800.626.2000.
Dimension and installation information are shown in inches.
Listed by
Underwriters
Laboratories![]() R
R
R
Specification Revised 7/05
210272