Controls and Functions
7PAIR Indicator
This indicator flashes during the pairing process between the Soundbar and Subwoofer. After the link between the Soundbar and Subwoofer is established, this indicator will turn off.
8POWER Button
Plug the power cord into the AC outlet. The Soundbar goes to the standby mode.
Press this button to turn the Soundbar on. The POWER indicator will illuminate to indicate the Soundbar is on. The Soundbar will remain on as long as an input signal is active. If the input becomes inactive the Soundbar will change to standby mode to conserve power.
To completely turn off the Soundbar, press this button again.
9SURROUND Button
This button is used to select either the FX SURROUND mode or the STEREO mode.
10MUTE Button
Press this button when you want to activate the audio mute. Press it again to deactivate the mute function. Pressing the VOLUME buttons will also deactivate the mute function.
11MAIN VOLUME Buttons
Press the + or - button to adjust the main volume up or down respectively.
12SUBWOOFER VOLUME Buttons
Press the + or - button to adjust the Subwoofer volume up or down respectively.
The Subwoofer volume sets the balance of the Subwoofer with the Soundbar. So the output level of the Subwoofer is adjusted by both the main volume and the Subwoofer volume.
13INPUT SELECTOR Button
Press this button to select INPUT 1, INPUT 2, or INPUT 3.
14PAIRING Button
This is used to recover the wireless connection between the Soundbar and the Subwoofer. Press and hold this button at least 3 seconds until the PAIR indicator on the front panel starts flashing. Then press the PAIRING button on the rear panel of the Subwoofer. The two units should link back up.
15INPUT 3
Connection type - 3.5 mm mini stereo. If your TV has a headphone output, this is a primary input to use by using the supplied 3.5 mm mini stereo cable.
16INPUT 2
Connection Type - RCA. Use this input to connect with your external devices
17INPUT 1
Connection Type - RCA. If your TV does not have a headphone output, use this input to connect with the
18PAIR Indicator
Upon confirming the PAIR indicator on the front panel of the Soundbar flashes, press the PAIRING button on this panel. It will turn on when the wireless connection is recovered.
19PAIRING Button
This is used to recover the wireless connection between
the Soundbar and the Subwoofer. Upon confirming the PAIR indicator on the front panel of the Soundbar flashes, Press this button. The two units should link back up.
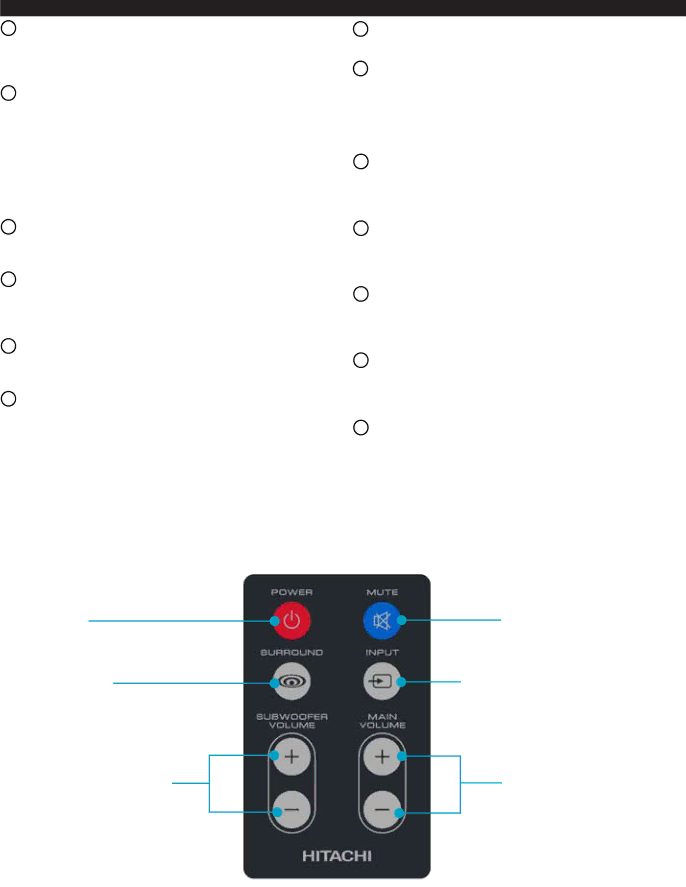
POWER Button
Press this button to turn the Soundbar on or off.
SURROUND Button
This button is used to select either the FX SURROUND mode or the STEREO mode.
SUBWOOFER VOLUME Buttons Press the + or - button to adjust the Subwoofer volume up or down respectively.
Remote Control
MUTE Button
Press this button when you want to activate the audio mute. Press it again to deactivate the mute function.
![]() INPUT SELECTOR Button Press this button to select INPUT 1, INPUT 2, or INPUT 3.
INPUT SELECTOR Button Press this button to select INPUT 1, INPUT 2, or INPUT 3.
MAIN VOLUME Buttons Press the + or - button to adjust the main volume up or down respectively.
9