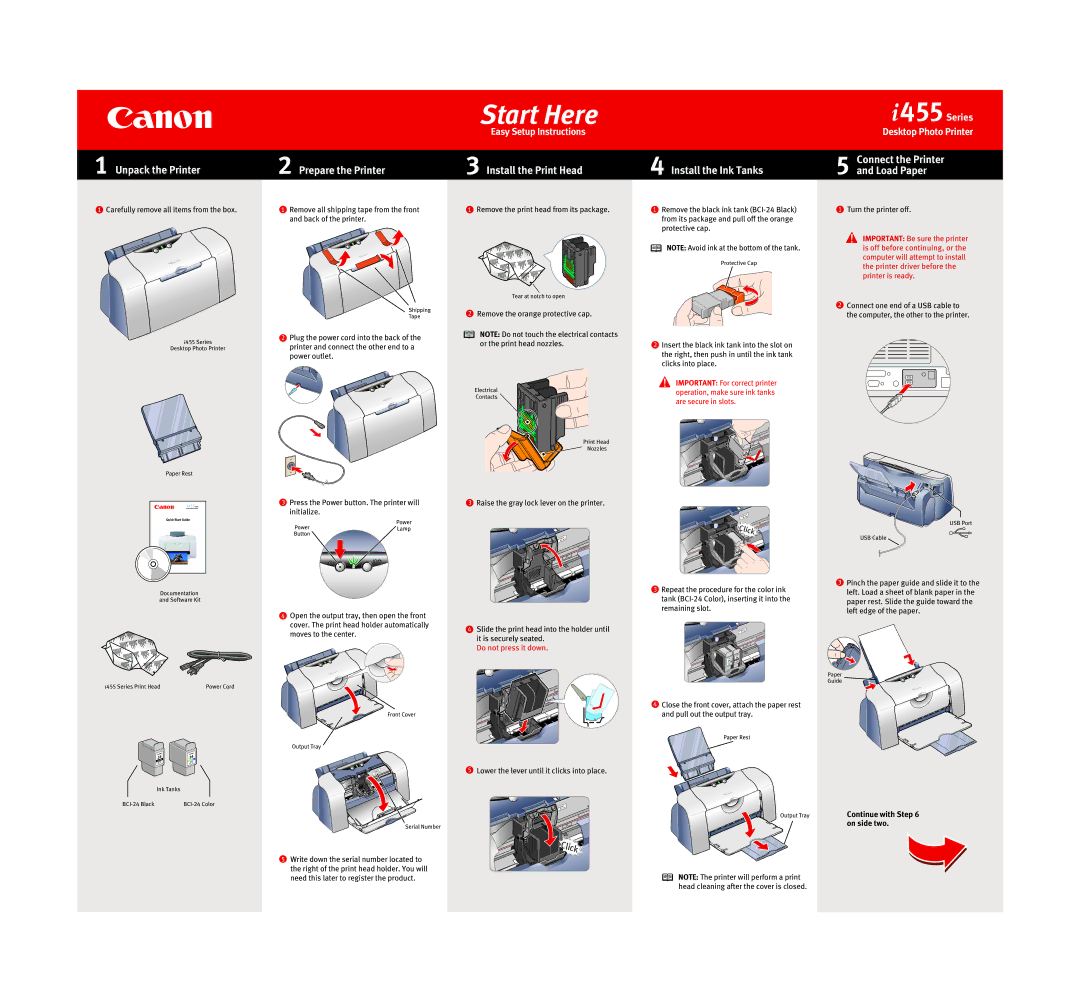
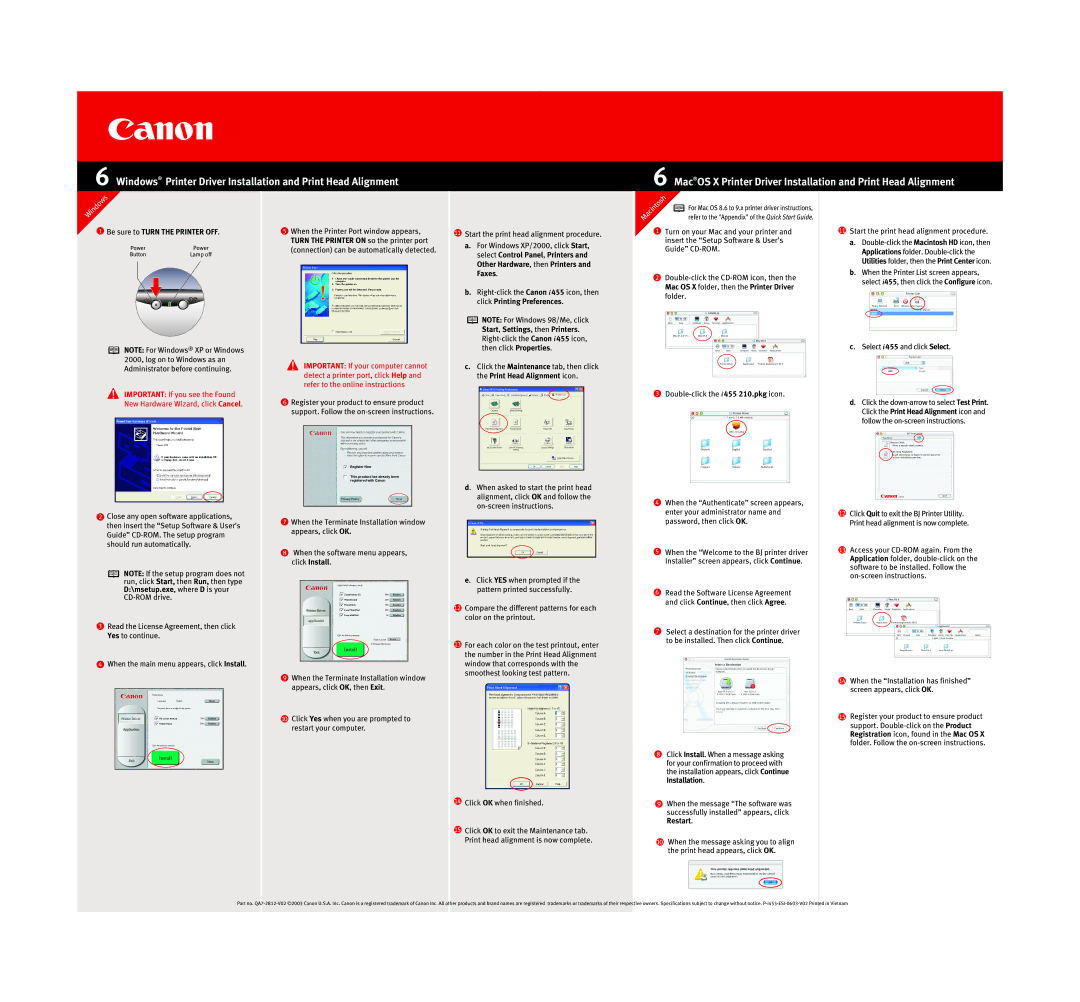
6 Windows® Printer Driver Installation and Print Head Alignment
6 Mac®OS X Printer Driver Installation and Print Head Alignment
Windows
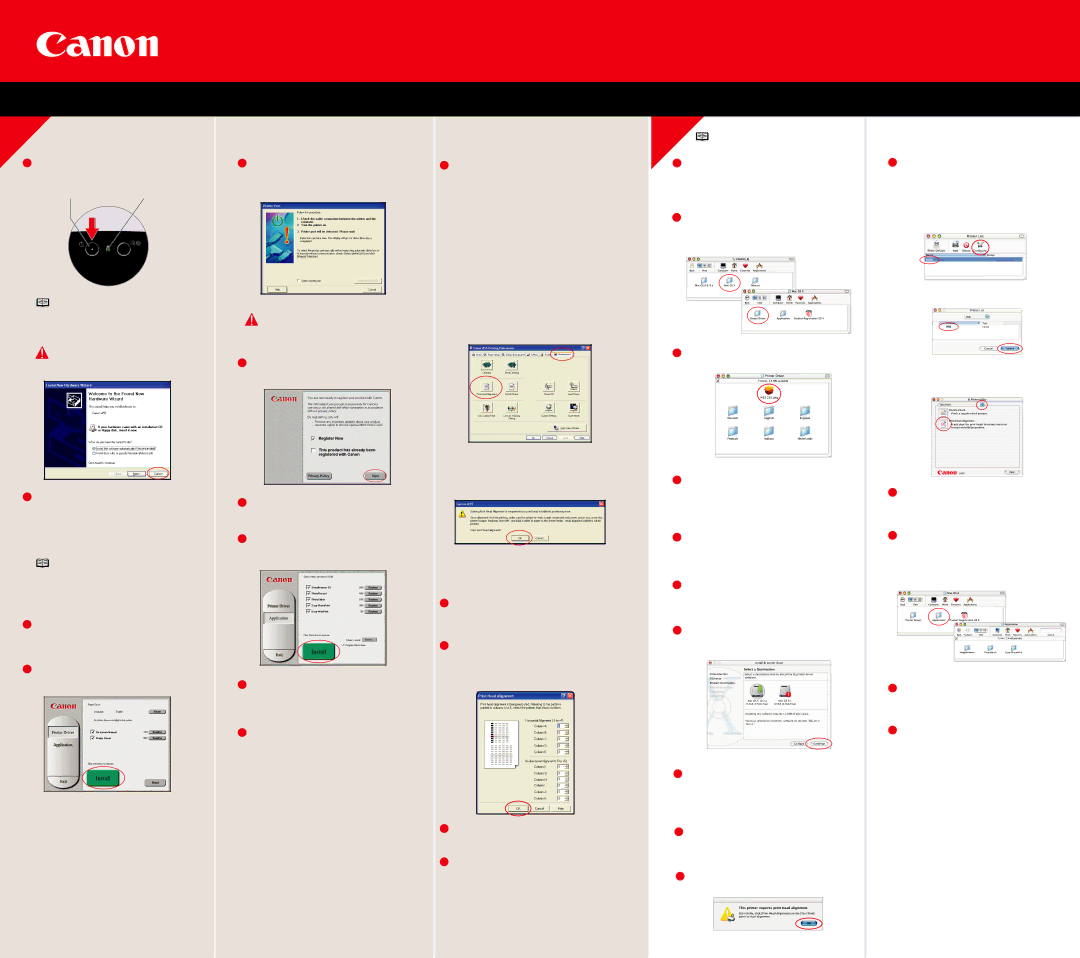
1 Be sure to TURN THE PRINTER OFF. | 5 When the Printer Port window appears, | |
Power | Power | TURN THE PRINTER ON so the printer port |
(connection) can be automatically detected. | ||
Button | Lamp off |
|
11Start the print head alignment procedure.
a.For Windows XP/2000, click Start, select Control Panel, Printers and Other Hardware, then Printers and Faxes.
b.
Macintosh | For Mac OS 8.6 to 9.x printer driver instructions, |
| |
| refer to the "Appendix" of the Quick Start Guide. |
1Turn on your Mac and your printer and insert the “Setup Software & User's Guide”
2
Mac OS X folder, then the Printer Driver folder.
11Start the print head alignment procedure.
a.
Utilities folder, then the Print Center icon.
b. When the Printer List screen appears, select i455, then click the Configure icon.
NOTE: For Windows® XP or Windows 2000, log on to Windows as an Administrator before continuing.
IMPORTANT: If you see the Found New Hardware Wizard, click Cancel.
2Close any open software applications, then insert the “Setup Software & User's Guide”
NOTE: If the setup program does not run, click Start, then Run, then type D:\msetup.exe, where D is your
3Read the License Agreement, then click Yes to continue.
4When the main menu appears, click Install.
IMPORTANT: If your computer cannot detect a printer port, click Help and refer to the online instructions
6Register your product to ensure product support. Follow the
7When the Terminate Installation window appears, click OK.
8When the software menu appears, click Install.
9When the Terminate Installation window appears, click OK, then Exit.
10Click Yes when you are prompted to restart your computer.
![]() NOTE: For Windows 98/Me, click Start, Settings, then Printers.
NOTE: For Windows 98/Me, click Start, Settings, then Printers.
c.Click the Maintenance tab, then click the Print Head Alignment icon.
d. When asked to start the print head alignment, click OK and follow the
e. Click YES when prompted if the pattern printed successfully.
12Compare the different patterns for each color on the printout.
13For each color on the test printout, enter the number in the Print Head Alignment window that corresponds with the smoothest looking test pattern.
14Click OK when finished.
15Click OK to exit the Maintenance tab. Print head alignment is now complete.
3
4When the “Authenticate” screen appears, enter your administrator name and password, then click OK.
5When the “Welcome to the BJ printer driver Installer” screen appears, click Continue.
6Read the Software License Agreement and click Continue, then click Agree.
7Select a destination for the printer driver to be installed. Then click Continue.
8Click Install. When a message asking for your confirmation to proceed with the installation appears, click Continue Installation.
9When the message “The software was successfully installed” appears, click
Restart.
10When the message asking you to align the print head appears, click OK.
c. Select i455 and click Select.
d. Click the
12Click Quit to exit the BJ Printer Utility. Print head alignment is now complete.
13Access your
14When the “Installation has finished” screen appears, click OK.
15Register your product to ensure product support.
Part no.