Hitachi 32LD4550U, 32LD4550C Connecting the Hdmi cable,  Hdmi in 1DVI or Hdmi in 2 jack on

Page 24
Select HDMI1 or HDMI2 input source using the INPUT button on the remote control.

Connecting the HDMI cable

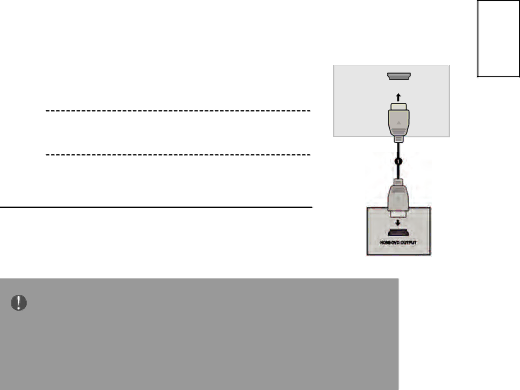
Connect the HDMI output of the DVD to the


HDMI IN 1(DVI) or HDMI IN 2 jack on the


HDMI IN 1

TV.


(DVI)


Refer to the DVD player's manual for operating instructions.

NOTE

The TV can receive video and audio signals simultaneously when using a HDMI cable.

If the DVD does not support Auto HDMI, you must set the output resolution appropriately.

English

19

Image 24
Contents 19LD4550C 19LD4550U Page Contents Watching TV / Programme Control Parental Control / Ratings Important Safety Instructions About This Manual Trademark CreditsAbout Software Safety Precautions About the Symbols Important for United KingdomSafety Precautions Do not handle the Power Cord with wet hands Safety Precautions Supplied Accessories OverviewPreparation Front Panel ControlsPower Cord Socket Back Panel InformationStand Installation Only 26/32Detaching Stand Only 26/32 Wall Mounting External Equipment Setup HD Receiver SetupConnecting a set-top box with an Hdmi  box to the Hdmi IN1DVI or Hdmi in 2 jackDigital Audio Out Setup Connect one end of an optical cable to the TV Digital Audio Optical Output PortDVD Setup When connecting with a component cableConnecting with a Euro Scart cable Connecting the Hdmi cable  Hdmi in 1DVI or Hdmi in 2 jack onVCR or DVD Setup Wall Jack AntennaConnecting with a Euro Scart cable Connecting with a S-Video cableOther A/V Source Setup Insertion Of CI ModulePC Setup Connecting with a D-sub 15 pin cableConnecting with a Hdmi to DVI cable Supported Display Resolution Auto Configure RGB PC mode only Select Auto ConfigAdjustment for screen Position, Size, Phase Select H. Position, V. Position, Phase, Size orResolution Selecting Resolution Select ResolutionRemote Control Key Functions Watching TV / Programme ControlInstalling Batteries Volume Adjustment Initializing setupTurning On The TV Programme SelectionQuick Setup Select CountryMenus Selection And Adjustment SetupAuto Programme Tuning Select Auto TuningAudio Language Selection In Digital Mode Only Select 1st Audio Language or 2nd Audio LanguageManual Programme Tuning In Digital Mode DTVManual Programme Tuning In Analog Mode Programme Skip Programme SkipAssigning Programme Fine TuneIn Analog Mode Select ProgrammeSelecting The Channel List Channel ListInput List Select Input ListPicture Control Picture Size Aspect Ratio Control169 Original Zoom1149 Zoom2Preset Picture Settings OK or Select Picture ModeSelect Picture Colour Temperature Normal/Warm/Cool Select Colour TemperatureManual Picture Adjustment Picture Mode-User optionPicture Improvement Technology Flesh ToneAdaptive Luma Control Noise ReductionPicture Mode User Dynamic Nature Game Sport CinemaSound Setting Adjustment -User Mode Sound ControlSelect a Frequency band Preset Sound Settings-Sound Mode Select Sound ModeBalance Auto Volume Level Select On or OffSelecting Digital Audio Out Select Digital Audio OutSelect Dolby Digital or PCM TV Speakers On/ Off Setup Audio Description on/off Setup Select Audio DescriptionOption Control Menu Language SelectionSelect Menu Language Time Zone Setup Select Time ZoneZone Clock Setup ClockAuto On/Off Timer Setting ClockSleep Timer Setting Diagnostics Select DiagnosticsCommon InterfaceCI Select OptionSelect Common Interface Disply CI card InformationSet Password & Lock System Parental Control / RatingsInput a 4-digit password Block ProgrammeParental Control Program Block Key Lock Switch On/Off TeletextSimple Text Top TextSpecial Teletext Functions RevealInitializing Reset to original factory settings AppendixTroubleshooting TV does not operate properlyAudio function does not work Warranty United Kingdom