OPERATING INSTRUCTIONS cont.
DRY IRONING
All marked settings on the temperature dial can be used for dry ironing.
1.Plug the cord into a household electrical outlet (see page 3 for voltage settings). The pilot light light will go “On”, indicating that the iron is heating up.
2.Set Temperature Control Dial to desired temperature setting.
3.Place garment steamer/iron on its heel (on a stable, protected surface) while iron is warming to desired temperature.
4.When the iron has reached the desired temperature, the pilot light will go “Off”.
OPERATING INSTRUCTIONS cont.
Using the Swivel Handle
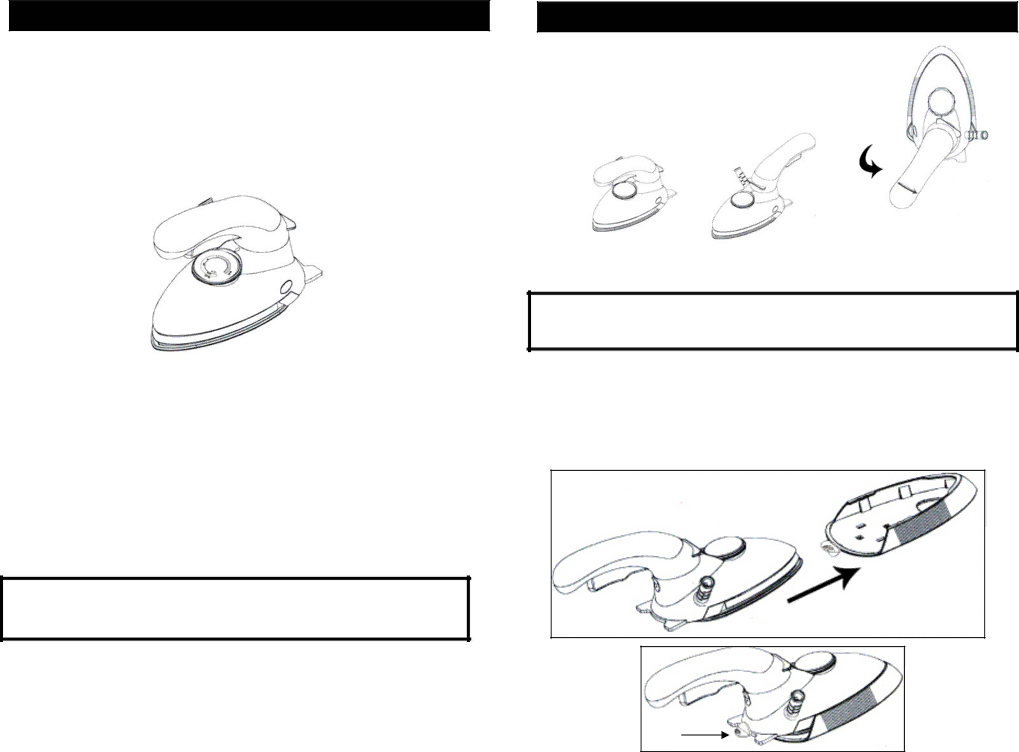
The handle on the garment steamer/iron can be changed in position by turning the handle 180° counter clockwise. (See illustration at right.) You can use the iron with the handle over it for regular ironing or with the handle behind it for steaming garments. (See illustrations below.)
EMPTYING, CLEANING & STORING THE GARMENT STEAMER/IRON
Always empty and clean your garment steamer/iron after each use and before storing.
1.Turn the temperature control dial to the “MIN” position
2.Unplug the power cord from the electrical outlet.
3.Empty the garment steamer/iron of all remaining water in the water reservoir.
4.Allow the unit to cool down before cleaning.
5.When the garment steamer/iron has cooled down completely, scale and other residue can be wiped off the soleplate with a damp cloth.
6.Store the garment steamer/iron in the upright position.
WARNING! Use caution when emptying the garment steamer/iron. Burns may occur from touching hot metal surfaces, hot water or steam.
7
Using the Garment Brush
CAUTION! To prevent the risk of burns, make sure that the iron is not plugged in and that the iron sole plate is not hot before you slide on the garment brush to the iron.
1.Disconnect the garment steamer/iron from the power supply.
2.If the appliance is hot, let it cool down first..
3.Slide the garment brush onto the soleplate of the garment steamer/iron and lock in place by turning the locking tab 180°
4.To remove the garment brush, disconnect garment steamer/iron from the power supply and let the unit cool down.
5.Turn the locking tab 180° clockwise and slide the garment brush off.
Locking
Tab
4