
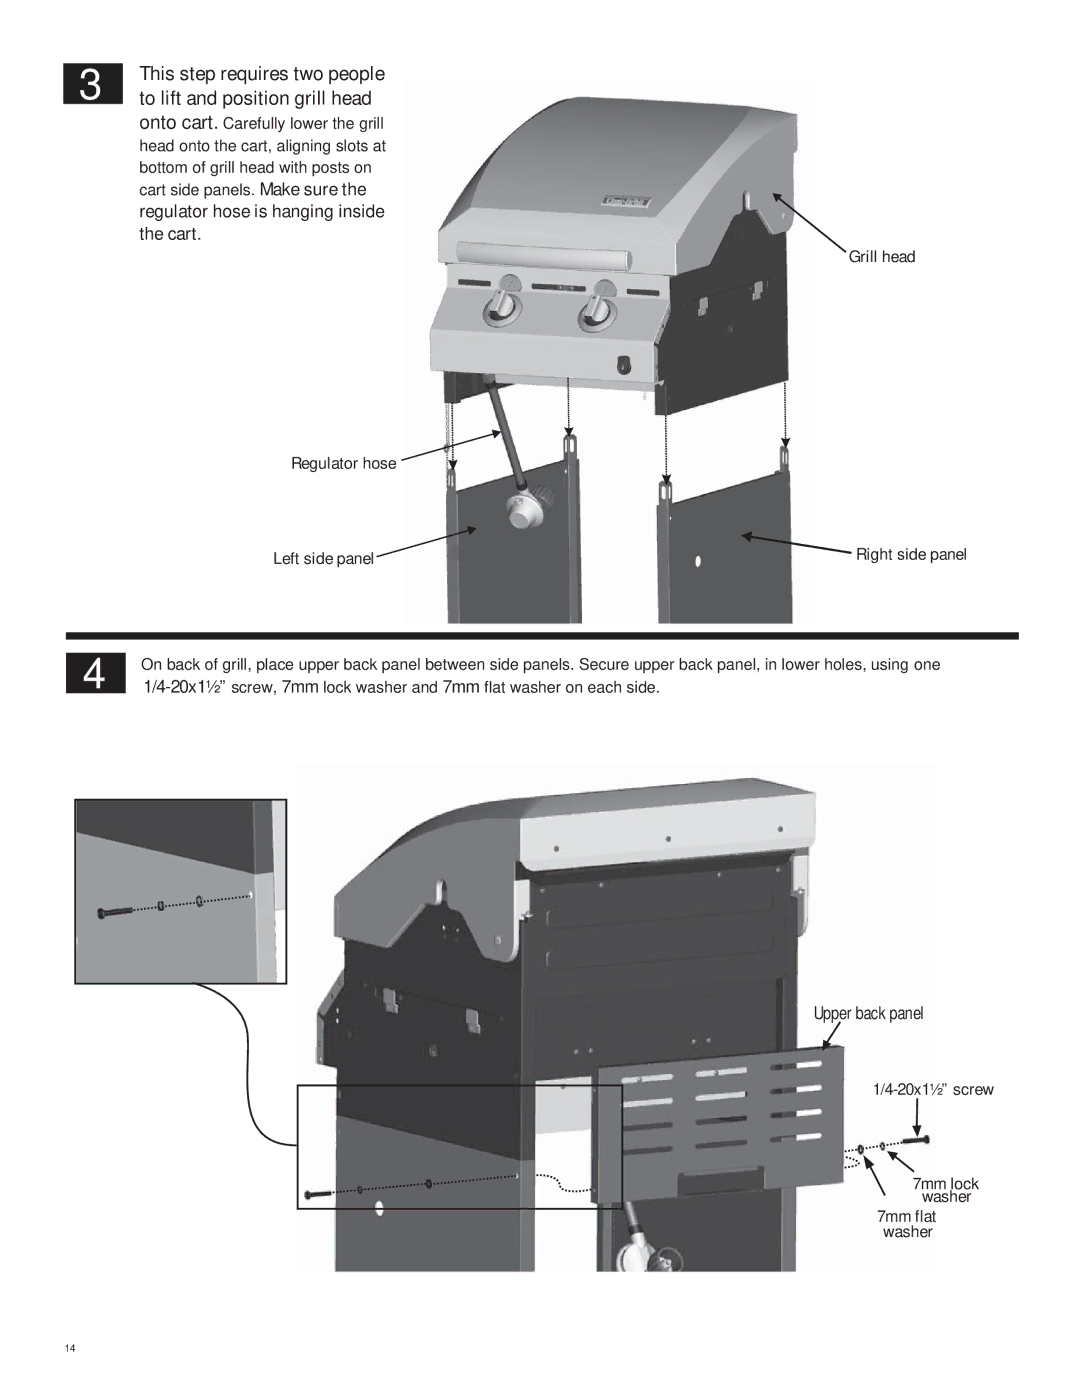

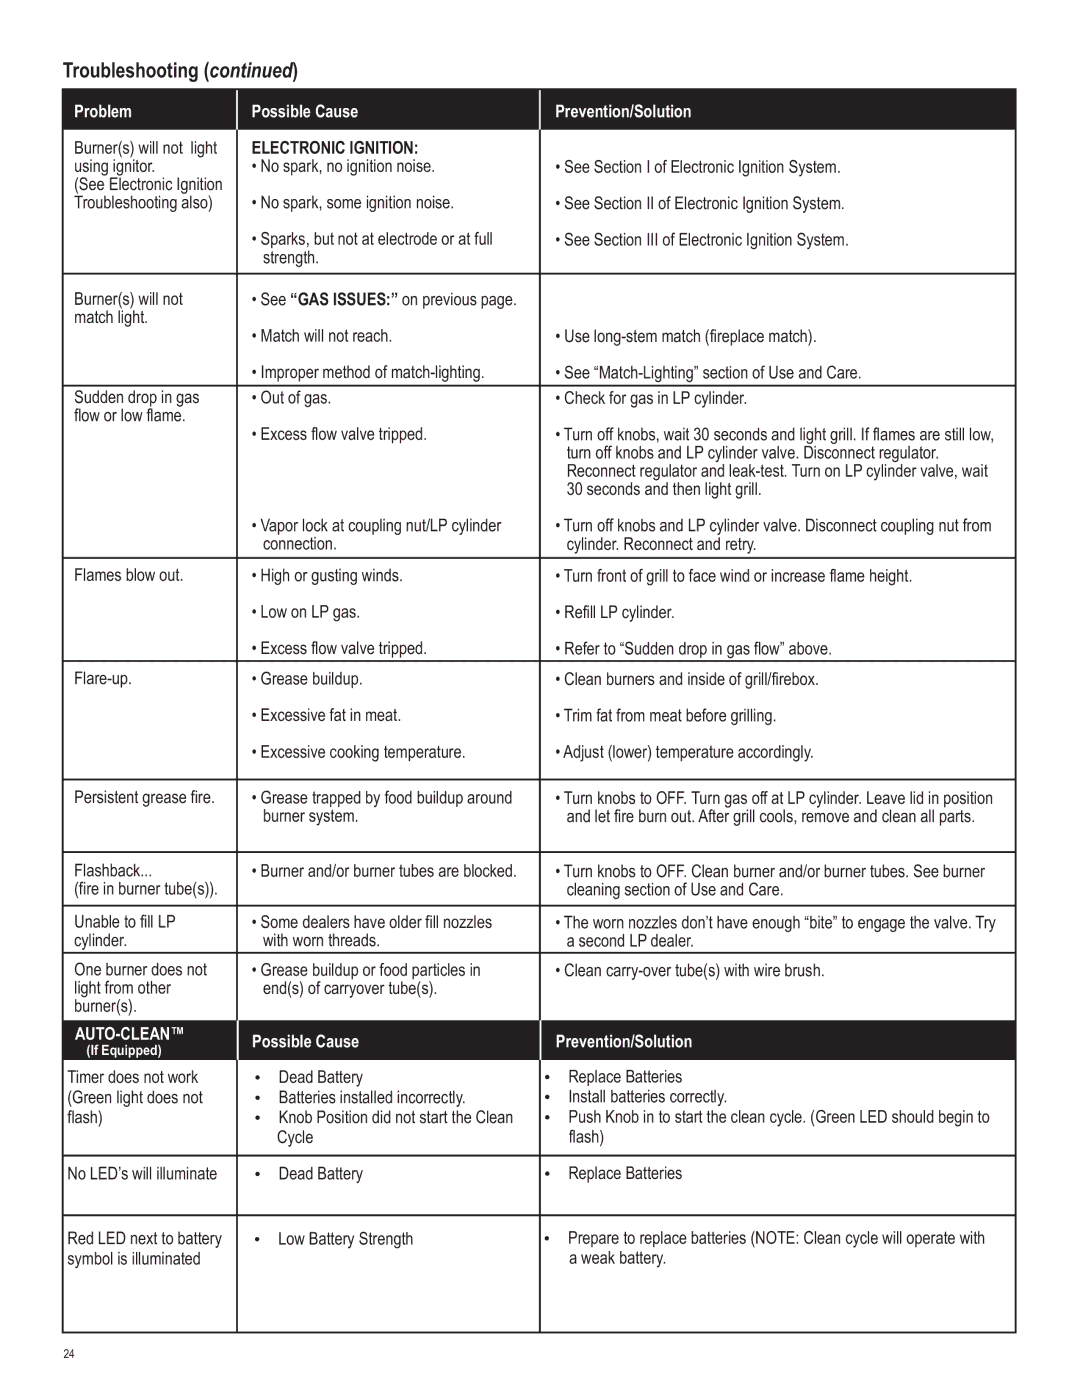


3
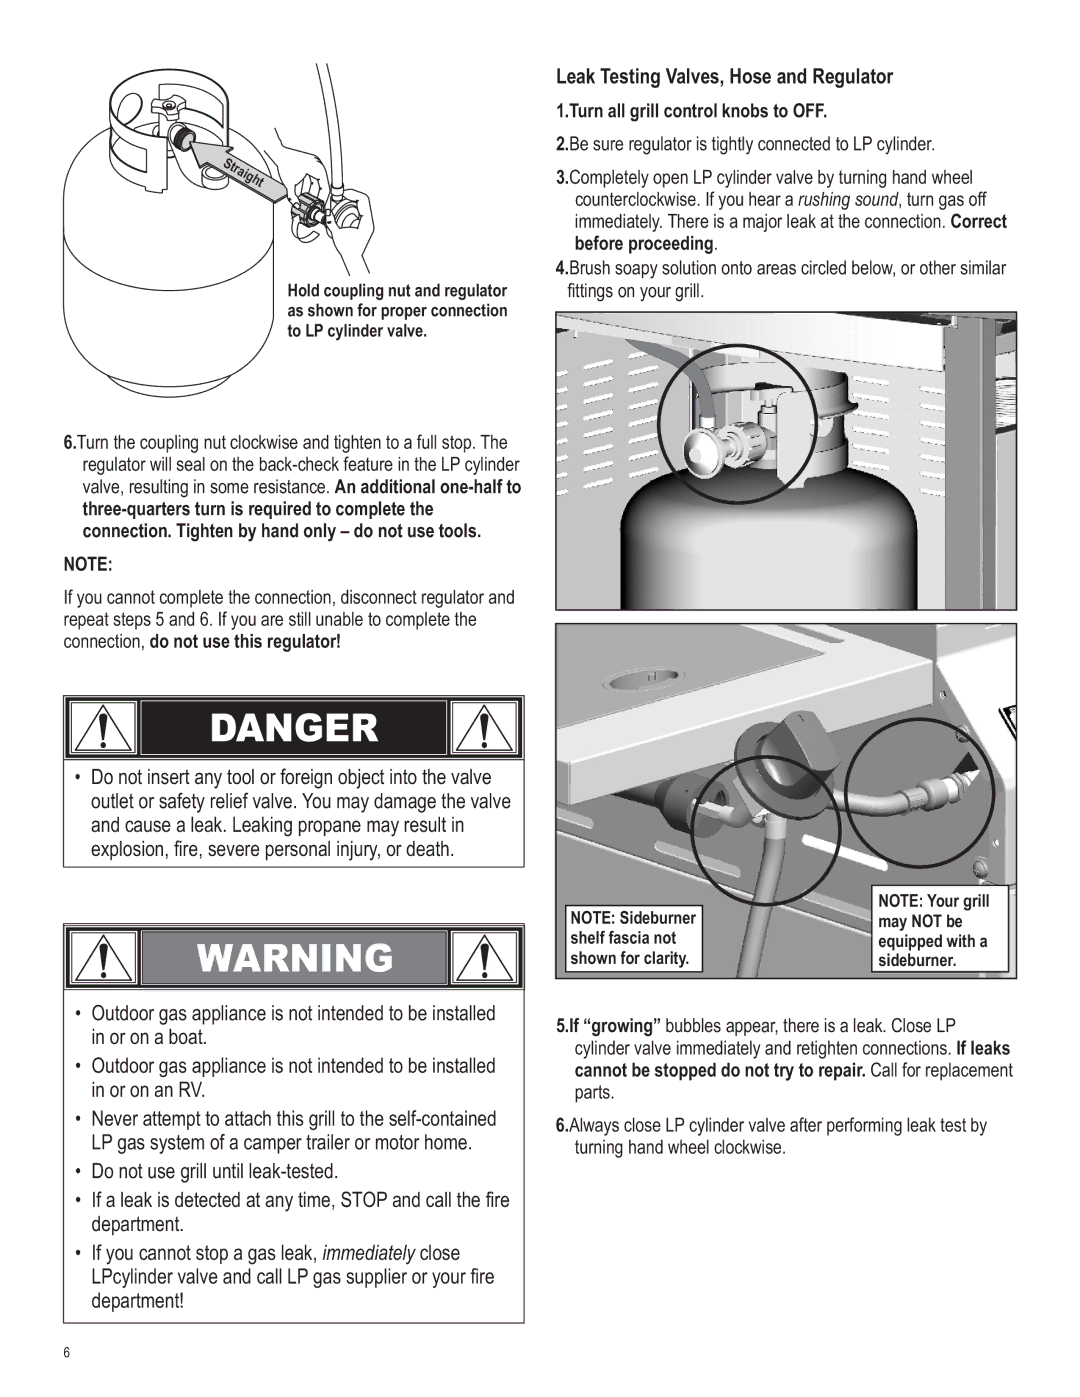
This step requires two people to lift and position grill head onto cart. Carefully lower the grill head onto the cart, aligning slots at bottom of grill head with posts on cart side panels. Make sure the regulator hose is hanging inside the cart.
Regulator hose ![]()
Left side panel![]()
Grill head
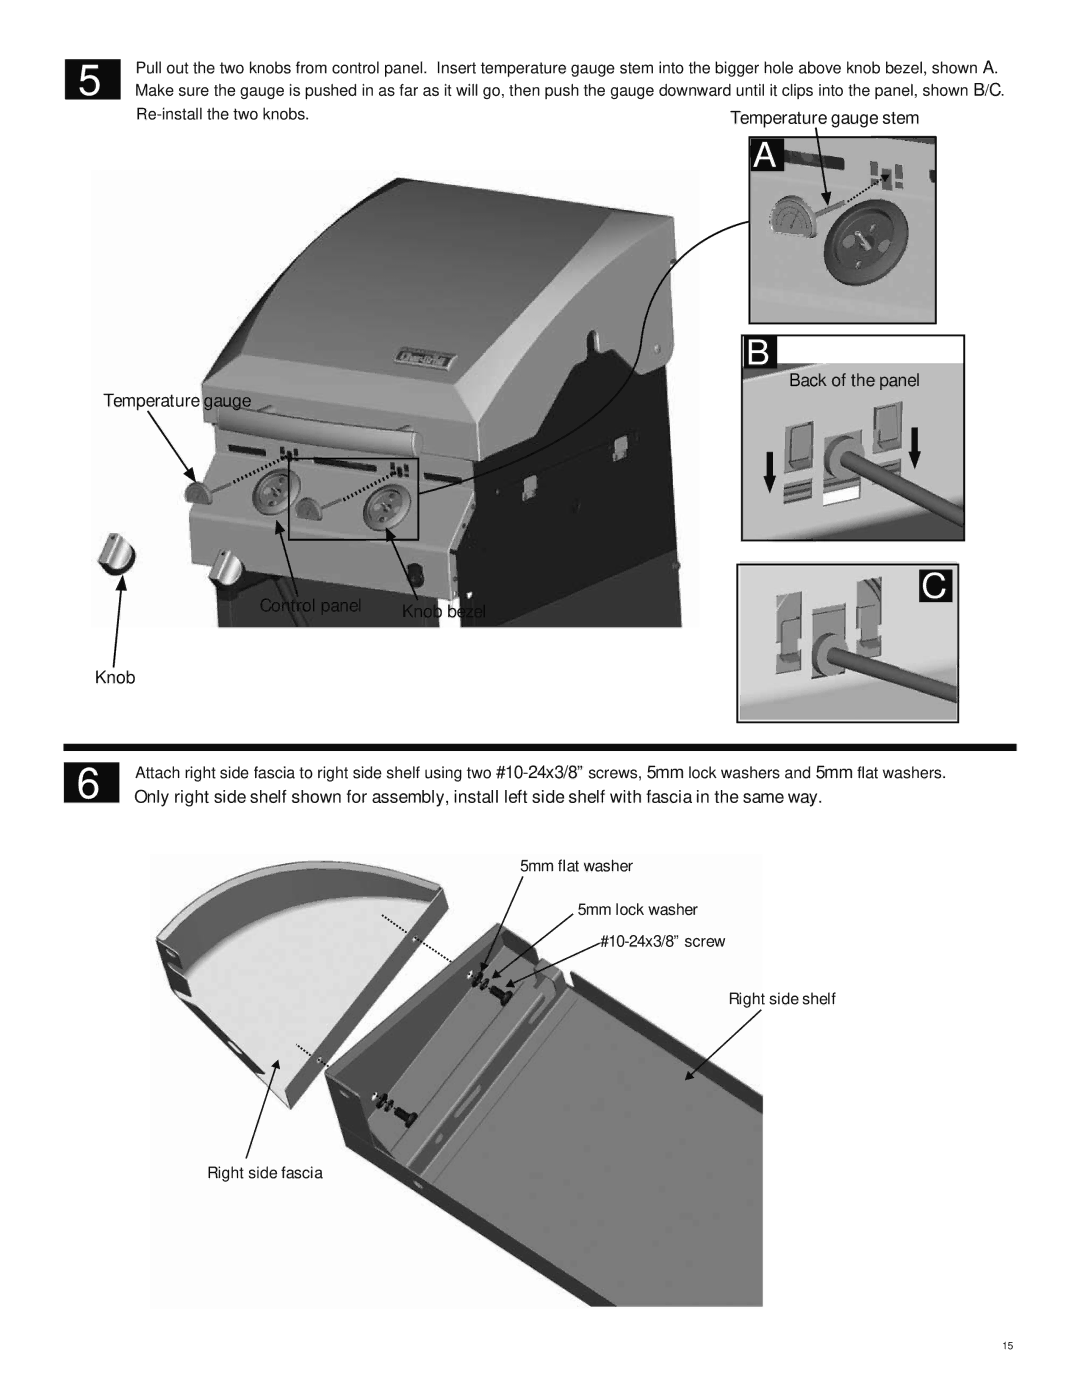
![]() Right side panel
Right side panel
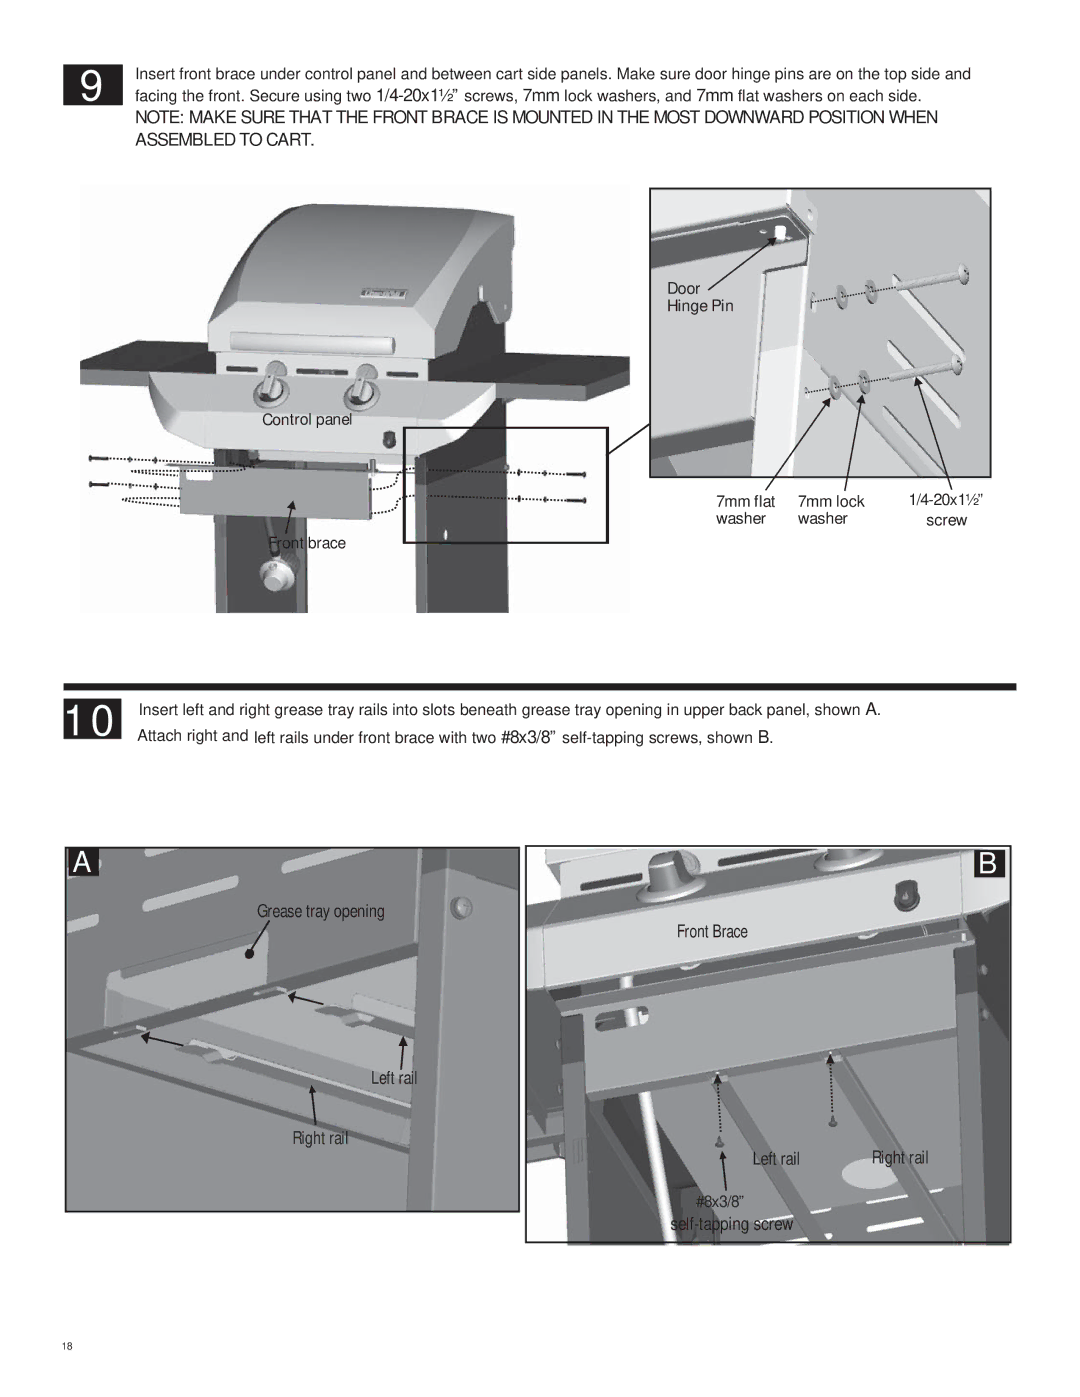
4
On back of grill, place upper back panel between side panels. Secure upper back panel, in lower holes, using one
Upper back panel
7mm lock washer
7mm flat washer
14