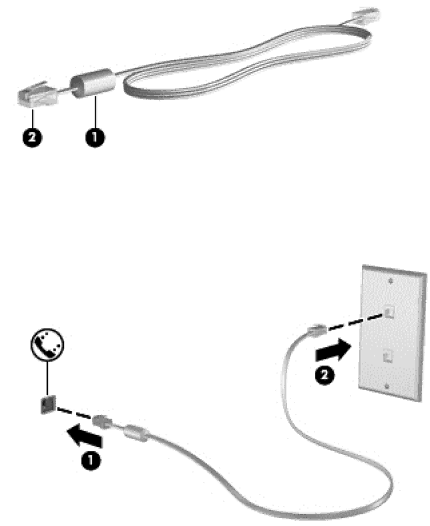
Connecting a modem cable
1.Plug the modem cable into the modem jack (1) on the computer.
2.Plug the modem cable into the
Connecting a country- or region-specific modem cable adapter
Telephone jacks vary by country or region. To use the modem and the modem cable outside the country or region in which you purchased the computer, you must obtain a country- or
To connect the modem to an analog telephone line that does not have an
1.Plug the modem cable into the modem jack (1) on the computer.
2.Plug the modem cable into the modem cable adapter (2).