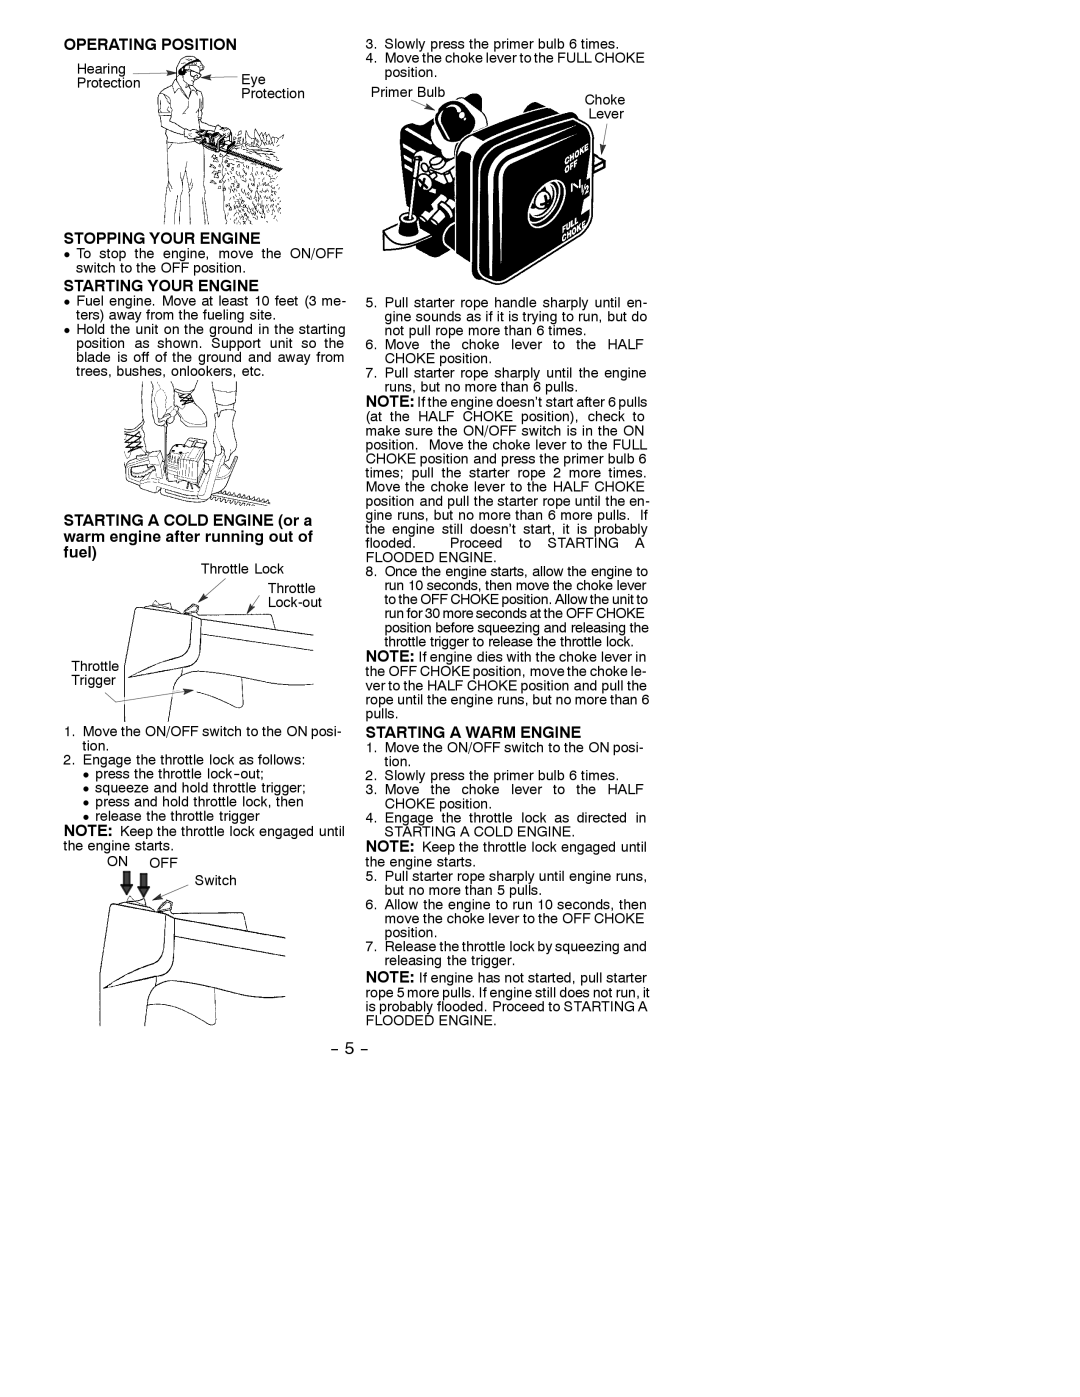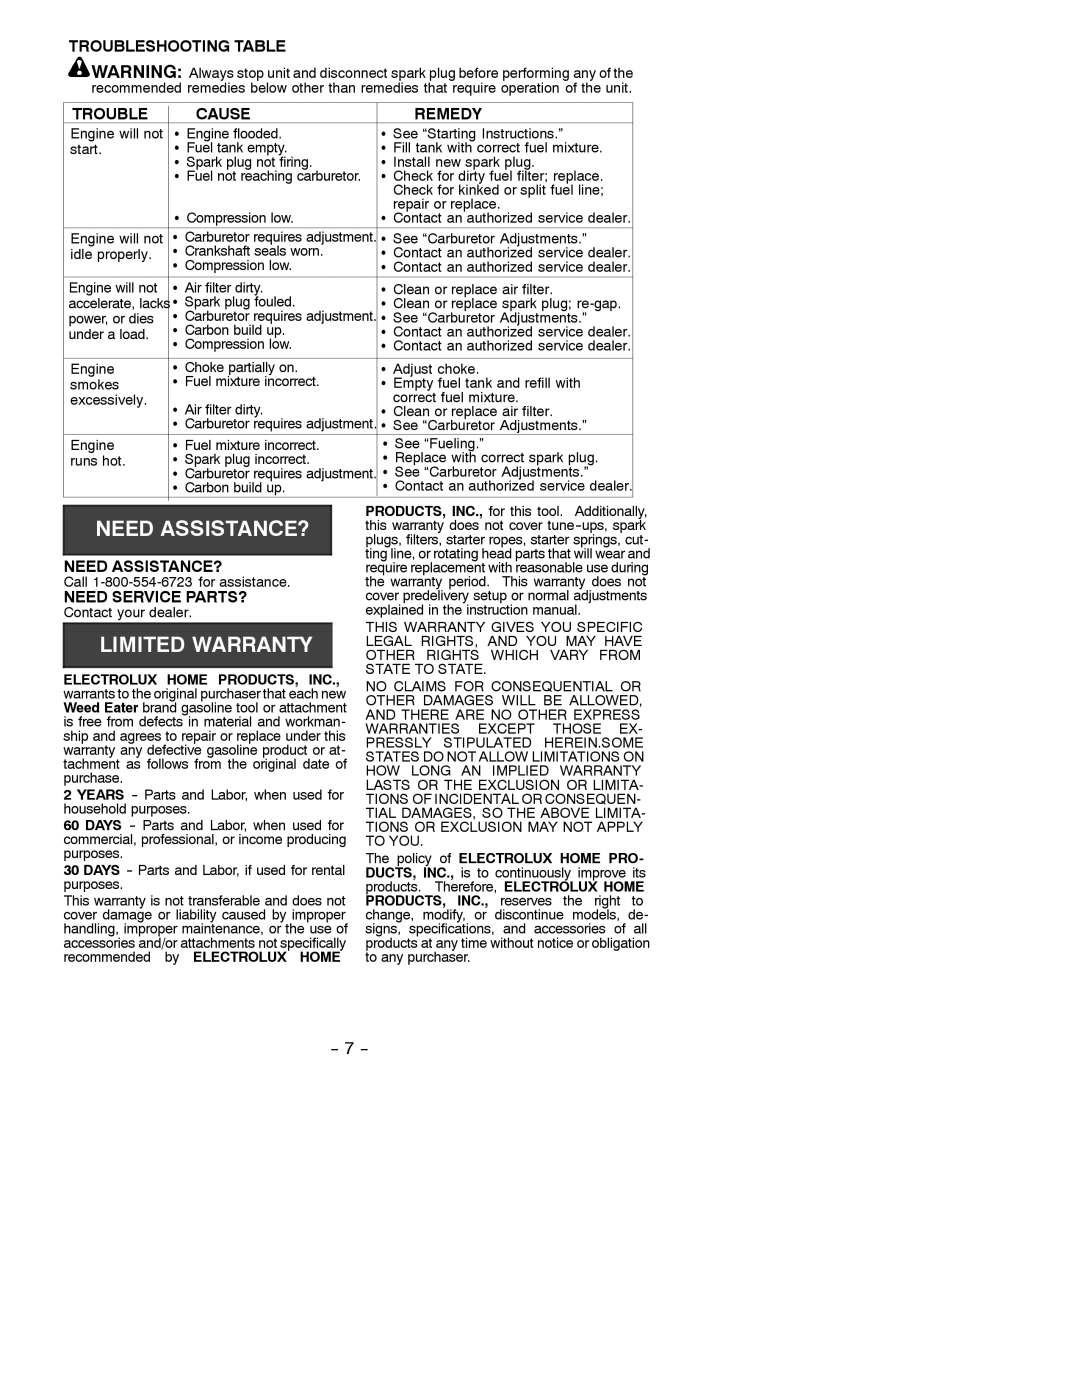
STARTING A FLOODED ENGINE
Flooded engines can be started by placing the ON/OFF switch in the ON position and the choke lever in the OFF CHOKE position and engaging the throttle lock as directed in the STARTING A COLD ENGINE section; then, pull the rope to clear the engine of excess fuel. Starting could require pulling the starter rope many times depending on how badly the unit is flooded. If the unit still doesn’t start, refer to the TROUBLESHOOTING TABLE or call
![]() WARNING: Ensure ON/OFF switch is in the OFF position and disconnect the spark plug before performing maintenance except for carburetor adjustments.
WARNING: Ensure ON/OFF switch is in the OFF position and disconnect the spark plug before performing maintenance except for carburetor adjustments.
We recommend all service and adjustments not listed in this manual be performed by an authorized service dealer.
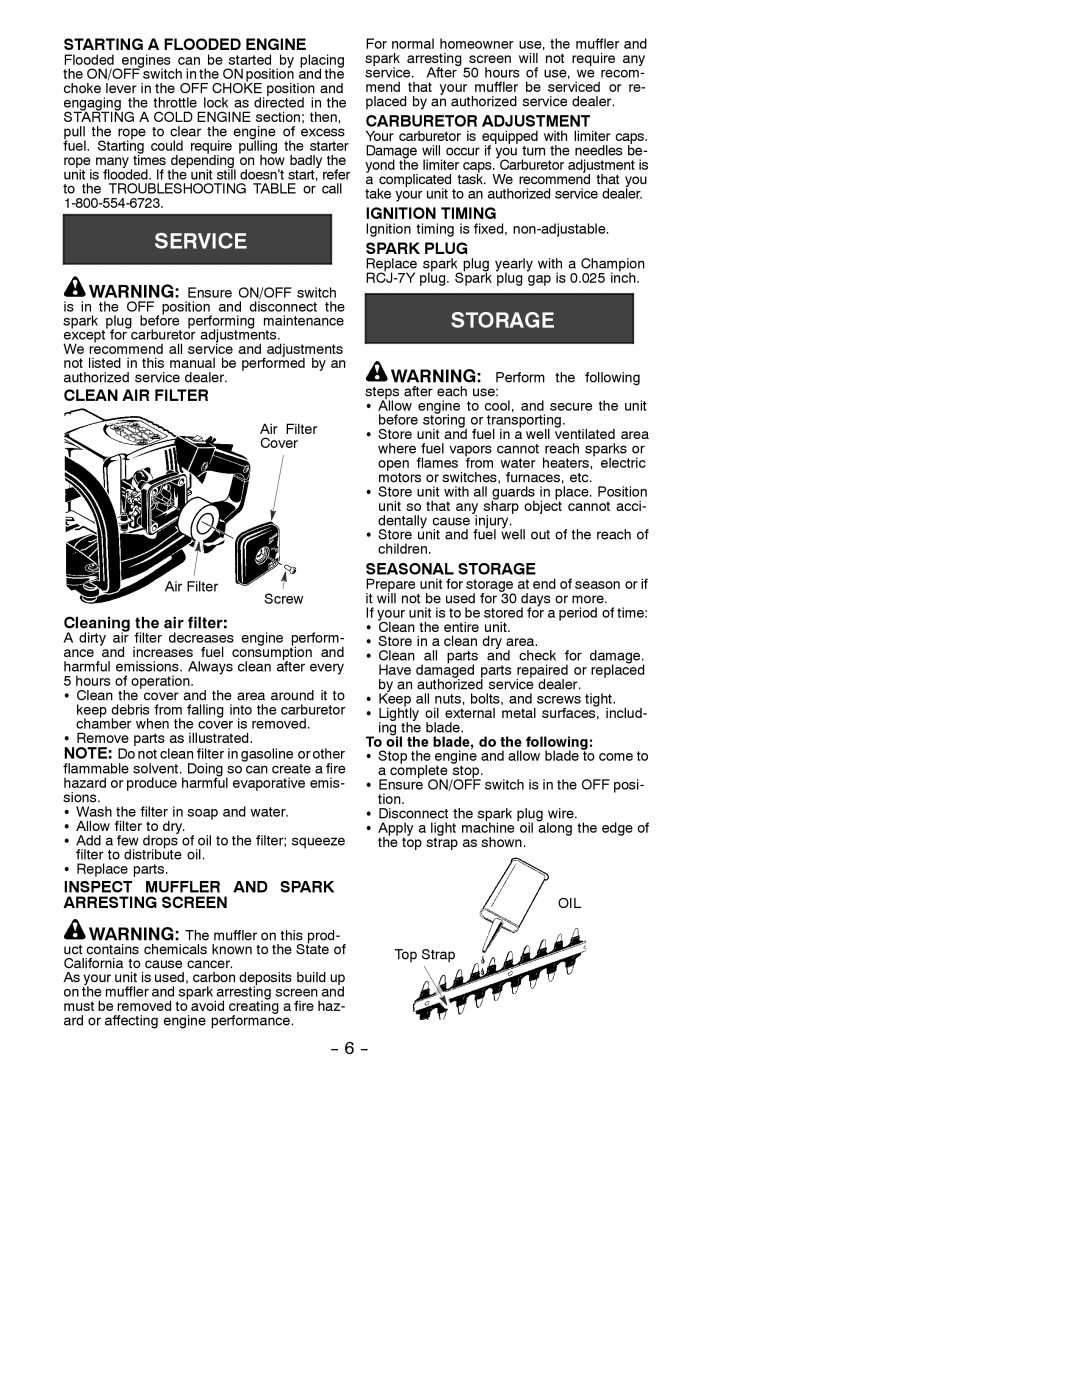
CLEAN AIR FILTER
Air Filter
Cover
Air Filter
Screw
Cleaning the air filter:
A dirty air filter decreases engine perform- ance and increases fuel consumption and harmful emissions. Always clean after every 5 hours of operation.
SClean the cover and the area around it to keep debris from falling into the carburetor chamber when the cover is removed.
SRemove parts as illustrated.
NOTE: Do not clean filter in gasoline or other flammable solvent. Doing so can create a fire hazard or produce harmful evaporative emis- sions.
SWash the filter in soap and water. S Allow filter to dry.
S Add a few drops of oil to the filter; squeeze filter to distribute oil.
S Replace parts.
INSPECT MUFFLER AND SPARK ARRESTING SCREEN
![]() WARNING: The muffler on this prod- uct contains chemicals known to the State of California to cause cancer.
WARNING: The muffler on this prod- uct contains chemicals known to the State of California to cause cancer.
As your unit is used, carbon deposits build up on the muffler and spark arresting screen and must be removed to avoid creating a fire haz- ard or affecting engine performance.
For normal homeowner use, the muffler and spark arresting screen will not require any service. After 50 hours of use, we recom- mend that your muffler be serviced or re- placed by an authorized service dealer.
CARBURETOR ADJUSTMENT
Your carburetor is equipped with limiter caps. Damage will occur if you turn the needles be- yond the limiter caps. Carburetor adjustment is a complicated task. We recommend that you take your unit to an authorized service dealer.
IGNITION TIMING
Ignition timing is fixed,
SPARK PLUG
Replace spark plug yearly with a Champion
![]() WARNING: Perform the following steps after each use:
WARNING: Perform the following steps after each use:
S Allow engine to cool, and secure the unit before storing or transporting.
SStore unit and fuel in a well ventilated area where fuel vapors cannot reach sparks or open flames from water heaters, electric motors or switches, furnaces, etc.
SStore unit with all guards in place. Position unit so that any sharp object cannot acci-
dentally cause injury.
SStore unit and fuel well out of the reach of children.
SEASONAL STORAGE
Prepare unit for storage at end of season or if it will not be used for 30 days or more.
If your unit is to be stored for a period of time:
SClean the entire unit.
SStore in a clean dry area.
S Clean all parts and check for damage. Have damaged parts repaired or replaced by an authorized service dealer.
SKeep all nuts, bolts, and screws tight.
S Lightly oil external metal surfaces, includ- ing the blade.
To oil the blade, do the following:
SStop the engine and allow blade to come to a complete stop.
SEnsure ON/OFF switch is in the OFF posi- tion.
SDisconnect the spark plug wire.
SApply a light machine oil along the edge of the top strap as shown.
OIL
Top Strap
