Do not short circuit. A tool’s power supply will short circuit if a metal object makes a connection between the positive and negative contacts on the DC connection socket (See Fig. 2). Do not place an Electric tool near anything that may cause a short circuit, such as coins, keys or nails. A short circuited power supply may cause fire and personal injury.
Store your Electric tool and Power Supply in a cool, dry place. Do not store the tool’s power supply where temperatures may exceed 105°F (40°C) such as in direct sunlight, a vehicle or metal building during the summer.
Product Configuration / Specifications: Power Supply
Model Number | Mains Input | Mains | Output | Efficiency | Total Output | Operating Temperature | Operating |
| Voltage* | Frequency |
|
| Regulation | C (F) | Humidity |
28436 | 30 VDC 5A | 85% Min. | +/- 2% |
*Note: Device evaluated @
Power Supply Operating Instructions
TURNING POWER SUPPLY ON/OFF
CAUTION: Make certain the Switch on the Power Supply is in the “O” (OFF) position, and the AC power source is the same as specified range on the Power Supply nameplate.
1.Connect AC power cord to AC
2.Connect the other end of the DC cable to the Electric Power Tool. Ensure both ends of the DC cable are connected and screwed in completely.
3.Turn the Power Supply switch “ON” (“l” position). The “DC OK” LED lamp showing Green indicates proper functioning of the Power Supply. To turn off the Power Supply off, move the swath to the “O” (OFF) position.
4.Power Supply must be installed in an environment with temperature
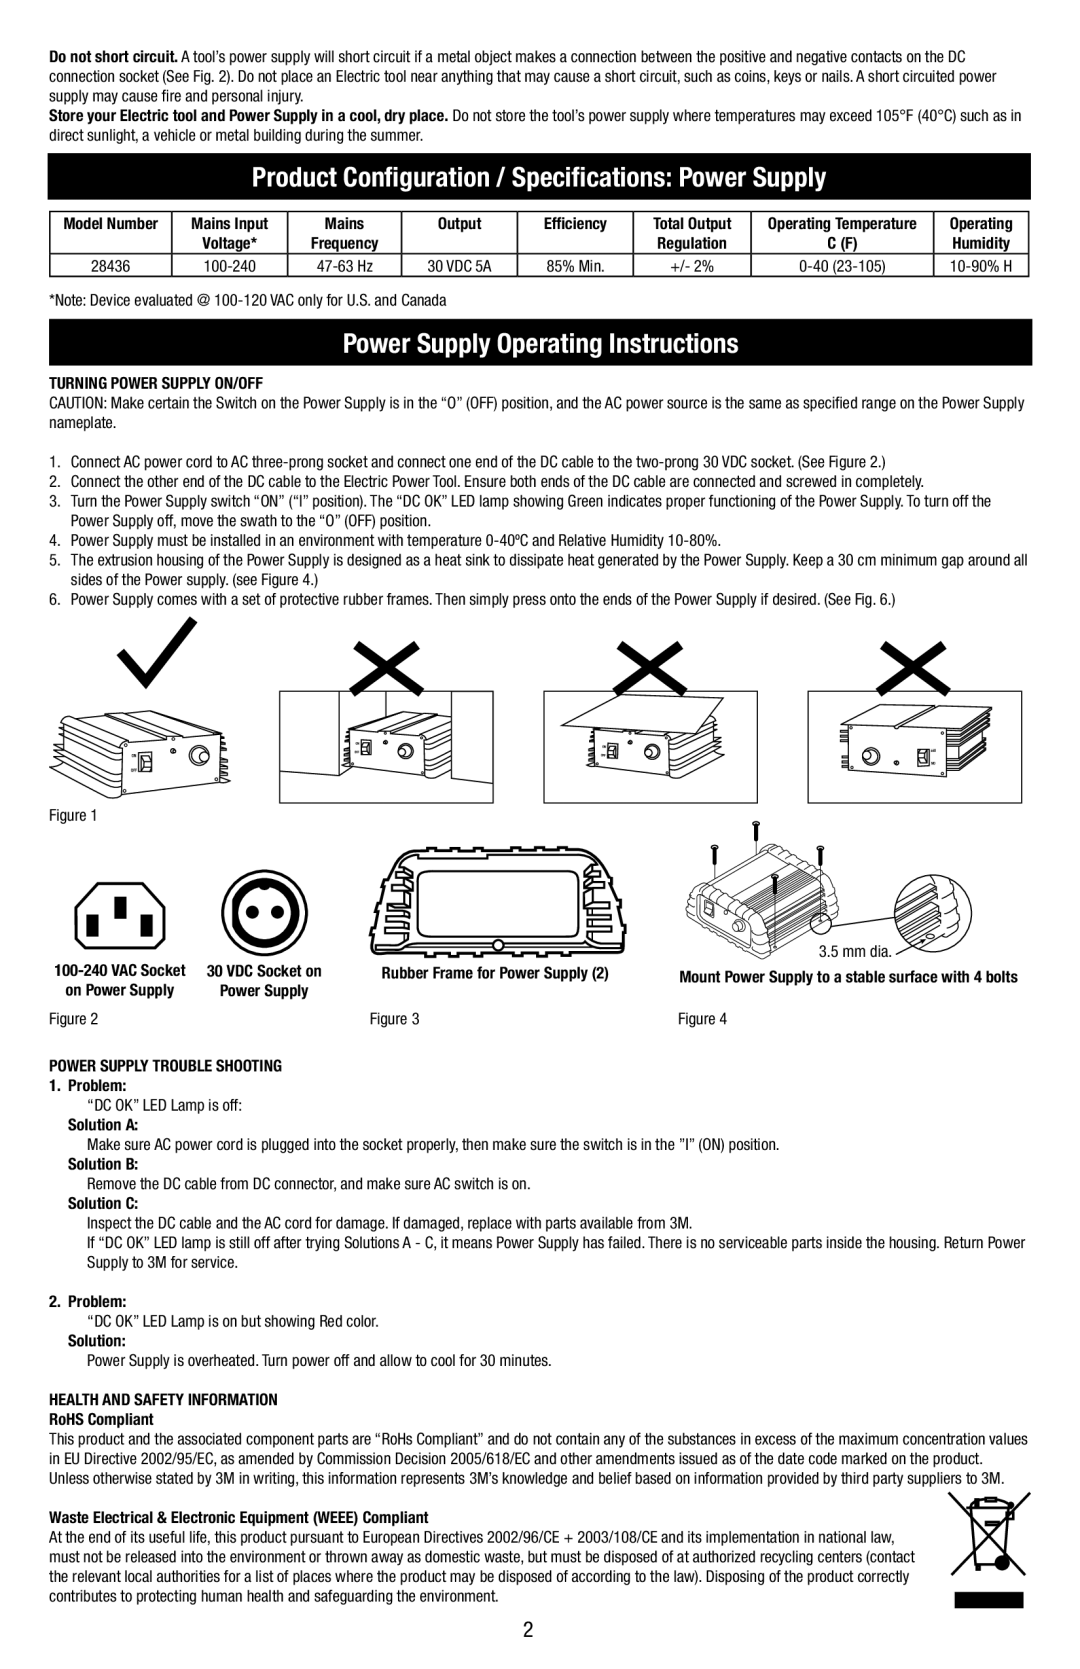
5.The extrusion housing of the Power Supply is designed as a heat sink to dissipate heat generated by the Power Supply. Keep a 30 cm minimum gap around all sides of the Power supply. (see Figure 4.)
6.Power Supply comes with a set of protective rubber frames. Then simply press onto the ends of the Power Supply if desired. (See Fig. 6.)
Figure 1
3.5 mm dia.![]()
30 VDC Socket on | Rubber Frame for Power Supply (2) | Mount Power Supply to a stable surface with 4 bolts | |
on Power Supply | Power Supply |
|
|
Figure 2 |
| Figure 3 | Figure 4 |
POWER SUPPLY TROUBLE SHOOTING
1. Problem:
“DC OK” LED Lamp is off:
Solution A:
Make sure AC power cord is plugged into the socket properly, then make sure the switch is in the ”I” (ON) position.
Solution B:
Remove the DC cable from DC connector, and make sure AC switch is on.
Solution C:
Inspect the DC cable and the AC cord for damage. If damaged, replace with parts available from 3M.
If “DC OK” LED lamp is still off after trying Solutions A - C, it means Power Supply has failed. There is no serviceable parts inside the housing. Return Power Supply to 3M for service.
2. Problem:
“DC OK” LED Lamp is on but showing Red color.
Solution:
Power Supply is overheated. Turn power off and allow to cool for 30 minutes.
HEALTH AND SAFETY INFORMATION
RoHS Compliant
This product and the associated component parts are “RoHs Compliant” and do not contain any of the substances in excess of the maximum concentration values in EU Directive 2002/95/EC, as amended by Commission Decision 2005/618/EC and other amendments issued as of the date code marked on the product. Unless otherwise stated by 3M in writing, this information represents 3M’s knowledge and belief based on information provided by third party suppliers to 3M.
Waste Electrical & Electronic Equipment (WEEE) Compliant
At the end of its useful life, this product pursuant to European Directives 2002/96/CE + 2003/108/CE and its implementation in national law, must not be released into the environment or thrown away as domestic waste, but must be disposed of at authorized recycling centers (contact the relevant local authorities for a list of places where the product may be disposed of according to the law). Disposing of the product correctly contributes to protecting human health and safeguarding the environment.
2