802.11g Wireless Router
Quick Installation Guide
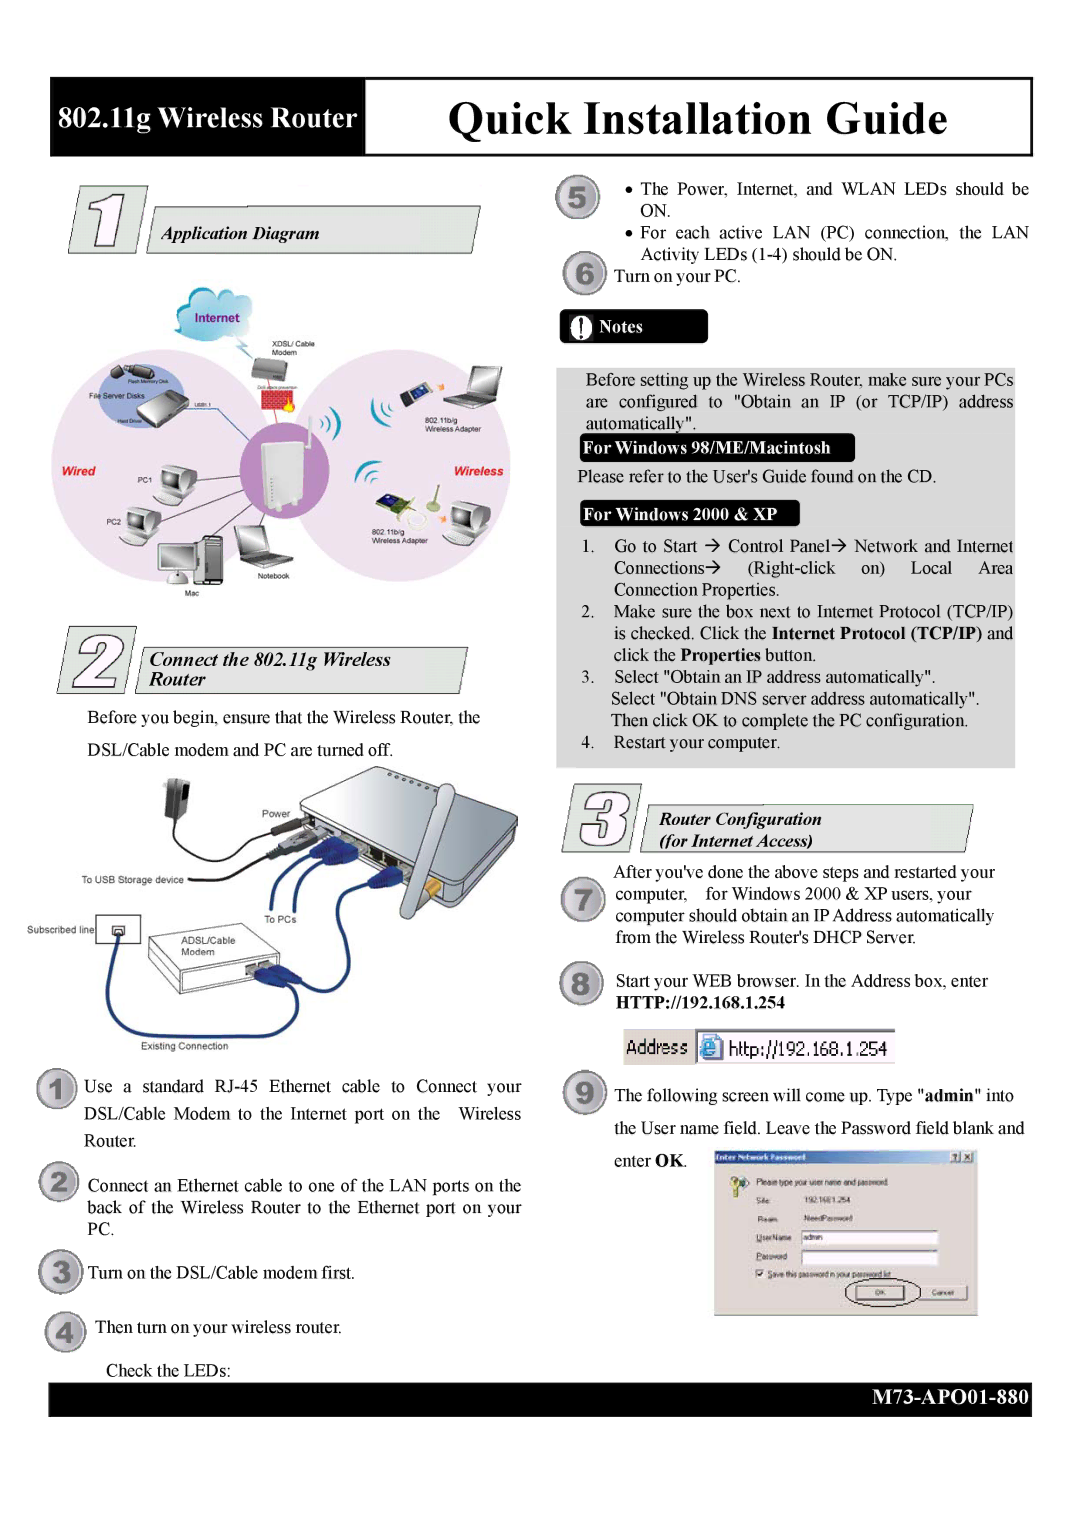
Application Diagram
Connect the 802.11g Wireless
Router
Before you begin, ensure that the Wireless Router, the
DSL/Cable modem and PC are turned off.
Use a standard
Connect an Ethernet cable to one of the LAN ports on the back of the Wireless Router to the Ethernet port on your PC.
![]() Turn on the DSL/Cable modem first.
Turn on the DSL/Cable modem first.
![]() Then turn on your wireless router. Check the LEDs:
Then turn on your wireless router. Check the LEDs:
•The Power, Internet, and WLAN LEDs should be ON.
•For each active LAN (PC) connection, the LAN
Activity LEDs
Turn on your PC.
![]() Notes
Notes
Before setting up the Wireless Router, make sure your PCs are configured to "Obtain an IP (or TCP/IP) address automatically".
For Windows 98/ME/Macintosh
Please refer to the User's Guide found on the CD.
For Windows 2000 & XP
1.Go to Start Æ Control PanelÆ Network and Internet ConnectionsÆ
2.Make sure the box next to Internet Protocol (TCP/IP) is checked. Click the Internet Protocol (TCP/IP) and click the Properties button.
3.Select "Obtain an IP address automatically".
Select "Obtain DNS server address automatically". Then click OK to complete the PC configuration.
4.Restart your computer.
Router Configuration
(for Internet Access)
After you've done the above steps and restarted your computer, for Windows 2000 & XP users, your computer should obtain an IP Address automatically from the Wireless Router's DHCP Server.
Start your WEB browser. In the Address box, enter
HTTP://192.168.1.254
![]() The following screen will come up. Type "admin" into the User name field. Leave the Password field blank and
The following screen will come up. Type "admin" into the User name field. Leave the Password field blank and
enter OK.