3108677, 3108669, 3108651 specifications
Ace Hardware has built a reputation as a leading retailer in home improvement and hardware essentials. Among its impressive array of products, items numbered 3108651, 3108669, and 3108677 stand out for their innovative features and robust technologies.Ace Hardware item 3108651 is a comprehensive tool set designed for both casual DIY enthusiasts and seasoned professionals. This set includes a wide range of hand tools made from high-carbon steel, ensuring durability and long-lasting performance. The ergonomic design of the handles provides ease of use and reduces fatigue during extended projects. Additionally, the tools feature a rust-resistant finish that adds an extra layer of protection, ensuring they remain in excellent condition over time.
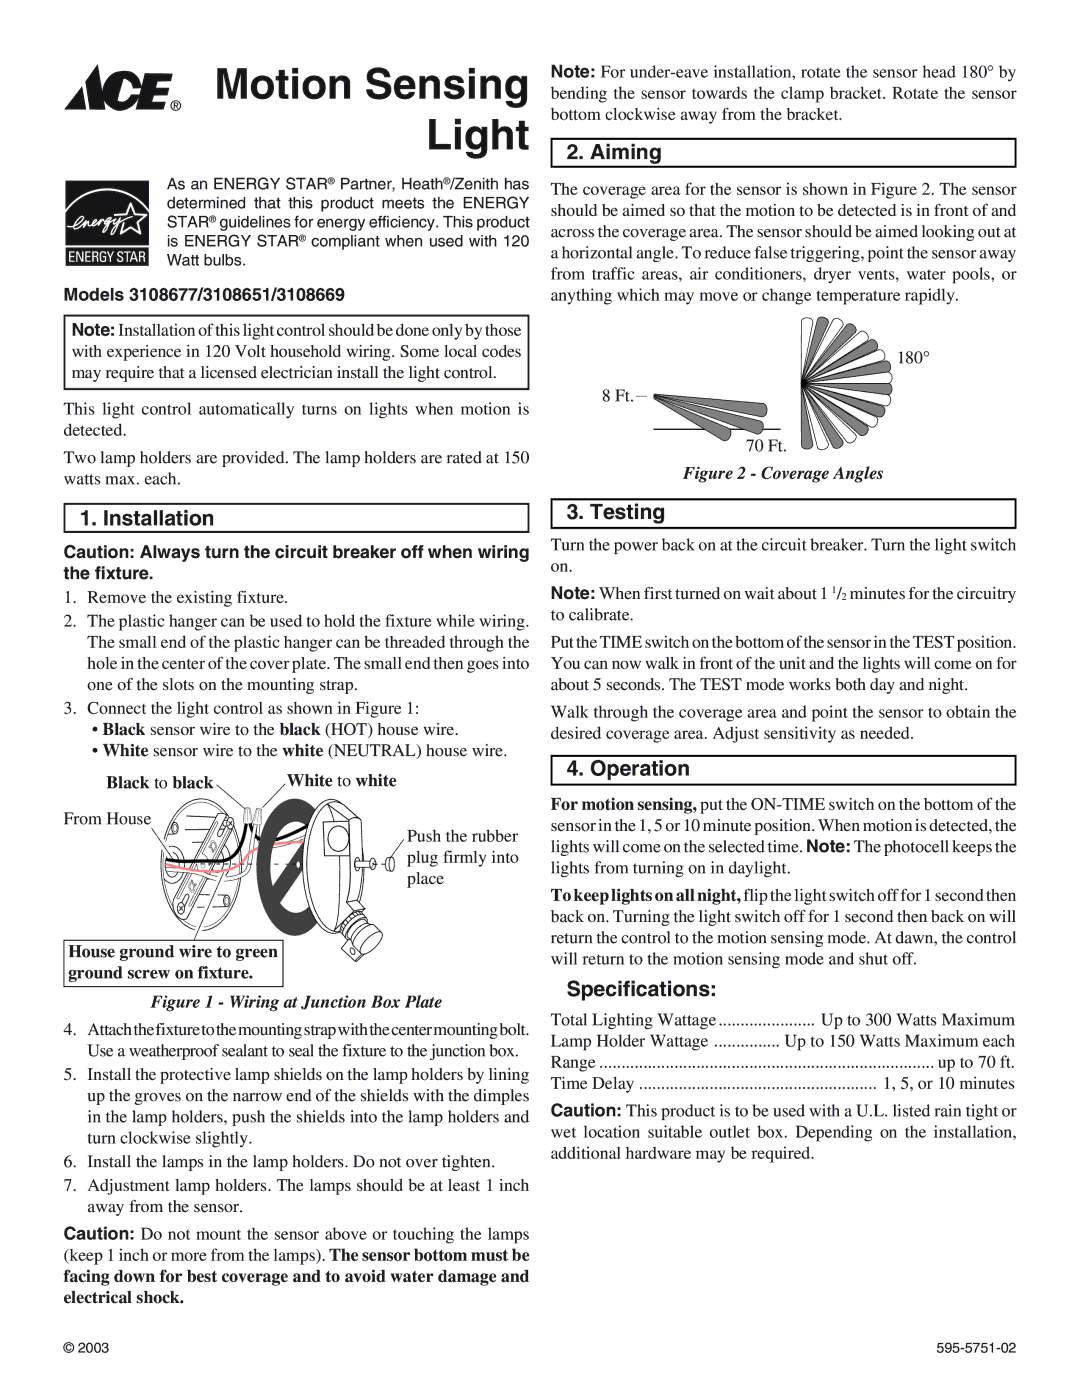
Next, item 3108669 is an advanced power drill that combines power with precision. This cordless drill is equipped with a lithium-ion battery that delivers superior performance, allowing for extended usage without frequent recharging. With multiple speed settings and a torque adjustment feature, it provides flexibility for various applications, from delicate tasks to heavy-duty drilling. The integrated LED work light ensures visibility in dimly lit spaces, making it a versatile tool for any job.
Lastly, item 3108677 is a heavy-duty storage solution designed to keep tools organized and easily accessible. This storage unit features durable steel construction with a powder-coated finish, providing excellent resistance to scratches and rust. With multiple drawers and compartments, it is ideal for categorizing tools and materials, promoting efficiency in any workspace. The drawer sliders are designed for smooth operation, allowing easy access to stored items.
In summary, Ace Hardware products 3108651, 3108669, and 3108677 collectively embody the brand's commitment to quality and innovation. The tool set, power drill, and storage solution each provide unique features tailored to meet the evolving needs of DIYers and professionals alike. With a strong emphasis on durability, functionality, and convenience, these items are essential for anyone looking to tackle home improvement projects effectively. Ace Hardware continues to be a reliable partner for all things related to home improvement, offering products that are built to last and designed for efficiency.