49
Replacing and cleaning the dust filters
Replacing the dust filters
1Turn the projector off then unplug the power cord.
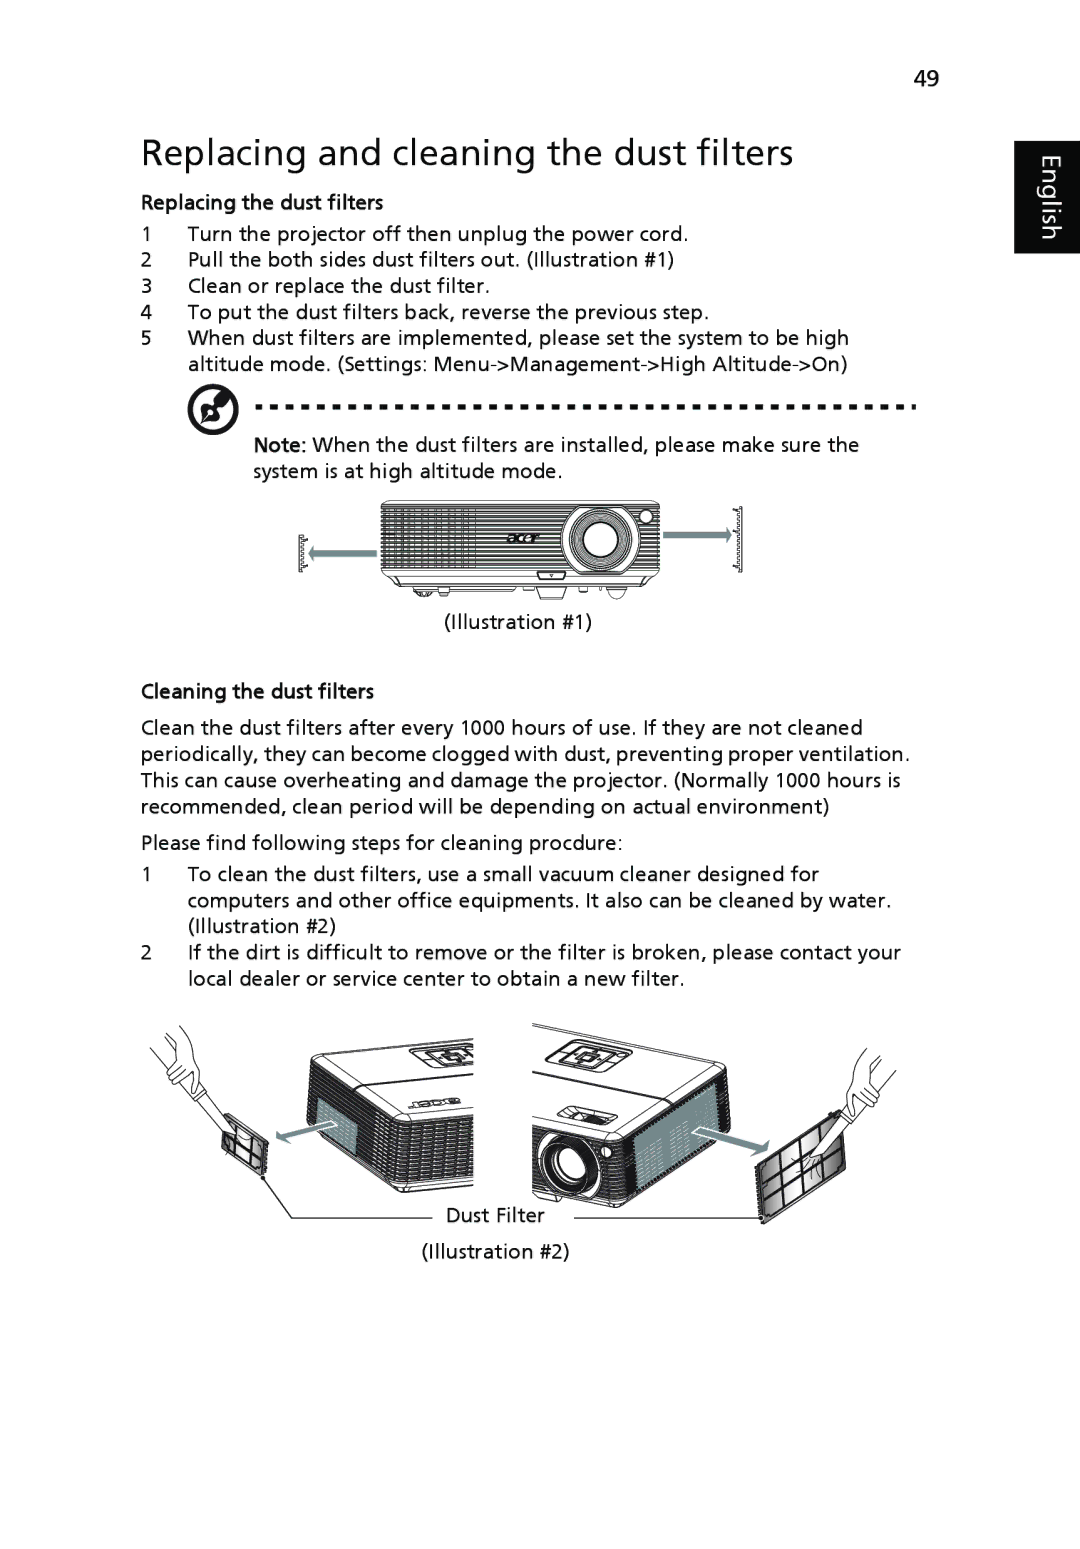
2Pull the both sides dust filters out. (Illustration #1)
3Clean or replace the dust filter.
4To put the dust filters back, reverse the previous step.
5When dust filters are implemented, please set the system to be high altitude mode. (Settings:
Note: When the dust filters are installed, please make sure the system is at high altitude mode.
(Illustration #1)
Cleaning the dust filters
Clean the dust filters after every 1000 hours of use. If they are not cleaned periodically, they can become clogged with dust, preventing proper ventilation. This can cause overheating and damage the projector. (Normally 1000 hours is recommended, clean period will be depending on actual environment)
Please find following steps for cleaning procdure:
1To clean the dust filters, use a small vacuum cleaner designed for computers and other office equipments. It also can be cleaned by water. (Illustration #2)
2If the dirt is difficult to remove or the filter is broken, please contact your local dealer or service center to obtain a new filter.
![]() Dust Filter
Dust Filter ![]()
![]() (Illustration #2)
(Illustration #2)
