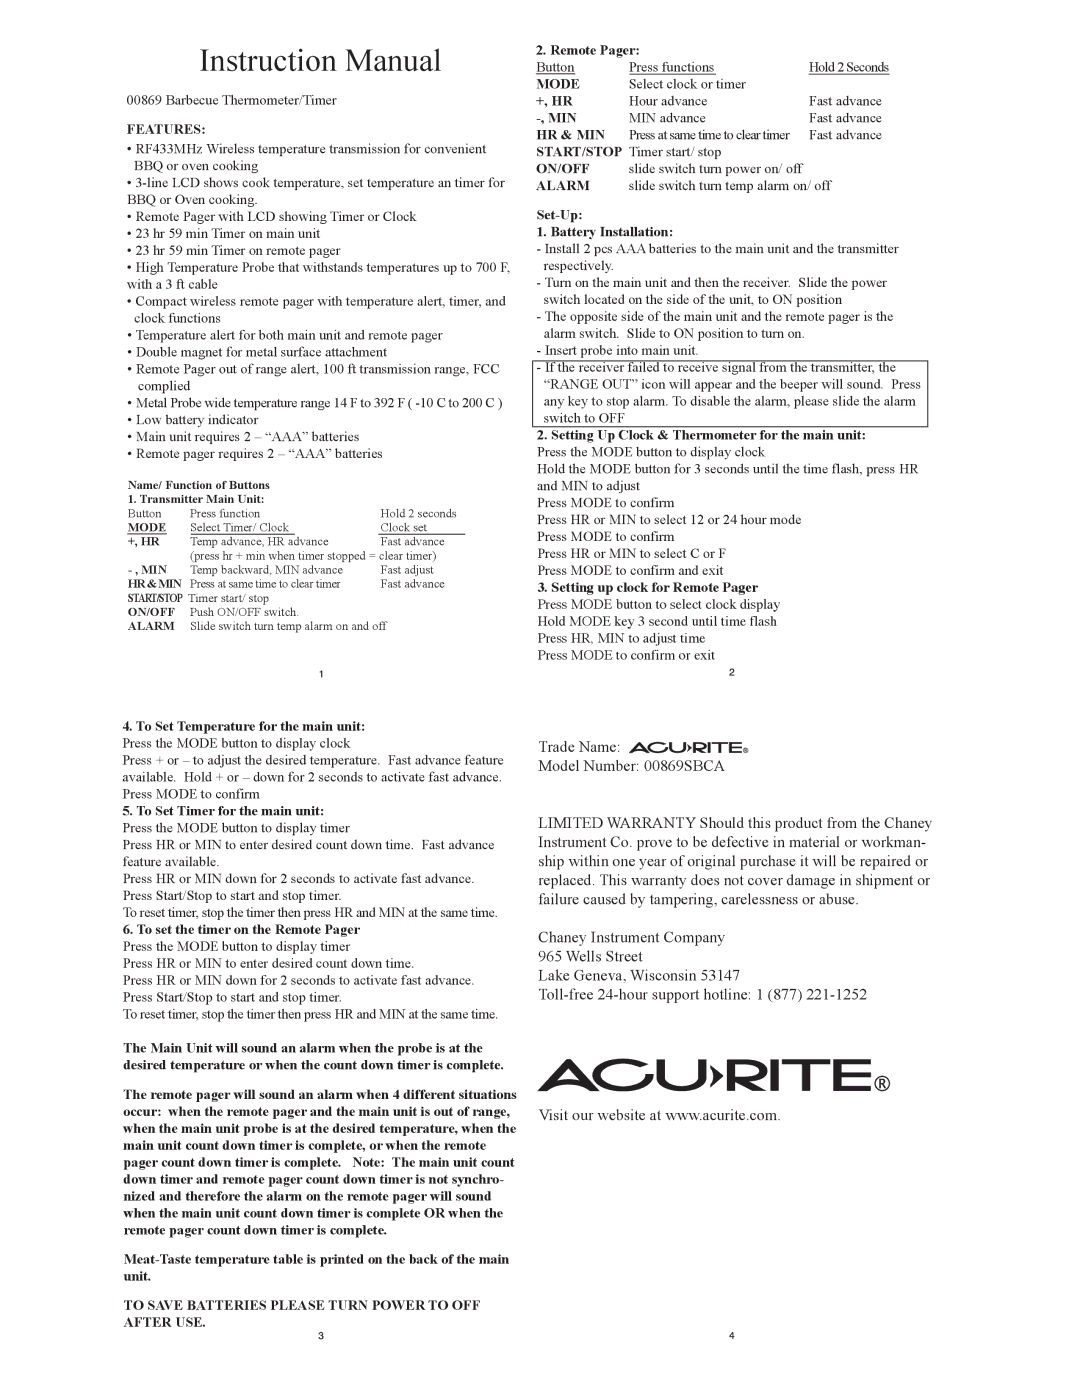
Instruction Manual

00869 Barbecue Thermometer/Timer

FEATURES:

RF433MHz Wireless temperature transmission for convenient BBQ or oven cooking

3-line LCD shows cook temperature, set temperature an timer for BBQ or Oven cooking.

Remote Pager with LCD showing Timer or Clock

23 hr 59 min Timer on main unit

23 hr 59 min Timer on remote pager

High Temperature Probe that withstands temperatures up to 700 F, with a 3 ft cable

Compact wireless remote pager with temperature alert, timer, and clock functions

Temperature alert for both main unit and remote pager

Double magnet for metal surface attachment

Remote Pager out of range alert, 100 ft transmission range, FCC complied

Metal Probe wide temperature range 14 F to 392 F ( -10 C to 200 C )

Low battery indicator

Main unit requires 2 – “AAA” batteries

Remote pager requires 2 – “AAA” batteries

Name/ Function of Buttons


1. Transmitter Main Unit:


Button

Press function

Hold 2 seconds

MODE

Select Timer/ Clock

Clock set

+, HR

Temp advance, HR advance

Fast advance

- , MIN

(press hr + min when timer stopped = clear timer)

Temp backward, MIN advance

Fast adjust

HR&MIN Press at same time to clear timer

Fast advance

START/STOP Timer start/ stop


ON/OFF

Push ON/OFF switch.


ALARM

Slide switch turn temp alarm on and off

4.To Set Temperature for the main unit:

Press the MODE button to display clock

Press + or – to adjust the desired temperature. Fast advance feature available. Hold + or – down for 2 seconds to activate fast advance. Press MODE to confirm

5.To Set Timer for the main unit:

Press the MODE button to display timer

Press HR or MIN to enter desired count down time. Fast advance feature available.

Press HR or MIN down for 2 seconds to activate fast advance. Press Start/Stop to start and stop timer.

To reset timer, stop the timer then press HR and MIN at the same time.

6.To set the timer on the Remote Pager

Press the MODE button to display timer

Press HR or MIN to enter desired count down time.

Press HR or MIN down for 2 seconds to activate fast advance. Press Start/Stop to start and stop timer.

To reset timer, stop the timer then press HR and MIN at the same time.

The Main Unit will sound an alarm when the probe is at the desired temperature or when the count down timer is complete.

The remote pager will sound an alarm when 4 different situations occur: when the remote pager and the main unit is out of range, when the main unit probe is at the desired temperature, when the main unit count down timer is complete, or when the remote pager count down timer is complete. Note: The main unit count down timer and remote pager count down timer is not synchro- nized and therefore the alarm on the remote pager will sound when the main unit count down timer is complete OR when the remote pager count down timer is complete.

Meat-Taste temperature table is printed on the back of the main unit.

TO SAVE BATTERIES PLEASE TURN POWER TO OFF AFTER USE.

2. Remote Pager:


Button

Press functions

Hold 2 Seconds

MODE

Select clock or timer


+, HR

Hour advance

Fast advance

-, MIN

MIN advance

Fast advance

HR & MIN

Press at same time to clear timer

Fast advance

START/STOP Timer start/ stop


ON/OFF

slide switch turn power on/ off


ALARM

slide switch turn temp alarm on/ off

Set-Up:

1. Battery Installation:

-Install 2 pcs AAA batteries to the main unit and the transmitter respectively.

-Turn on the main unit and then the receiver. Slide the power switch located on the side of the unit, to ON position

-The opposite side of the main unit and the remote pager is the alarm switch. Slide to ON position to turn on.

-Insert probe into main unit.

-If the receiver failed to receive signal from the transmitter, the “RANGE OUT” icon will appear and the beeper will sound. Press any key to stop alarm. To disable the alarm, please slide the alarm switch to OFF

2.Setting Up Clock & Thermometer for the main unit:

Press the MODE button to display clock

Hold the MODE button for 3 seconds until the time flash, press HR and MIN to adjust

Press MODE to confirm

Press HR or MIN to select 12 or 24 hour mode Press MODE to confirm

Press HR or MIN to select C or F

Press MODE to confirm and exit

3. Setting up clock for Remote Pager Press MODE button to select clock display Hold MODE key 3 second until time flash Press HR, MIN to adjust time

Press MODE to confirm or exit

Trade Name:

Model Number: 00869SBCA

LIMITED WARRANTY Should this product from the Chaney Instrument Co. prove to be defective in material or workman- ship within one year of original purchase it will be repaired or replaced. This warranty does not cover damage in shipment or failure caused by tampering, carelessness or abuse.

Chaney Instrument Company 965 Wells Street

Lake Geneva, Wisconsin 53147

Toll-free 24-hour support hotline: 1 (877) 221-1252

Visit our website at www.acurite.com.

Page 1
Image 1
Acu-Rite 869 instruction manual Features, To Save Batteries Please Turn Power to OFF After USE, Mode, Hr & Min, On/Off

869 specifications

The Acu-Rite 869 is a sophisticated weather station designed for both home and professional use, offering a range of features and technologies that make it an invaluable tool for monitoring environmental conditions. With its sleek design and user-friendly interface, the Acu-Rite 869 stands out as a reliable choice for those looking to keep track of weather patterns.

One of the key features of the Acu-Rite 869 is its ability to provide real-time weather data. Equipped with a high-precision sensor suite, it measures temperature, humidity, and barometric pressure, allowing users to gain insights into current weather conditions. The device also includes an integrated wind sensor to measure both wind speed and direction, which is crucial for anyone interested in meteorology or outdoor activities.

The Acu-Rite 869 boasts a wireless range of up to 330 feet, enabling users to place the outdoor sensor unit in optimal locations without the clutter of wires. This flexibility allows for accurate data collection in various environments. Additionally, the device utilizes advanced technology to ensure that data is transmitted seamlessly, even through walls and obstacles.

Another standout characteristic of the Acu-Rite 869 is its ability to provide not only real-time data but also historical weather information. Users can view past weather trends over various timeframes, giving them a deeper understanding of local climate patterns. The intuitive display features an easy-to-read LCD screen that provides all relevant information at a glance, complete with symbols for quick interpretation.

The Acu-Rite 869 also includes a built-in alarm system, which is customizable. Users can set alerts for specific conditions, such as extreme temperatures or high wind speeds. This feature enhances safety and preparedness for sudden weather changes, making the device particularly useful for outdoor enthusiasts, farmers, and anyone living in a region known for unpredictable weather.

Finally, the Acu-Rite 869 is compatible with the AcuRite Access app, allowing users to monitor their weather data remotely via smartphones and tablets. This feature opens up a new level of convenience, enabling users to stay informed even when they are away from home.

Overall, the Acu-Rite 869 combines advanced technology with practicality, making it one of the top choices among weather stations available on the market today. Whether for personal use or professional purposes, the Acu-Rite 869 equips users with the essential information needed to plan ahead and stay safe in changing weather conditions.