ADDONICS TECHNOLOGIES
Model: AD2CFEXC34
Installation Guide
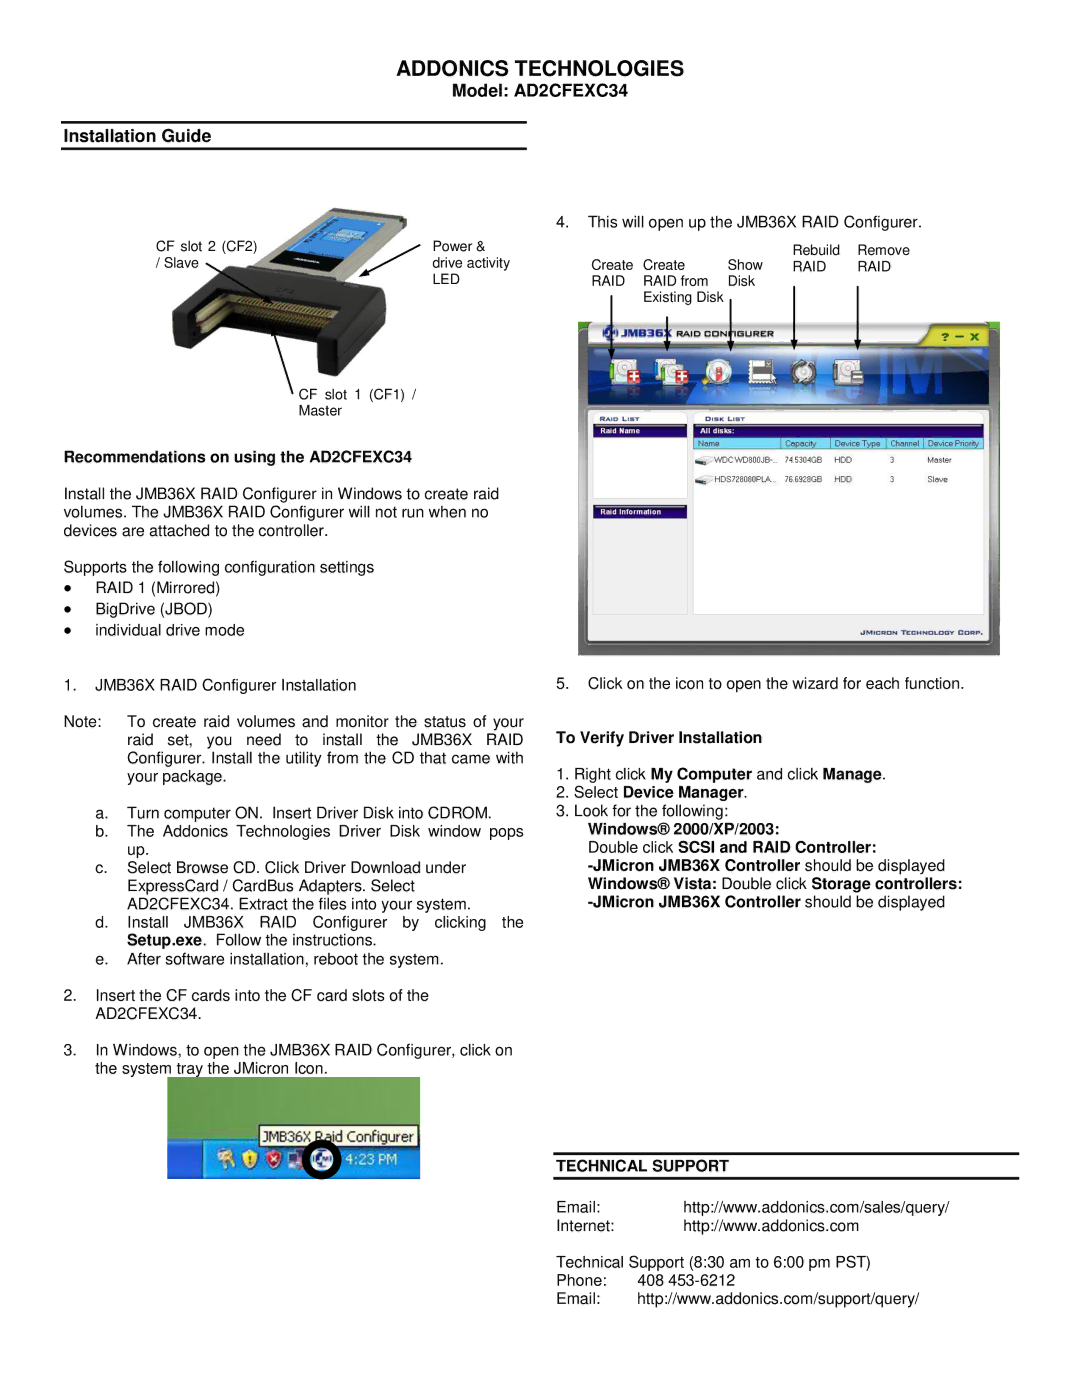
CF slot 2 (CF2) | Power & |
/ Slave | drive activity |
| LED |
CF slot 1 (CF1) /
Master
Recommendations on using the AD2CFEXC34
Install the JMB36X RAID Configurer in Windows to create raid volumes. The JMB36X RAID Configurer will not run when no devices are attached to the controller.
Supports the following configuration settings
∙RAID 1 (Mirrored)
∙BigDrive (JBOD)
∙individual drive mode
4.This will open up the JMB36X RAID Configurer.
Create | Create | Show | Rebuild | Remove |
RAID | RAID | |||
RAID | RAID from | Disk |
|
|
| Existing Disk |
|
|
|
1.JMB36X RAID Configurer Installation
Note: To create raid volumes and monitor the status of your raid set, you need to install the JMB36X RAID Configurer. Install the utility from the CD that came with your package.
a.Turn computer ON. Insert Driver Disk into CDROM.
b.The Addonics Technologies Driver Disk window pops up.
c.Select Browse CD. Click Driver Download under ExpressCard / CardBus Adapters. Select AD2CFEXC34. Extract the files into your system.
d.Install JMB36X RAID Configurer by clicking the Setup.exe. Follow the instructions.
e.After software installation, reboot the system.
2.Insert the CF cards into the CF card slots of the AD2CFEXC34.
3.In Windows, to open the JMB36X RAID Configurer, click on the system tray the JMicron Icon.
5.Click on the icon to open the wizard for each function.
To Verify Driver Installation
1.Right click My Computer and click Manage.
2.Select Device Manager.
3.Look for the following:
Windows® 2000/XP/2003:
Double click SCSI and RAID Controller:
TECHNICAL SUPPORT
Email:http://www.addonics.com/sales/query/
Internet: http://www.addonics.com
Technical Support (8:30 am to 6:00 pm PST)
Phone: 408
Email: http://www.addonics.com/support/query/