For IDE Drive
Note: Set up your IDE hard drive as Master device
Connect the
Step 4
Turn the Diamond enclosure over with the hard drive mounting holes facing up. Use the included flat head screws to secure the hard drive onto the bottom of the enclosure and turn in the screw to the “LOCK” position.
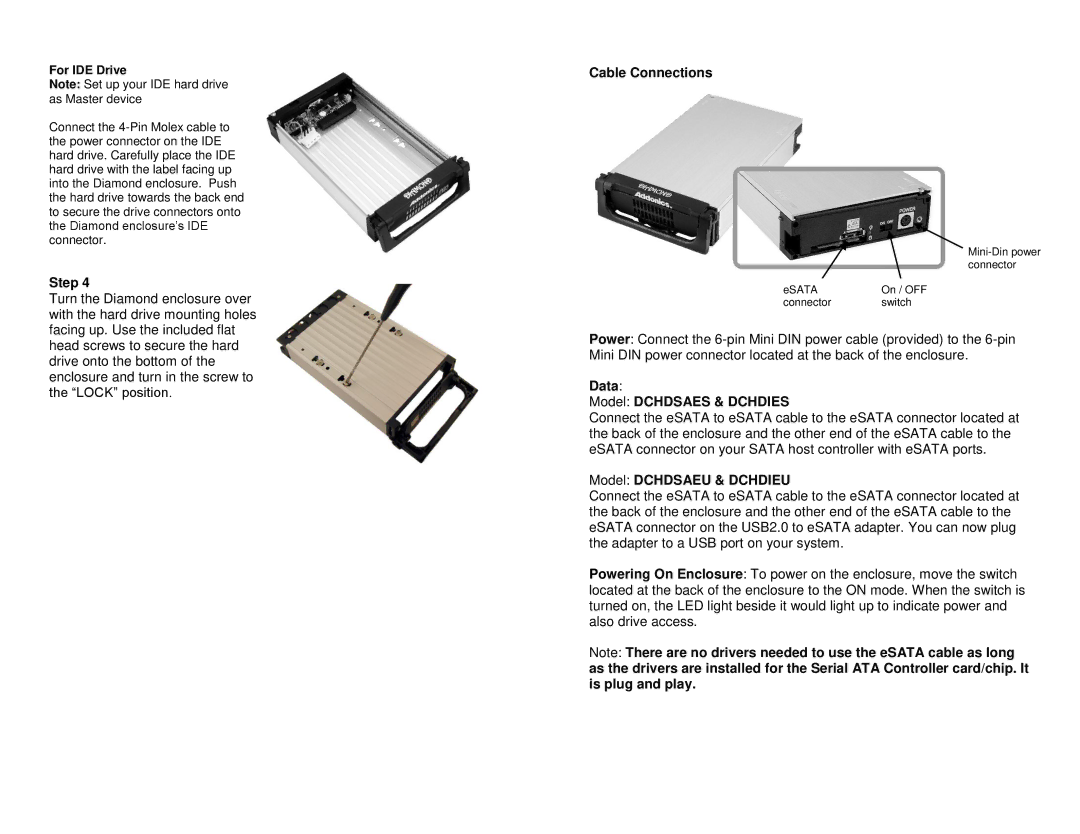
Cable Connections
eSATA |
| On / OFF |
connector |
| switch |
|
|
|
Power: Connect the
Data:
Model: DCHDSAES & DCHDIES
Connect the eSATA to eSATA cable to the eSATA connector located at the back of the enclosure and the other end of the eSATA cable to the eSATA connector on your SATA host controller with eSATA ports.
Model: DCHDSAEU & DCHDIEU
Connect the eSATA to eSATA cable to the eSATA connector located at the back of the enclosure and the other end of the eSATA cable to the eSATA connector on the USB2.0 to eSATA adapter. You can now plug the adapter to a USB port on your system.
Powering On Enclosure: To power on the enclosure, move the switch located at the back of the enclosure to the ON mode. When the switch is turned on, the LED light beside it would light up to indicate power and also drive access.
Note: There are no drivers needed to use the eSATA cable as long as the drivers are installed for the Serial ATA Controller card/chip. It is plug and play.