INTRODUCTION
The Adessso EZScan 2000 Document Scanner is the best companion for the busy business traveler because it quickly and easily scans and converts any printed document into a digital
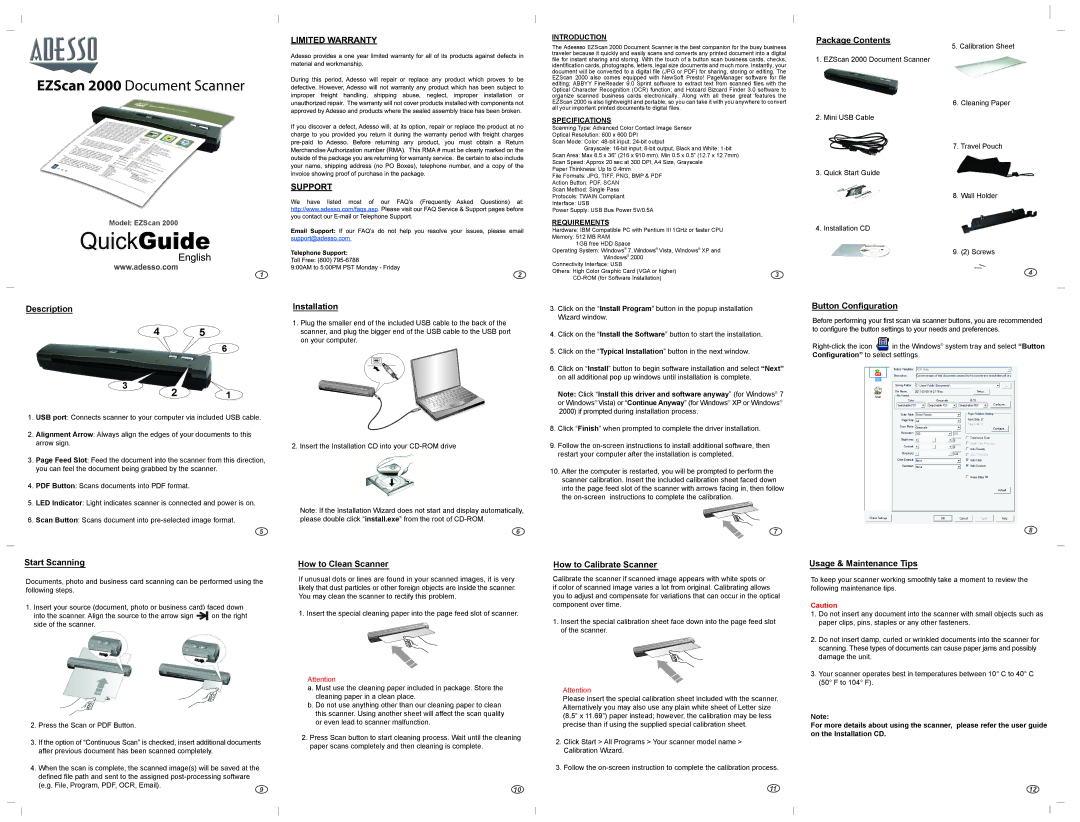
Package Contents
5. Calibration Sheet
EZScan 2000 Document Scanner
Model: EZScan 2000
1
Description
4 5
6
3 2 1
1.USB port: Connects scanner to your computer via included USB cable.
2.Alignment Arrow: Always align the edges of your documents to this arrow sign.
3.Page Feed Slot: Feed the document into the scanner from this direction, you can feel the document being grabbed by the scanner.
4.PDF Button: Scans documents into PDF format.
5.LED Indicator: Light indicates scanner is connected and power is on.
6.Scan Button: Scans document into
5
2
Installation
1.Plug the smaller end of the included USB cable to the back of the scanner, and plug the bigger end of the USB cable to the USB port on your computer.
2.Insert the Installation CD into your
Note: If the Installation Wizard does not start and display automatically, please double click “install.exe” from the root of
6
file for instant sharing and storing. With the touch of a button scan business cards, checks, identification cards, photographs, letters, legal size documents and much more. Instantly, your document will be converted to a digital file (JPG or PDF) for sharing, storing or editing. The EZScan 2000 also comes equipped with NewSoft Presto! PageManager software for file editing; ABBYY FineReader 9.0 Sprint software to extract text from scanned files with the Optical Character Recognition (OCR) function; and Hotcard Bizcard Finder 3.0 software to organize scanned business cards electronically. Along with all these great features the EZScan 2000 is also lightweight and portable, so you can take it with you anywhere to convert all your important printed documents to digital files.
SPECIFICATIONS
Scanning Type: Advanced Color Contact Image Sensor
Optical Resolution: 600 x 600 DPI
Scan Mode: Color:
Grayscale:
Scan Area: Max 8.5 x 36” (216 x 910 mm), Min 0.5 x 0.5” (12.7 x 12.7mm)
Scan Speed: Approx 20 sec at 300 DPI, A4 Size, Grayscale
Paper Thinkness: Up to 0.4mm
File Formats: JPG, TIFF, PNG, BMP & PDF
Action Button: PDF, SCAN
Scan Method: Single Pass
Protocols: TWAIN Compliant
Interface: USB
Power Supply: USB Bus Power 5V/0.5A
REQUIREMENTS
Hardware: IBM Compatible PC with Pentium III 1GHz or faster CPU
Memory: 512 MB RAM
1GB free HDD Space
Operating System: Windows® 7, Windows® Vista, Windows® XP and
Windows® 2000
Connectivity Interface: USB |
| |
Others: High Color Graphic Card (VGA or higher) | 3 | |
|
3.Click on the “Install Program” button in the popup installation Wizard window.
4.Click on the “Install the Software” button to start the installation.
5.Click on the “Typical Installation” button in the next window.
6.Click on “Install” button to begin software installation and select “Next” on all additional pop up windows until installation is complete.
Note: Click “Install this driver and software anyway” (for Windows® 7 or Windows® Vista) or “Continue Anyway” (for Windows® XP or Windows® 2000) if prompted during installation process.
8.Click “Finish” when prompted to complete the driver installation.
9.Follow the
10.After the computer is restarted, you will be prompted to perform the scanner calibration. Insert the included calibration sheet faced down into the page feed slot of the scanner with arrows facing in, then follow the
7
1. EZScan 2000 Document Scanner
6. Cleaning Paper
2. Mini USB Cable
7. Travel Pouch
3. Quick Start Guide
8. Wall Holder
4. Installation CD
9. (2) Screws
4
Button Configuration
Before performing your first scan via scanner buttons, you are recommended to configure the button settings to your needs and preferences.
![]() in the Windows® system tray and select “Button Configuration” to select settings.
in the Windows® system tray and select “Button Configuration” to select settings.
8
Start Scanning
Documents, photo and business card scanning can be performed using the following steps.
1. Insert your source (document, photo or business card) faced down
into the scanner. Align the source to the arrow sign on the right side of the scanner.
2.Press the Scan or PDF Button.
3.If the option of “Continuous Scan” is checked, insert additional documents after previous document has been scanned completely.
4.When the scan is complete, the scanned image(s) will be saved at the defined file path and sent to the assigned
(e.g. File, Program, PDF, OCR, Email). | 9 |
|
How to Clean Scanner
If unusual dots or lines are found in your scanned images, it is very likely that dust particles or other foreign objects are inside the scanner. You may clean the scanner to rectify this problem.
1. Insert the special cleaning paper into the page feed slot of scanner.
Attention
a. Must use the cleaning paper included in package. Store the cleaning paper in a clean place.
b. Do not use anything other than our cleaning paper to clean this scanner. Using another sheet will affect the scan quality or even lead to scanner malfunction.
2.Press Scan button to start cleaning process. Wait until the cleaning paper scans completely and then cleaning is complete.
10
How to Calibrate Scanner
Calibrate the scanner if scanned image appears with white spots or if color of scanned image varies a lot from original. Calibrating allows you to adjust and compensate for variations that can occur in the optical component over time.
1.Insert the special calibration sheet face down into the page feed slot of the scanner.
Attention
Please insert the special calibration sheet included with the scanner. Alternatively you may also use any plain white sheet of Letter size (8.5” x 11.69”) paper instead; however, the calibration may be less precise than if using the supplied special calibration sheet.
2.Click Start > All Programs > Your scanner model name > Calibration Wizard.
3.Follow the
11
Usage & Maintenance Tips
To keep your scanner working smoothly take a moment to review the following maintenance tips.
Caution
1.Do not insert any document into the scanner with small objects such as paper clips, pins, staples or any other fasteners.
2.Do not insert damp, curled or wrinkled documents into the scanner for scanning. These types of documents can cause paper jams and possibly damage the unit.
3.Your scanner operates best in temperatures between 10° C to 40° C (50° F to 104° F).
Note:
For more details about using the scanner, please refer the user guide on the Installation CD.
12