Installing a Barcode Reader
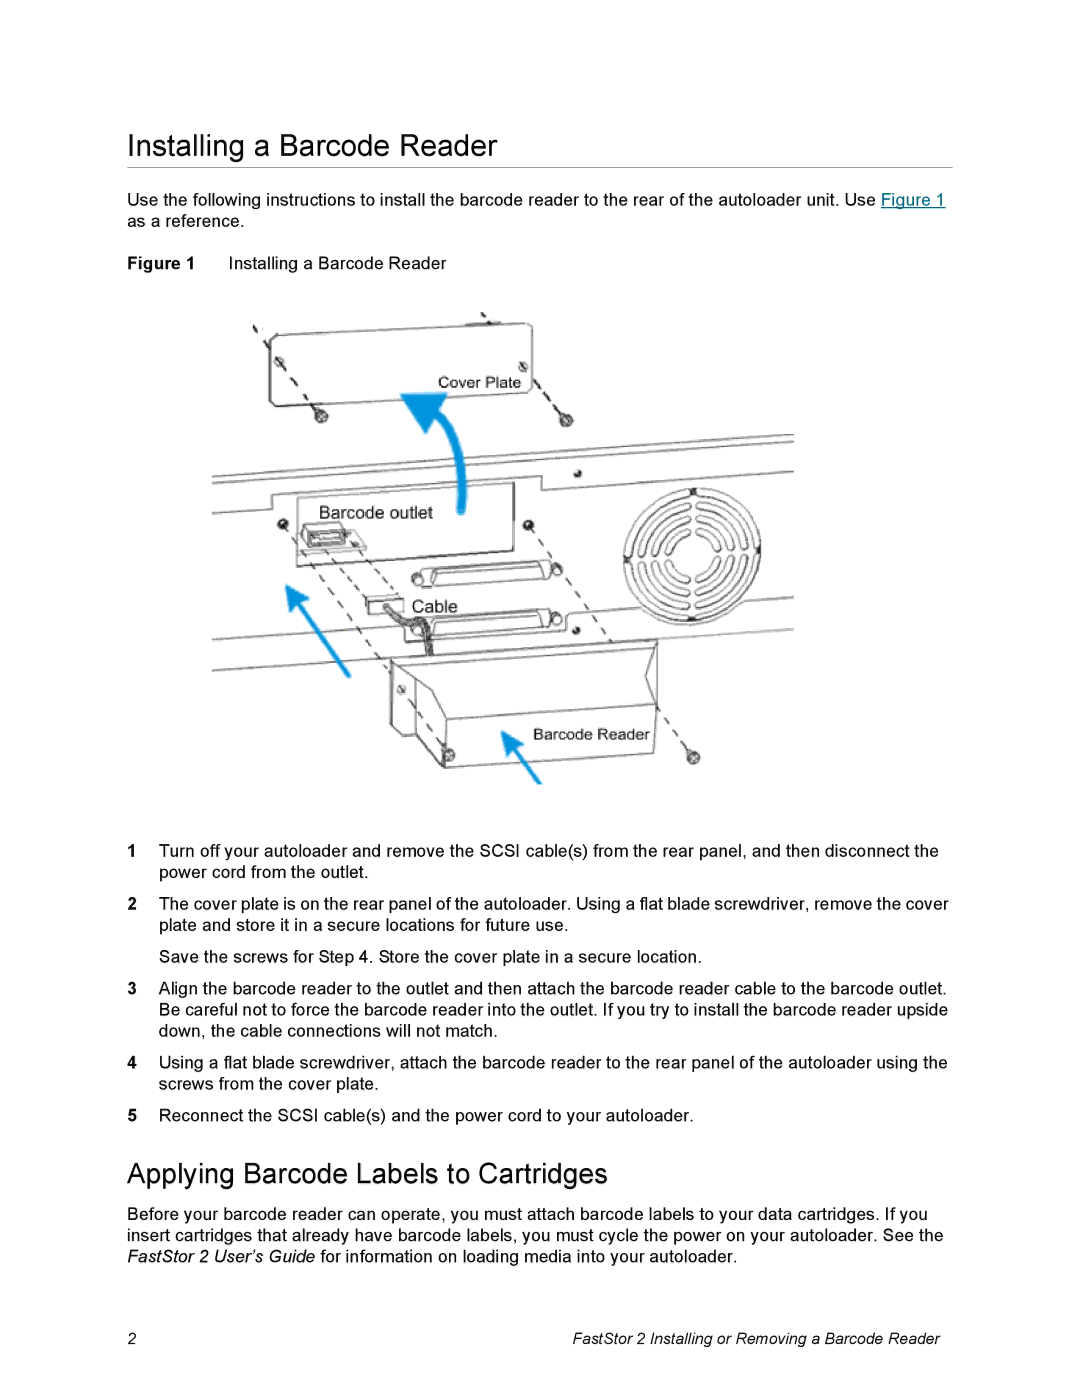
Use the following instructions to install the barcode reader to the rear of the autoloader unit. Use Figure 1 as a reference.
Figure 1 Installing a Barcode Reader
1Turn off your autoloader and remove the SCSI cable(s) from the rear panel, and then disconnect the power cord from the outlet.
2The cover plate is on the rear panel of the autoloader. Using a flat blade screwdriver, remove the cover plate and store it in a secure locations for future use.
Save the screws for Step 4. Store the cover plate in a secure location.
3Align the barcode reader to the outlet and then attach the barcode reader cable to the barcode outlet. Be careful not to force the barcode reader into the outlet. If you try to install the barcode reader upside down, the cable connections will not match.
4Using a flat blade screwdriver, attach the barcode reader to the rear panel of the autoloader using the screws from the cover plate.
5Reconnect the SCSI cable(s) and the power cord to your autoloader.
Applying Barcode Labels to Cartridges
Before your barcode reader can operate, you must attach barcode labels to your data cartridges. If you insert cartridges that already have barcode labels, you must cycle the power on your autoloader. See the FastStor 2 User’s Guide for information on loading media into your autoloader.
2 | FastStor 2 Installing or Removing a Barcode Reader |
