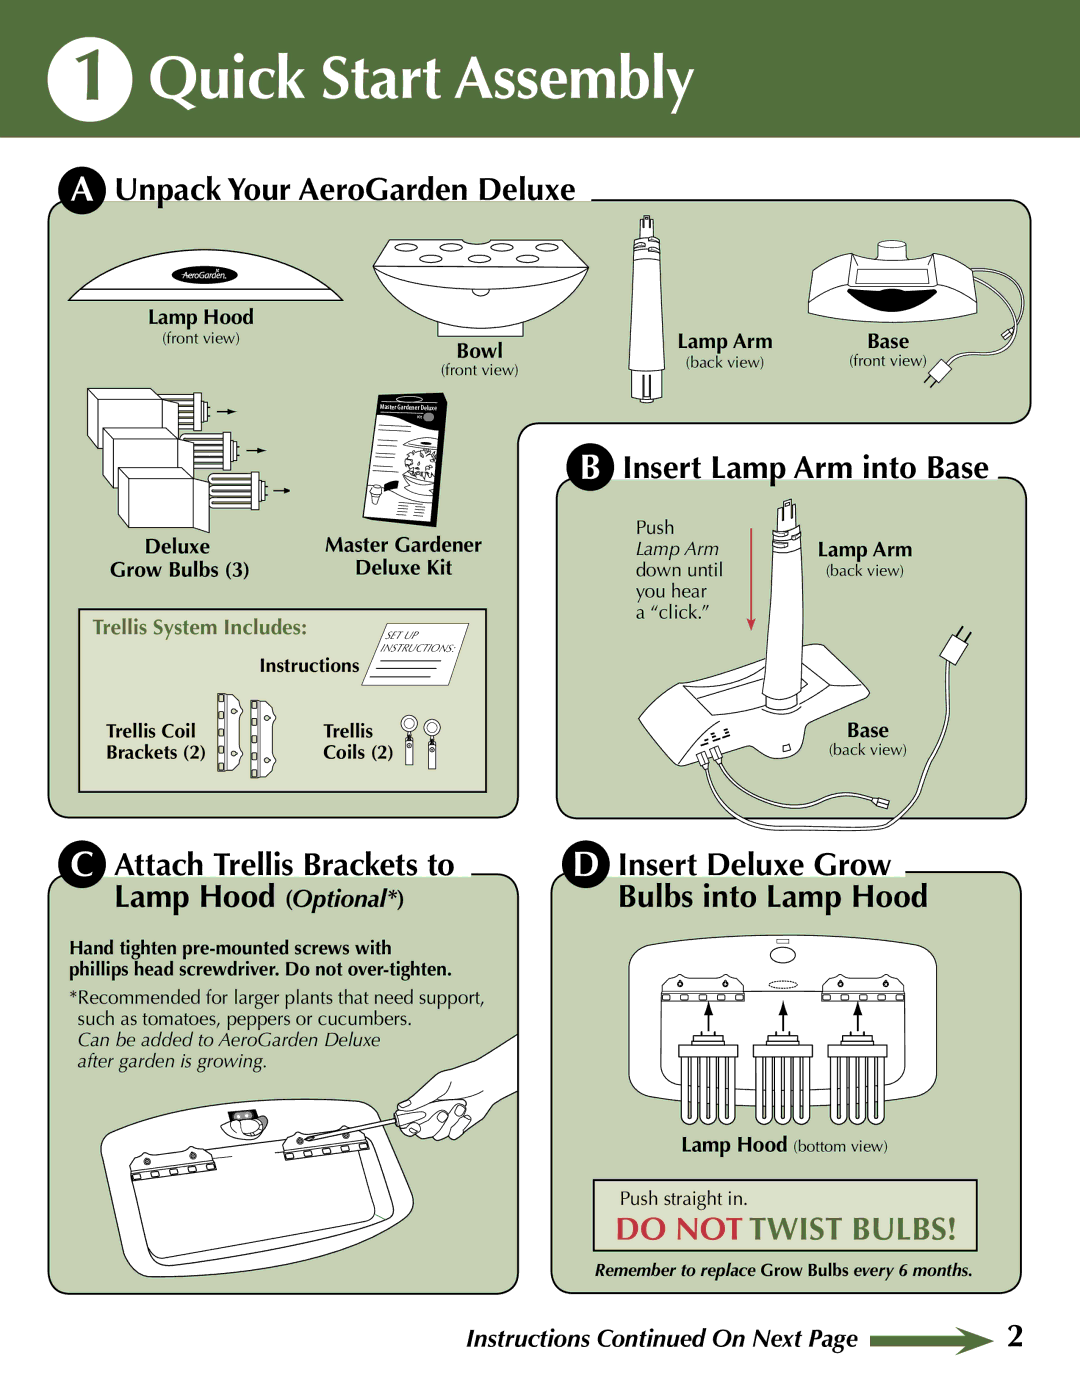
1Quick Start Assembly
AUnpack Your AeroGarden Deluxe
Lamp Hood
(front view) | Bowl | Lamp Arm | Base | |||||||
|
|
|
|
| (back view) | (front view) | ||||
|
|
|
|
| (front view) |
|
|
| ||
|
|
|
|
|
|
|
|
|
| |
|
|
|
|
|
|
|
|
|
|
|
|
|
|
|
|
|
|
|
|
|
|
|
|
|
|
|
|
|
|
|
|
|
|
|
|
|
|
|
|
|
|
|
|
Deluxe | Master Gardener |
Grow Bulbs (3) | Deluxe Kit |
Trellis System Includes: | SET UP |
| INSTRUCTIONS: |
Instructions | |
Trellis Coil | Trellis |
Brackets (2) | Coils (2) |
BInsert Lamp Arm into Base
Push | Lamp Arm |
Lamp Arm | |
down until | (back view) |
you hear |
|
a “click.” |
|
Base
(back view)
C Attach Trellis Brackets to | D Insert Deluxe Grow |
Lamp Hood (Optional*) | Bulbs into Lamp Hood |
Hand tighten
*Recommended for larger plants that need support, such as tomatoes, peppers or cucumbers.
Can be added to AeroGarden Deluxe after garden is growing.
Lamp Hood (bottom view)
Push straight in.
DO NOT TWIST BULBS!
Remember to replace Grow Bulbs every 6 months.
Instructions Continued On Next Page ![]() 2
2