
NSX-HMT26, CX-NHMT25, NSX-HMT25 specifications
The Aiwa NSX-HMT25, CX-NHMT25, and NSX-HMT26 are solid entries in the realm of consumer audio equipment, showcasing Aiwa's commitment to quality sound and innovative technology. These compact stereo systems are designed for those who appreciate fidelity in sound without compromising on style or functionality.One of the most notable features of these models is their robust sound output. Each system boasts a powerful amplifier that ensures clear, dynamic audio reproduction across different genres of music. Whether it’s the pulsating bass from electronic tracks or the nuanced highs of classical compositions, users can expect an impressive audio experience.
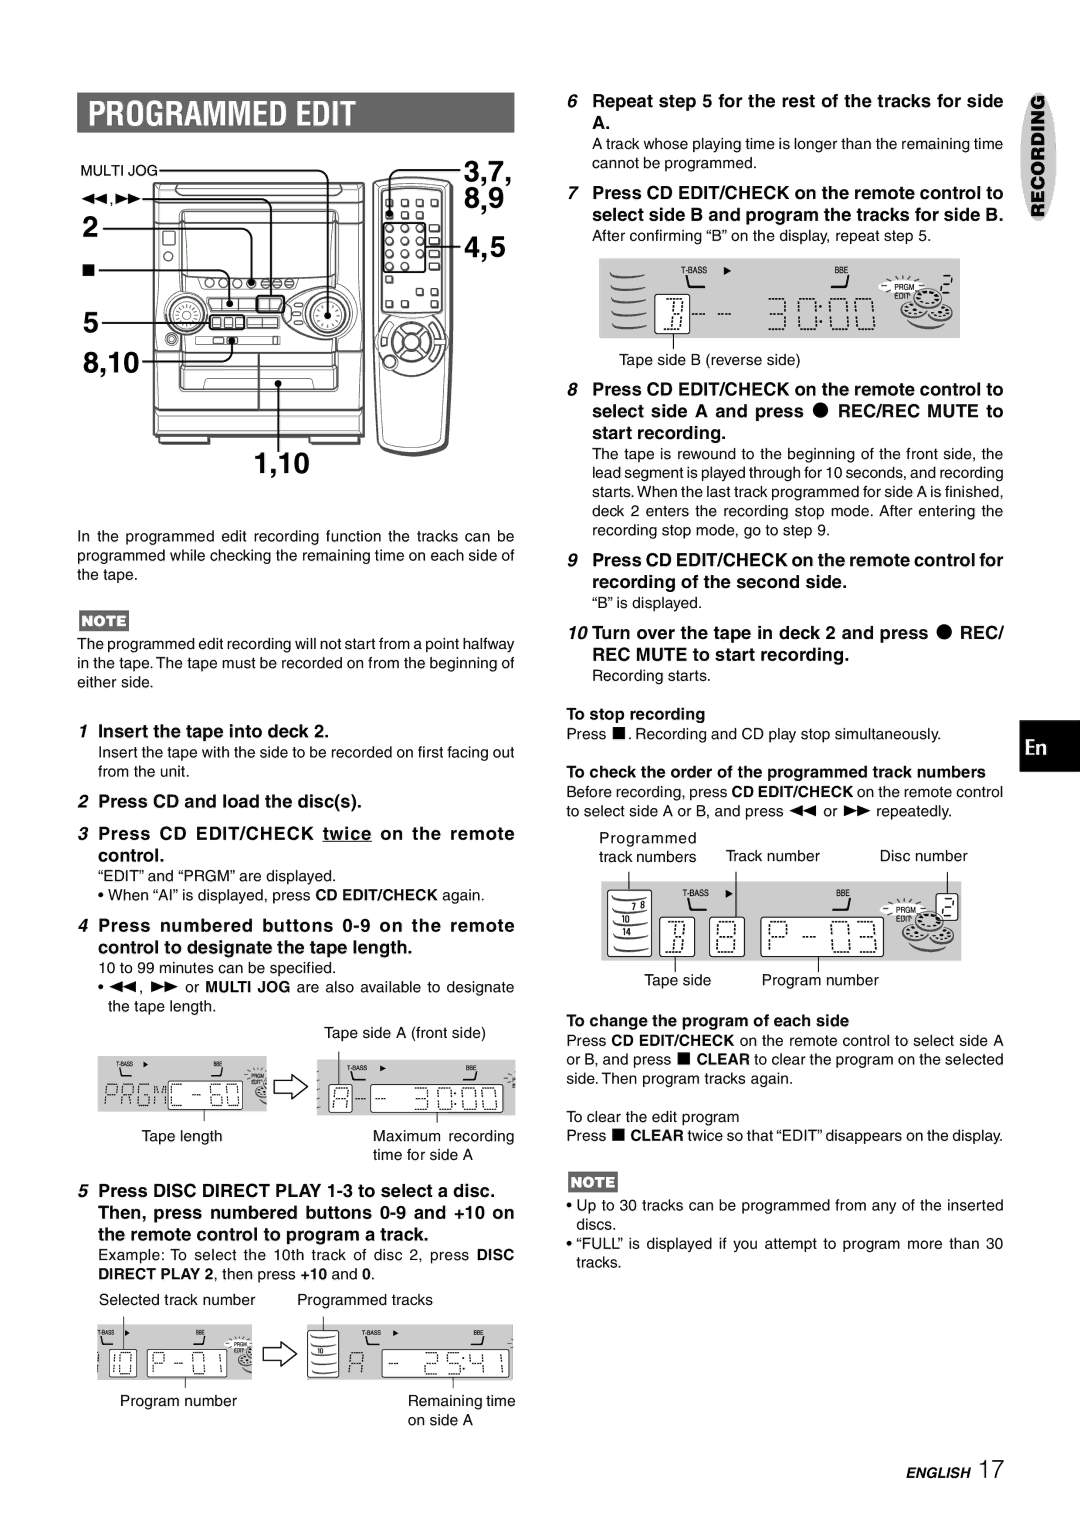
The NSX-HMT25 and NSX-HMT26 come equipped with a dual cassette deck, allowing for the convenient playback and recording of cassette tapes. This feature appeals to those who cherish the nostalgia of tape and wish to preserve their old recordings. In addition to cassette playback, both systems support CD playback, accommodating a diverse range of media formats. The CX-NHMT25 model enhances this versatility by incorporating a digital tuner, enabling access to a wide array of FM and AM radio stations.
These systems also feature advanced equalization options, allowing users to tailor sound profiles to their preferences. With preset equalizer settings and manual adjustments, audiophiles can customize sound output or select the ideal setting for different listening environments.
Another significant characteristic is the user-friendly interface, which includes an intuitive remote control. This design allows for easy navigation and control over the playback options from a distance, enhancing the overall user experience. The sleek and modern appearance of these stereo systems makes them an appealing addition to nearly any living space.
Connectivity is equally vital, and the Aiwa systems deliver in this aspect as well. They offer multiple audio input options, including auxiliary inputs for connecting external devices like smartphones or MP3 players. This ensures that users can easily integrate their personal music collections with the system.
In summary, the Aiwa NSX-HMT25, CX-NHMT25, and NSX-HMT26 stand out as versatile, high-quality audio solutions. With their solid sound performance, diverse media playback capabilities, customizable sound settings, and modern design, these stereo systems cater to both casual listeners and serious audiophiles alike, making them a noteworthy choice in home audio entertainment.