INTRODUCTION
This Quickstart Guide is intended to give you a brief overview of the functionality and features of the Q49. In this manual you will find instructions on how to connect the Q49 and how to use its basic features. Enjoy!
CONNECTION DIAGRAM
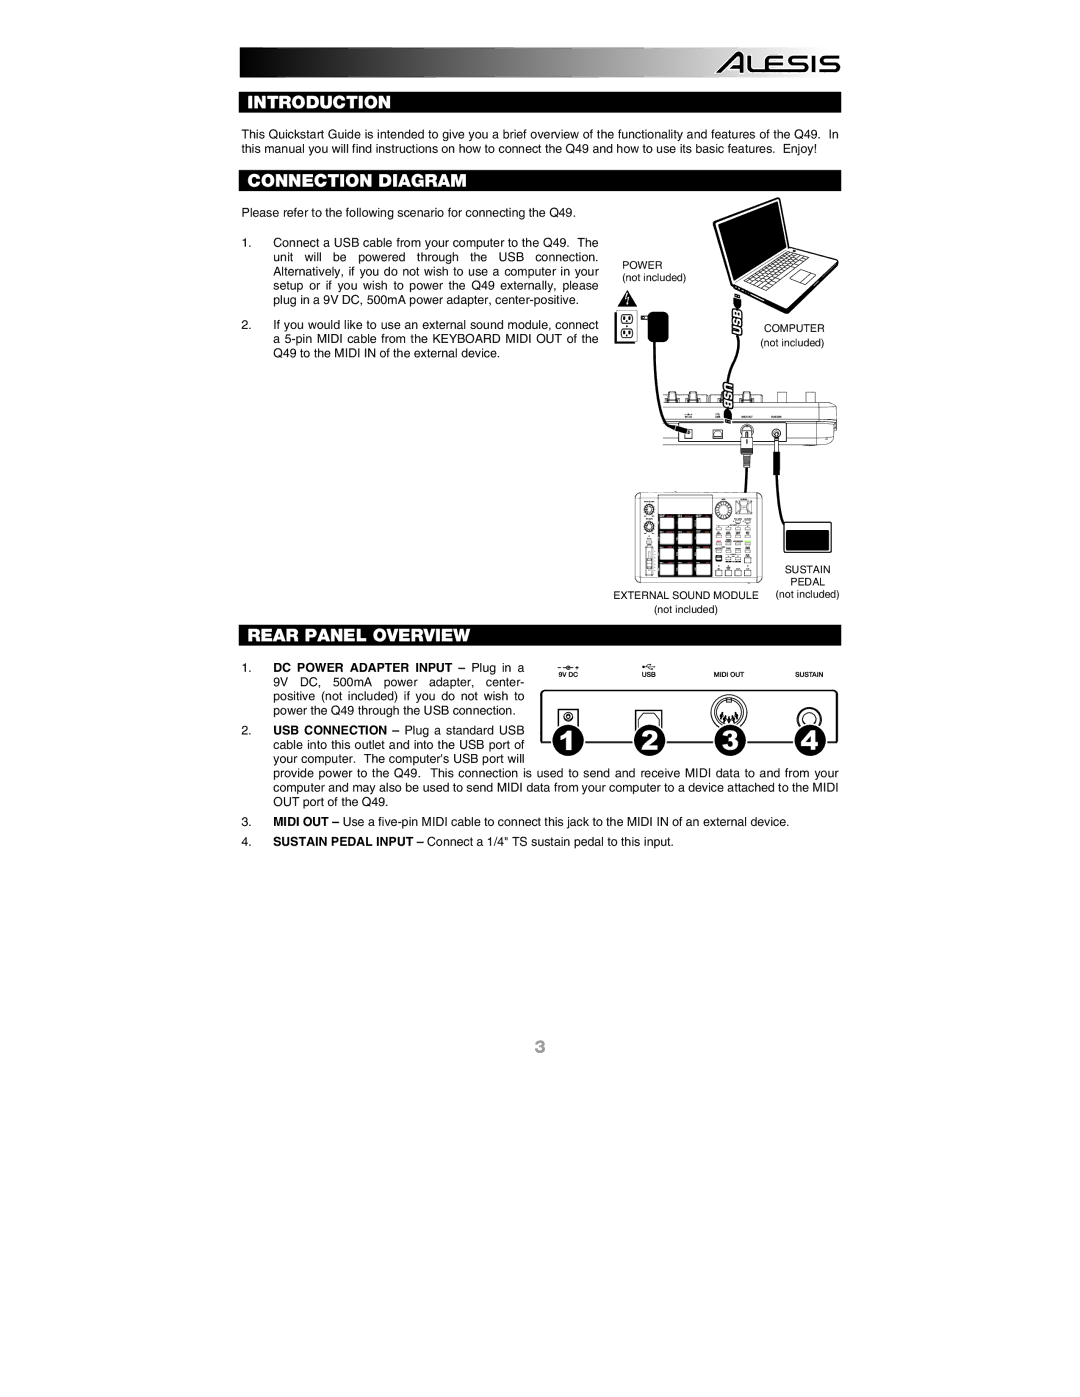
Please refer to the following scenario for connecting the Q49.
1.Connect a USB cable from your computer to the Q49. The unit will be powered through the USB connection. Alternatively, if you do not wish to use a computer in your setup or if you wish to power the Q49 externally, please plug in a 9V DC, 500mA power adapter,
2.If you would like to use an external sound module, connect a
POWER
(not included)
COMPUTER (not included)
| SUSTAIN |
| PEDAL |
EXTERNAL SOUND MODULE | (not included) |
(not included)
REAR PANEL OVERVIEW
1. | DC POWER ADAPTER INPUT – Plug in a |
|
|
|
|
| 9V DC, 500mA power adapter, center- |
|
|
|
|
| positive (not included) if you do not wish to |
|
|
|
|
| power the Q49 through the USB connection. |
|
|
|
|
2. | USB CONNECTION – Plug a standard USB | 1 | 2 | 3 | 4 |
| cable into this outlet and into the USB port of |
your computer. The computer's USB port will
provide power to the Q49. This connection is used to send and receive MIDI data to and from your computer and may also be used to send MIDI data from your computer to a device attached to the MIDI OUT port of the Q49.
3.MIDI OUT – Use a
4.SUSTAIN PEDAL INPUT – Connect a 1/4" TS sustain pedal to this input.
3
