
DPR-RDS1 specifications
The Alpine DPR-RDS1 is a versatile and advanced digital media receiver designed to enhance the listening experience in modern vehicles. Known for its user-friendly interface and a host of impressive features, this receiver stands out in its category, appealing to audiophiles and casual listeners alike.One of the key features of the DPR-RDS1 is its robust compatibility with various audio sources. It supports USB, Bluetooth, and auxiliary inputs, allowing users to easily connect their smartphones or other devices. The built-in Bluetooth technology provides wireless streaming capabilities, enabling hands-free calling and music playback from compatible devices without compromising safety on the road.
The DPR-RDS1 offers exceptional sound quality, thanks to its advanced digital signal processing. This technology optimizes audio output, providing clear, crisp sound across all frequencies. Users can customize their listening experience with a range of audio settings, including adjustable equalizer presets that allow for fine-tuning to suit personal preferences.
Another notable feature of the DPR-RDS1 is its compatibility with high-resolution audio formats. This makes it an attractive choice for those who appreciate high-fidelity sound, as it can decode various audio formats, ensuring a richer listening experience.
The intuitive user interface of the DPR-RDS1 is designed with ease of use in mind. A clear display provides essential information at a glance, while the controls are strategically positioned for accessibility while driving. The receiver also includes a built-in FM/AM tuner with RDS functionality, delivering real-time information about radio stations, including song titles and artist names.
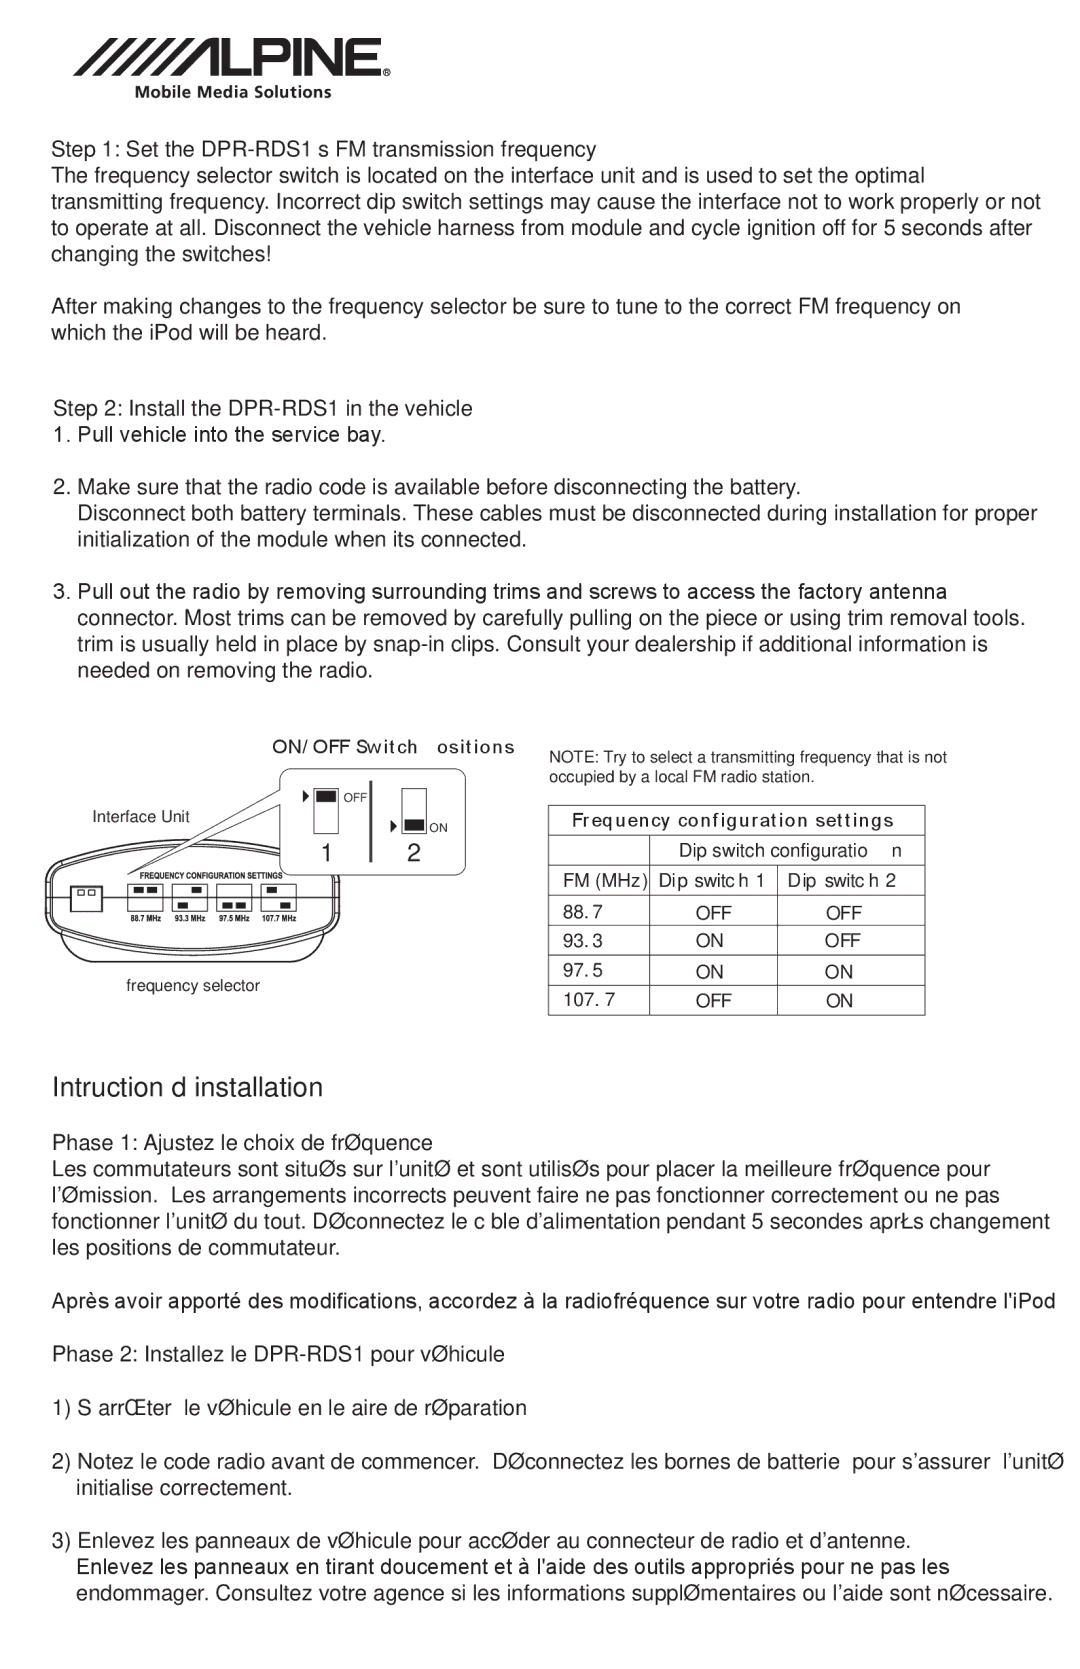
Installation of the DPR-RDS1 is straightforward, making it suitable for DIY enthusiasts and professionals alike. It is designed to fit into standard DIN slots and comes with detailed installation instructions. Additionally, the receiver is built to be durable, with a design that can withstand the vibrations and conditions of regular vehicle use.
In summary, the Alpine DPR-RDS1 is a feature-rich digital media receiver that combines convenience, quality, and advanced technology. With its wide range of audio compatibility, high-resolution support, user-friendly interface, and robust performance, it is an ideal choice for anyone looking to enhance their in-car audio experience. Whether you are a music lover or simply enjoy listening to your favorite radio stations, the DPR-RDS1 provides the functionality and sound quality to meet your needs.