Installation (SPX-107R, SPX-137R, SPX-177R)
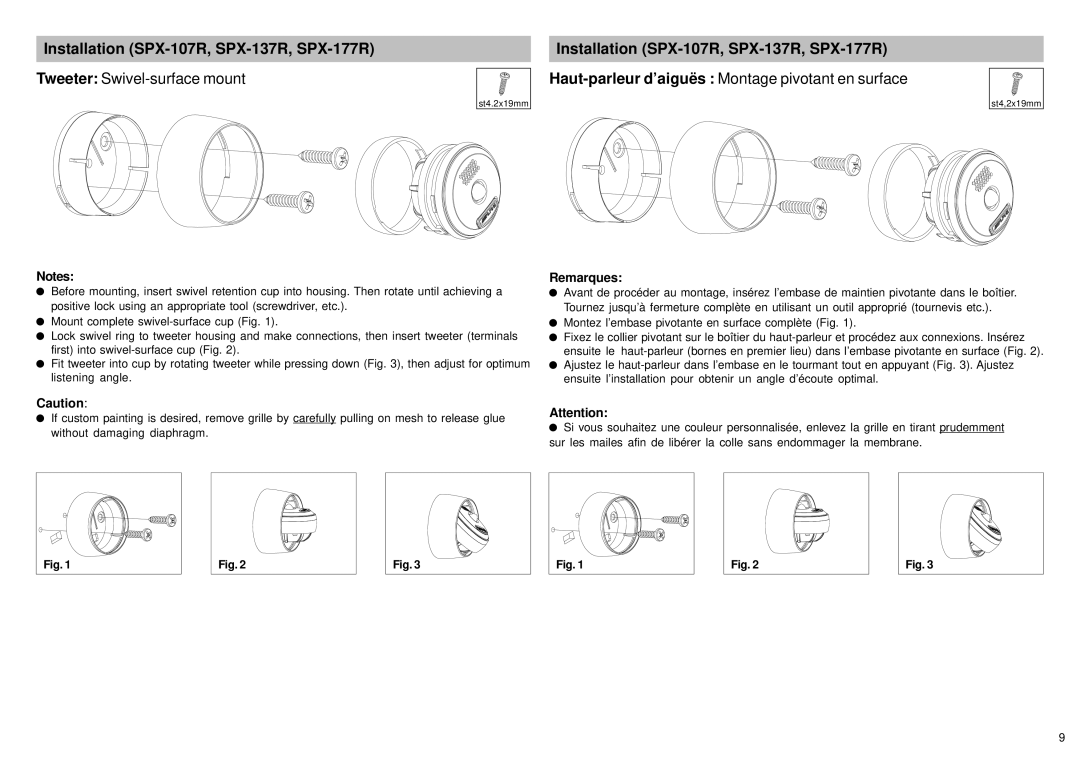
Tweeter: Swivel-surface mount
st4.2x19mm
Notes:
lBefore mounting, insert swivel retention cup into housing. Then rotate until achieving a positive lock using an appropriate tool (screwdriver, etc.).
lMount complete
lLock swivel ring to tweeter housing and make connections, then insert tweeter (terminals first) into
lFit tweeter into cup by rotating tweeter while pressing down (Fig. 3), then adjust for optimum listening angle.
Installation
Haut-parleur d’aiguës : Montage pivotant en surface
st4,2x19mm
Remarques:
lAvant de procéder au montage, insérez l’embase de maintien pivotante dans le boîtier. Tournez jusqu’à fermeture complète en utilisant un outil approprié (tournevis etc.).
lMontez l’embase pivotante en surface complète (Fig. 1).
lFixez le collier pivotant sur le boîtier du
lAjustez le
Caution:
lIf custom painting is desired, remove grille by carefully pulling on mesh to release glue without damaging diaphragm.
Attention:
lSi vous souhaitez une couleur personnalisée, enlevez la grille en tirant prudemment sur les mailes afin de libérer la colle sans endommager la membrane.
Fig. 1 |
Fig. 2
Fig. 3
Fig. 1 |
Fig. 2
Fig. 3
9