Assembly Instructions for CE101 Children’s
PARTS LIST
Key | Qty. | Description |
A | 2 | Sets of Hinged Legs |
B | 2 | Leg Cross Bars |
C | 2 | Plastic Storage Trays |
D | 1 | Green Chalkboard |
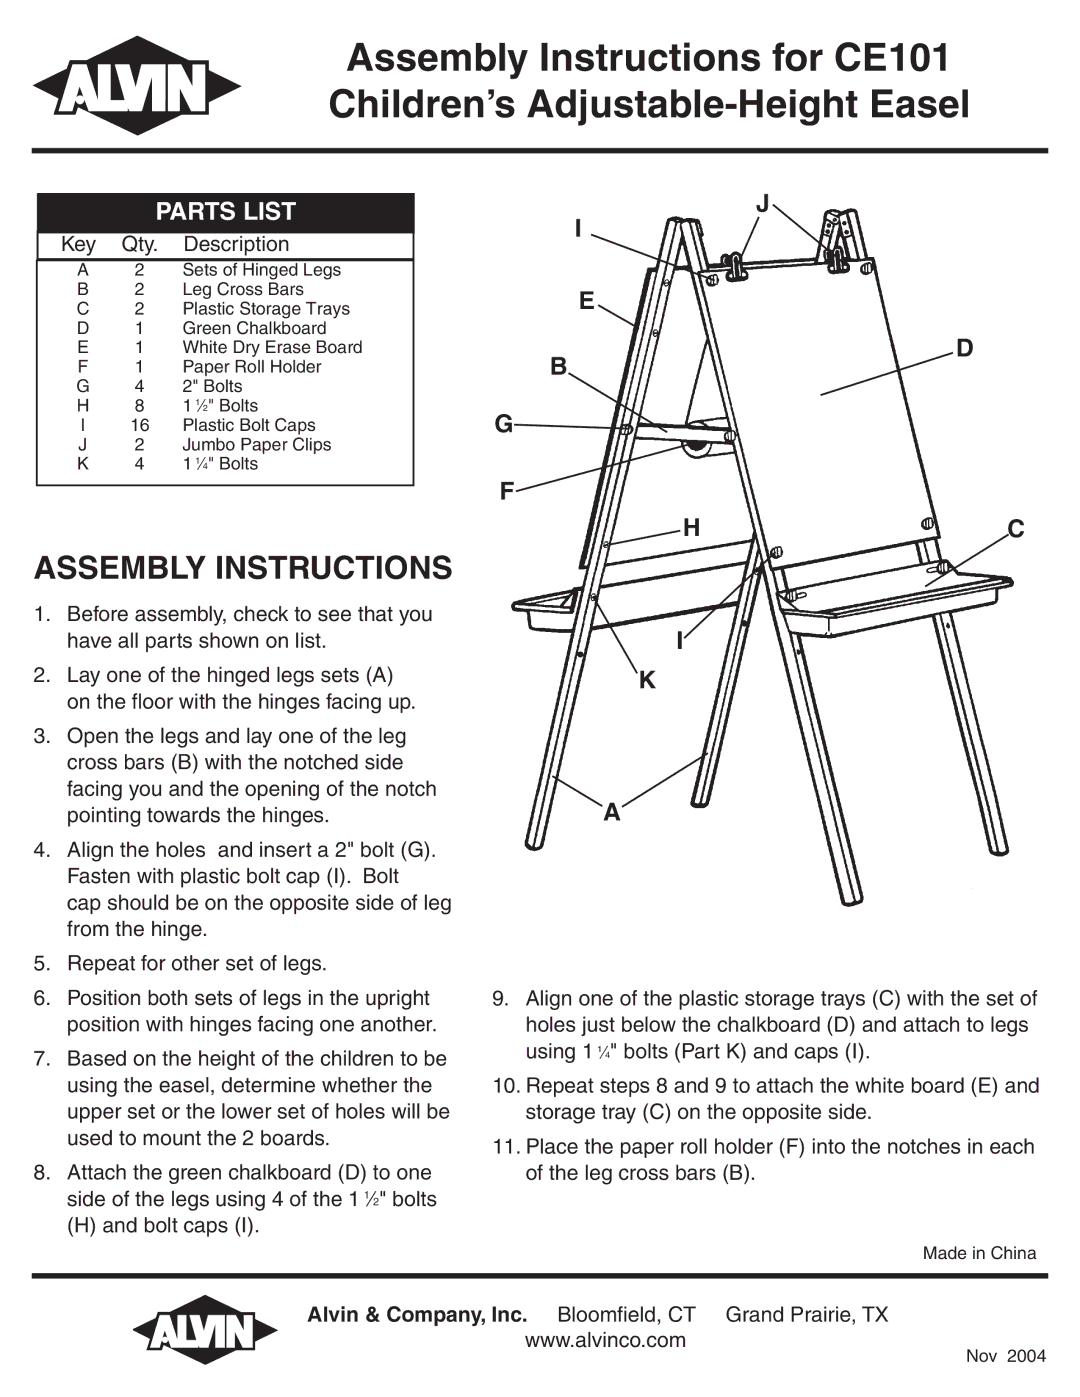
J I![]()
E
E | 1 | White Dry Erase Board |
F | 1 | Paper Roll Holder |
G | 4 | 2" Bolts |
H | 8 | 1 1⁄2" Bolts |
B
D
I | 16 | Plastic Bolt Caps |
J | 2 | Jumbo Paper Clips |
K | 4 | 1 1⁄4" Bolts |
ASSEMBLY INSTRUCTIONS
1.Before assembly, check to see that you have all parts shown on list.
2.Lay one of the hinged legs sets (A) on the floor with the hinges facing up.
3.Open the legs and lay one of the leg cross bars (B) with the notched side facing you and the opening of the notch pointing towards the hinges.
4.Align the holes and insert a 2" bolt (G). Fasten with plastic bolt cap (I). Bolt cap should be on the opposite side of leg from the hinge.
5.Repeat for other set of legs.
6.Position both sets of legs in the upright position with hinges facing one another.
7.Based on the height of the children to be using the easel, determine whether the upper set or the lower set of holes will be used to mount the 2 boards.
8.Attach the green chalkboard (D) to one side of the legs using 4 of the 1 1⁄2" bolts
(H) and bolt caps (I).
G![]()
F![]()
HC
I
K
A
9.Align one of the plastic storage trays (C) with the set of holes just below the chalkboard (D) and attach to legs using 1 1⁄4" bolts (Part K) and caps (I).
10.Repeat steps 8 and 9 to attach the white board (E) and storage tray (C) on the opposite side.
11.Place the paper roll holder (F) into the notches in each of the leg cross bars (B).
Made in China
Alvin & Company, Inc. Bloomfield, CT Grand Prairie, TX www.alvinco.com
Nov 2004