Wall Mounting Installation
• The heater must be mounted at four |
|
|
|
| |
points. Two mounting holes (keyhole |
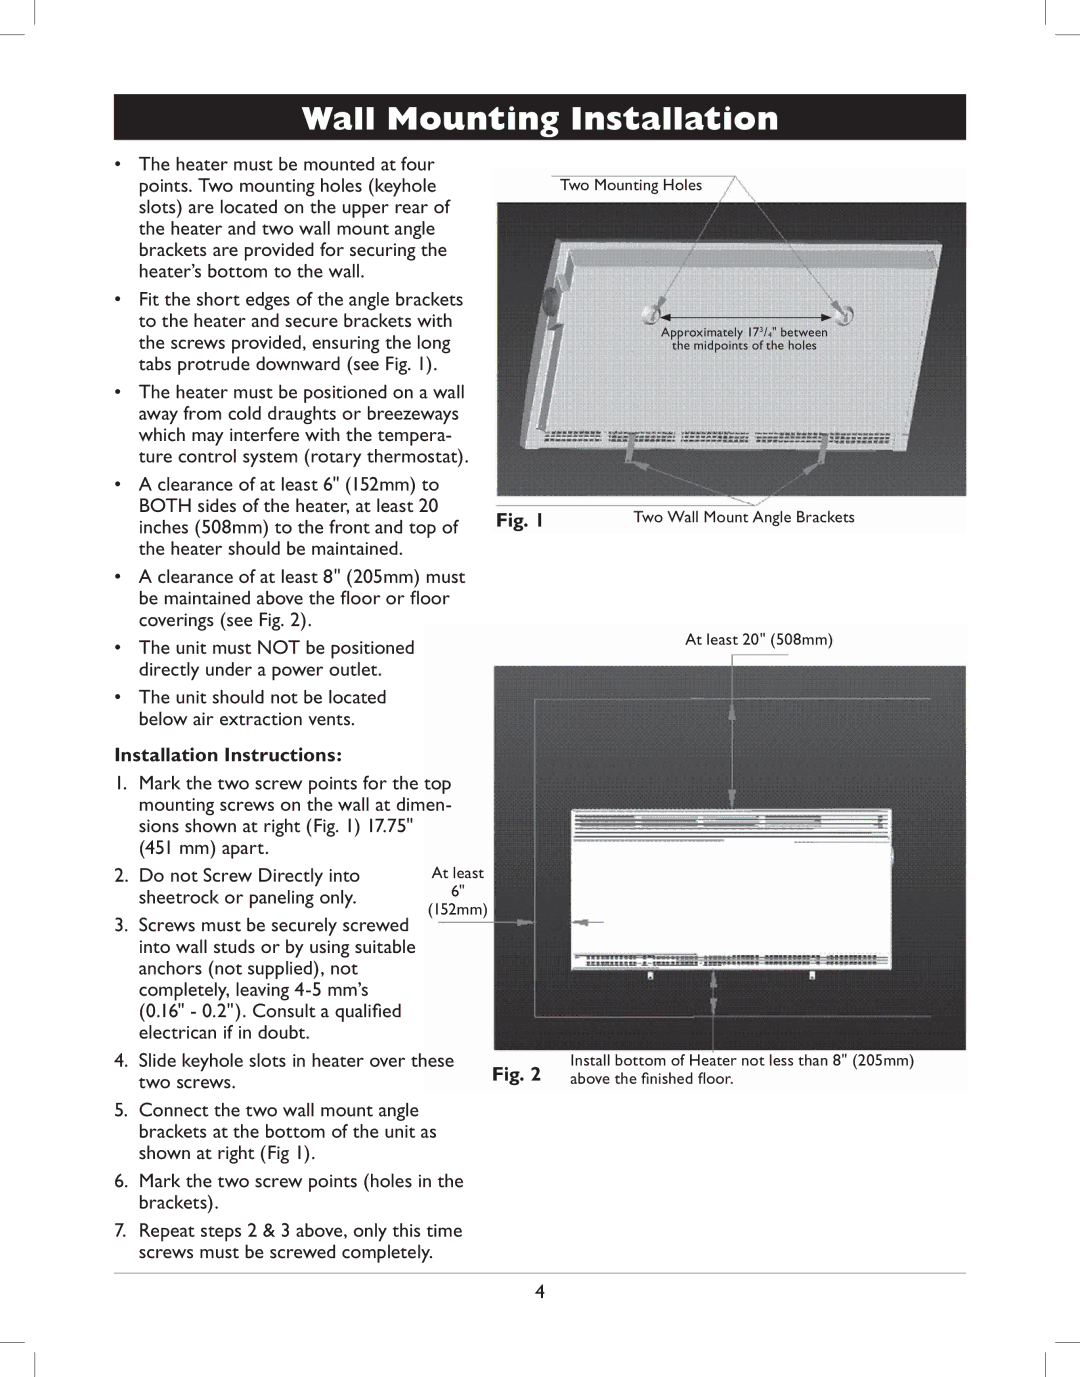
| Two Mounting Holes | |||
slots) are located on the upper rear of |
|
|
|
| |
the heater and two wall mount angle |
|
|
|
| |
brackets are provided for securing the |
|
|
|
| |
heater’s bottom to the wall. |
|
|
|
| |
• Fit the short edges of the angle brackets |
|
|
|
| |
to the heater and secure brackets with |
|
|
|
| |
| Approximately 173/4" between | ||||
the screws provided, ensuring the long |
| ||||
|
| the midpoints of the holes | |||
tabs protrude downward (see Fig. 1). |
|
|
|
| |
• The heater must be positioned on a wall |
|
|
|
| |
away from cold draughts or breezeways |
|
|
|
| |
which may interfere with the tempera- |
|
|
|
| |
ture control system (rotary thermostat). |
|
|
|
| |
• A clearance of at least 6" (152mm) to |
|
|
|
| |
BOTH sides of the heater, at least 20 | Fig. 1 | Two Wall Mount Angle Brackets | |||
inches (508mm) to the front and top of | |||||
|
|
|
| ||
the heater should be maintained. |
|
|
|
| |
•A clearance of at least 8" (205mm) must be maintained above the floor or floor coverings (see Fig. 2).
• | The unit must NOT be positioned | At least 20" (508mm) |
| ||
| directly under a power outlet. |
|
• | The unit should not be located |
|
| below air extraction vents. |
|
Installation Instructions:
1.Mark the two screw points for the top mounting screws on the wall at dimen- sions shown at right (Fig. 1) 17.75"
(451 mm) apart.
2. Do not Screw Directly into | At least |
sheetrock or paneling only. | 6" |
| (152mm) |
3.Screws must be securely screwed into wall studs or by using suitable anchors (not supplied), not completely, leaving
4. Slide keyhole slots in heater over these | Fig. 2 | Install bottom of Heater not less than 8" (205mm) | |
two screws. | above the finished floor. | ||
|
5.Connect the two wall mount angle brackets at the bottom of the unit as shown at right (Fig 1).
6.Mark the two screw points (holes in the brackets).
7.Repeat steps 2 & 3 above, only this time screws must be screwed completely.
4