4-1-5 2- / 4- / 6- / 8- Channel Audio Introduction
This motherboard comes with three audio jacks. To set up multi- channel surround sound, install an additional 5.1/7.1 surround cable (optional) and enable the feature through the audio driver.
English
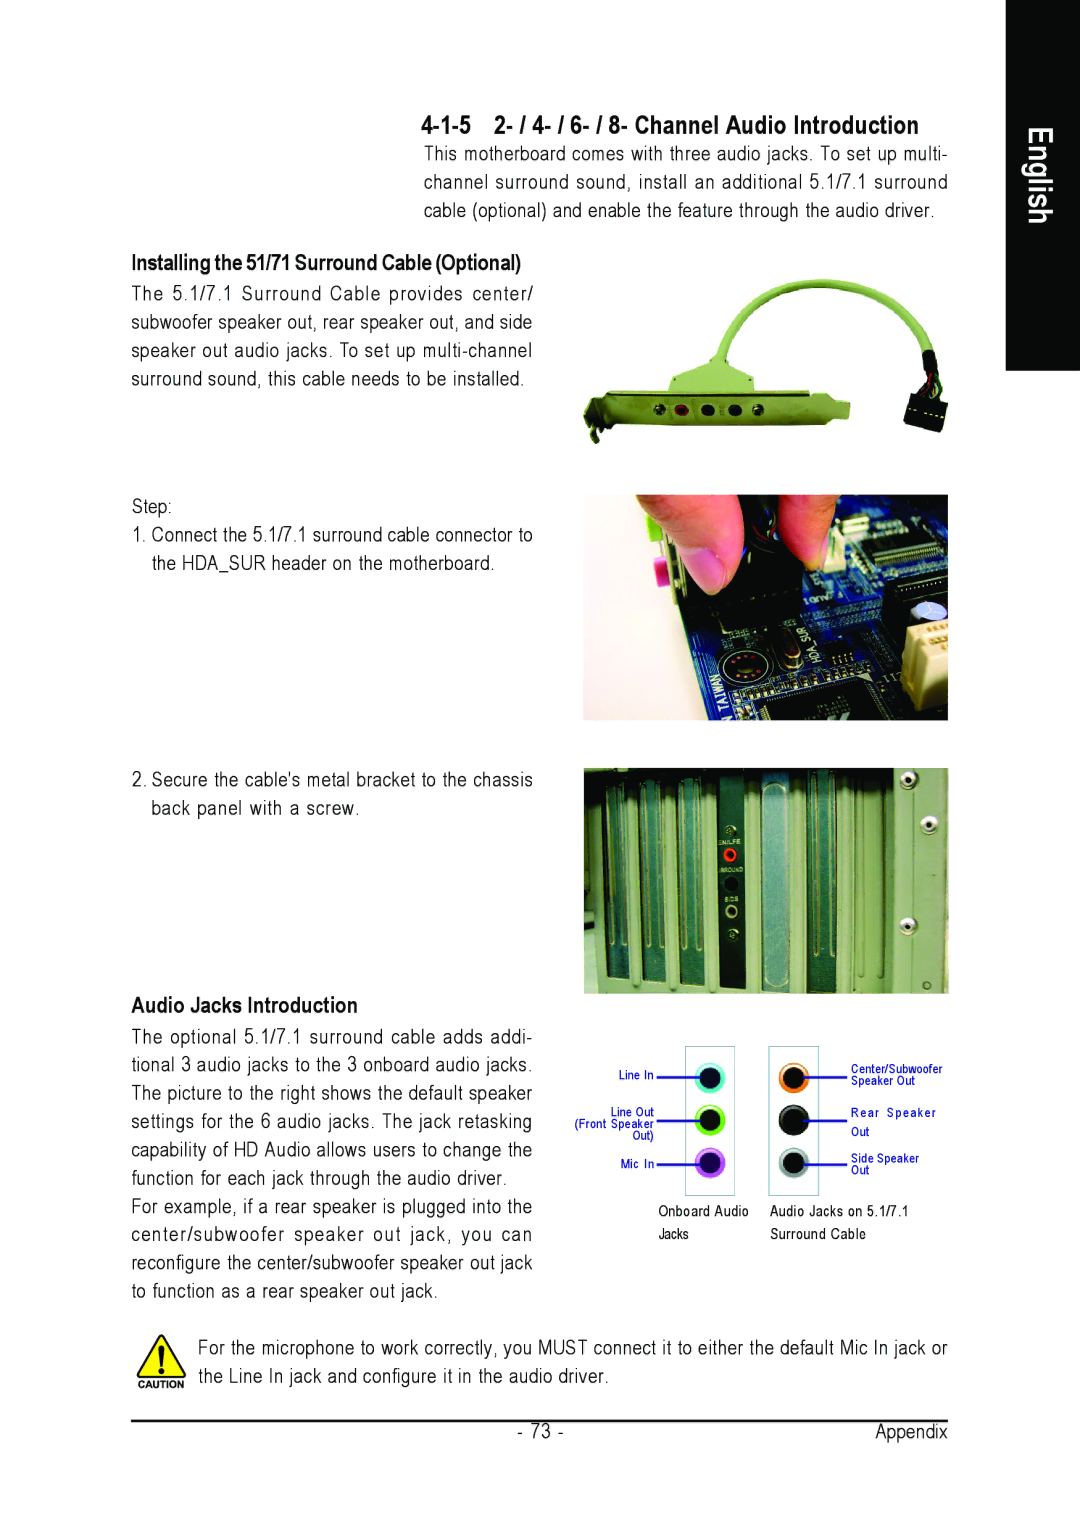
Installing the 5.1/7.1 Surround Cable (Optional)
The 5.1/7.1 Surround Cable provides center/ subwoofer speaker out, rear speaker out, and side speaker out audio jacks. To set up
Step:
1.Connect the 5.1/7.1 surround cable connector to the HDA_SUR header on the motherboard.
2.Secure the cable's metal bracket to the chassis back panel with a screw.
Audio Jacks Introduction
The optional 5.1/7.1 surround cable adds addi- tional 3 audio jacks to the 3 onboard audio jacks. The picture to the right shows the default speaker settings for the 6 audio jacks. The jack retasking capability of HD Audio allows users to change the function for each jack through the audio driver.
For example, if a rear speaker is plugged into the center/subwoofer speaker out jack, you can reconfigure the center/subwoofer speaker out jack to function as a rear speaker out jack.
Line In |
|
|
|
| Center/Subwoofer |
|
|
|
| Speaker Out | |
|
|
|
|
| |
Line Out |
|
| R e a r S p e a k e r | ||
(Front Speaker |
|
|
|
| Out |
Out) |
|
| |||
Mic In |
|
|
|
| Side Speaker |
|
|
|
| Out | |
|
|
|
|
| |
| Onboard Audio | Audio Jacks on 5.1/7.1 | |||
| Jacks | Surround Cable | |||
For the microphone to work correctly, you MUST connect it to either the default Mic In jack or the Line In jack and configure it in the audio driver.
- 73 - | Appendix |