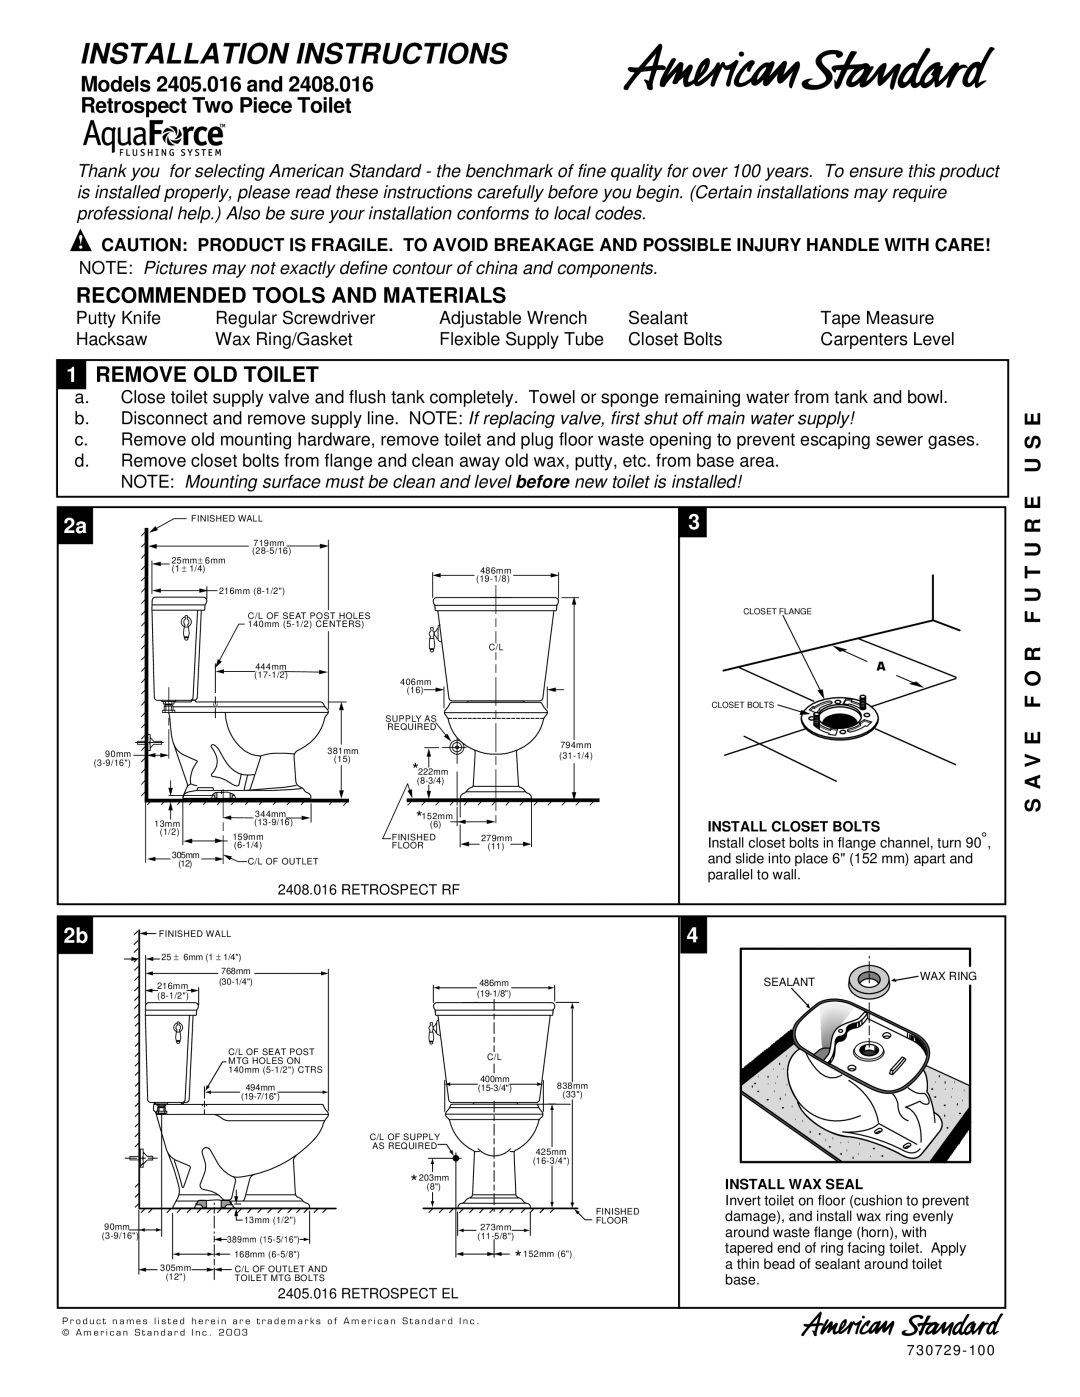
2405.016, 2408.016 specifications
The American Standard 2408.016 and 2405.016 are prominent models in the brand’s lineup of high-efficiency plumbing fixtures and fixtures. Known for their commitment to quality, durability, and innovative design, American Standard has established a reputation as a leader in the bathroom and kitchen markets.One of the standout features of the American Standard 2408.016 model is its impressive water efficiency. This model is designed to significantly reduce water consumption without compromising performance, participating in the WaterSense program, which signifies that it uses at least 20% less water than conventional models. This means that homeowners can enjoy a comfortable and luxurious bathroom experience while helping to conserve precious water resources.
The 2405.016 model also emphasizes water efficiency and is equipped with advanced technologies that enhance the user experience. Both models feature a sleek, modern design that complements a variety of bathroom aesthetics, making it an ideal choice for updated or new constructions. The smooth lines and elegant profile exhibit a contemporary flair while ensuring easy cleaning and maintenance.
Another notable characteristic of these models is their ergonomic height. The toilet height is designed to be comfortable for users of all ages, providing ease of access, particularly for seniors and individuals with limited mobility. This feature is crucial for creating a bathroom that is safe and user-friendly.
In terms of installation, the American Standard 2408.016 and 2405.016 are designed for straightforward setup, featuring robust and reliable components. The parts are widely recognized for their durability and long-lasting quality, ensuring that customers receive maximum value over time.
Furthermore, both models integrate advanced flushing technologies. The powerful flush action not only improves waste removal but also minimizes clogs and backup, offering a hassle-free experience. This reliable performance is complemented by a quiet operation, promoting a peaceful bathroom environment.
Overall, the American Standard 2408.016 and 2405.016 toilets embody efficiency, aesthetic appeal, and usability. By incorporating innovative design elements and sustainable features, these models contribute to an eco-friendly lifestyle while ensuring comfort and functionality in everyday use. Homeowners looking for a modern bathroom solution will find these toilets to be ideal choices, merging performance with style effortlessly.