2 | Place lavatory and pedestal into installed position. Level and |
| square the lavatory and pedestal assembly. Mark lavatory and |
| pedestal screw locations through the mounting holes. |
3 | Remove lavatory and pedestal from |
| installed position. Drill pilot holes |
| for lavatory and pedestal anchor |
| screws. |
| Use the kit provided for lavatory |
| and pedestal installation. |
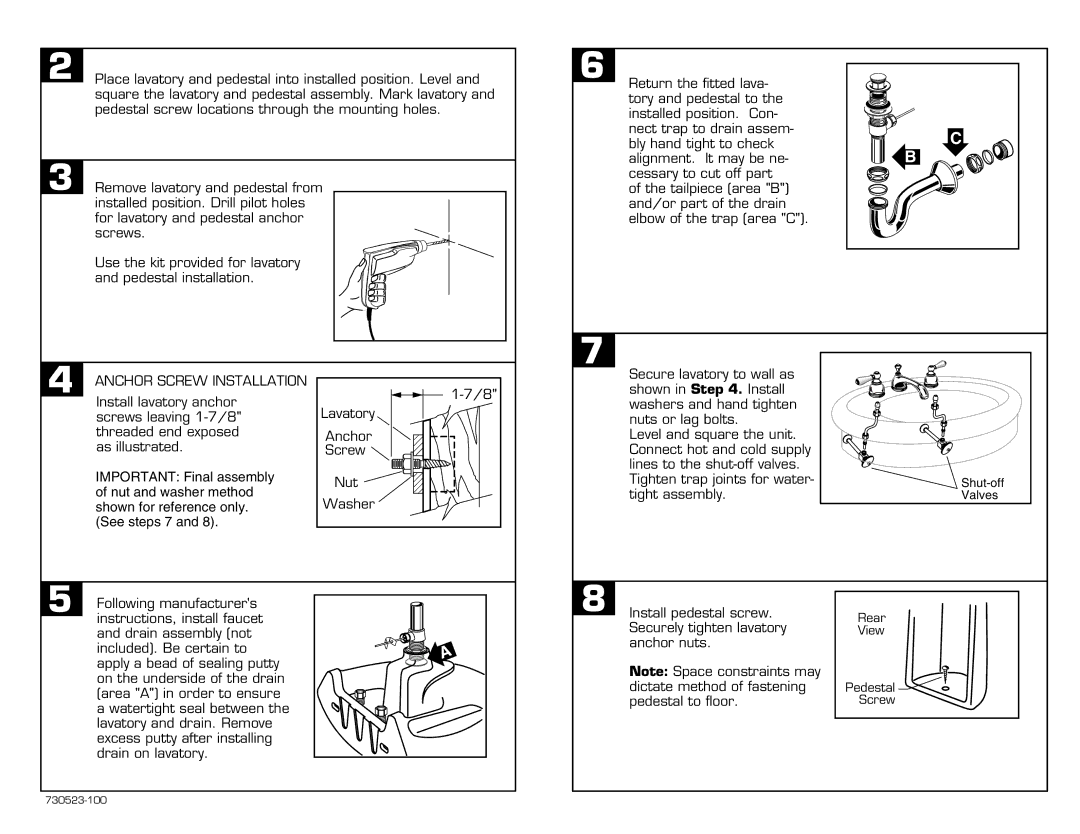
6
Return the fitted lava- |
|
tory and pedestal to the |
|
installed position. Con- |
|
nect trap to drain assem- | C |
bly hand tight to check | |
alignment. It may be ne- | B |
cessary to cut off part |
|
of the tailpiece (area "B") |
|
and/or part of the drain |
|
elbow of the trap (area "C"). |
|
7
4 ANCHOR SCREW INSTALLATION Install lavatory anchor
screws leaving
IMPORTANT: Final assembly of nut and washer method shown for reference only. (See steps 7 and 8).
Lavatory
Anchor Screw
Nut
Washer
Secure lavatory to wall as |
|
shown in Step 4. Install |
|
washers and hand tighten |
|
nuts or lag bolts. |
|
Level and square the unit. |
|
Connect hot and cold supply |
|
lines to the |
|
Tighten trap joints for water- | |
tight assembly. | Valves |
5 Following manufacturer's instructions, install faucet and drain assembly (not included). Be certain to apply a bead of sealing putty on the underside of the drain (area "A") in order to ensure a watertight seal between the lavatory and drain. Remove excess putty after installing drain on lavatory.
8
Install pedestal screw. Securely tighten lavatory anchor nuts.
Note: Space constraints may dictate method of fastening pedestal to floor.
Rear
View
Pedestal ![]() Screw
Screw