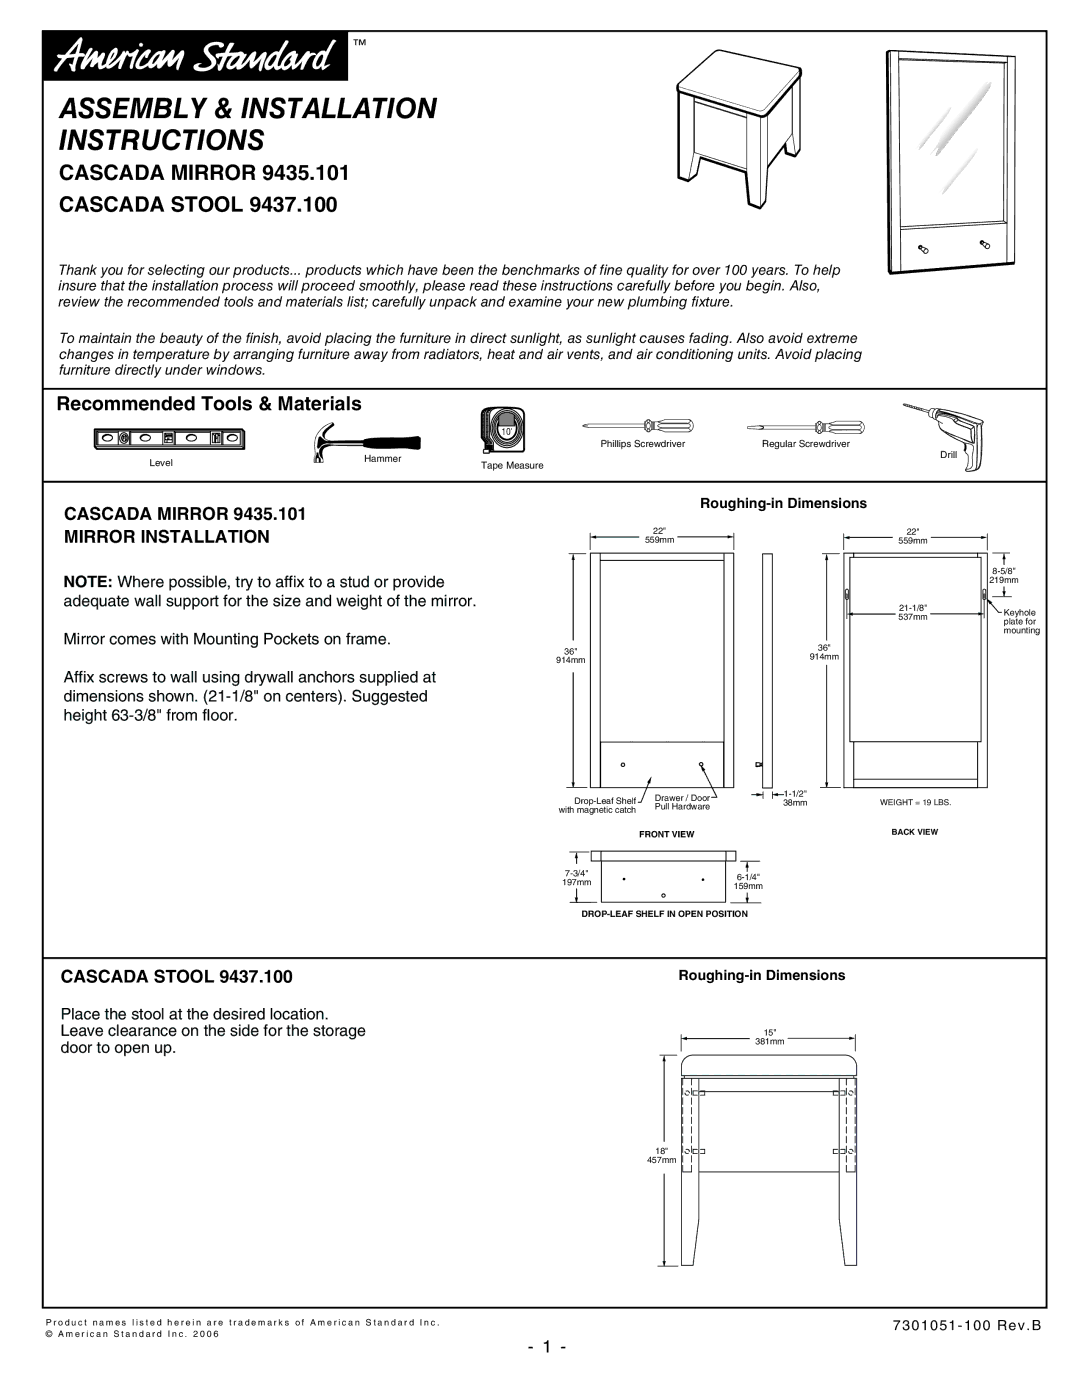
9437.100, 9435.101 specifications
The American Standard 9435.101 and 9437.100 are two prominent models in the brand's line of high-quality bathroom fixtures, known for their combination of performance, design, and durability. These faucets are engineered not only for aesthetic appeal but also for superior functionality, making them ideal choices for modern bathrooms.One of the key features of the 9435.101 faucet is its sleek, contemporary design, which includes clean lines and a polished chrome finish. This model often features an innovative mechanical cartridge that offers precision control over water flow and temperature. The ceramic disc valve technology incorporated in the design provides long-lasting performance and helps prevent leaks, ensuring that homeowners can enjoy a worry-free experience.
In contrast, the 9437.100 model boasts a modern look with its stylish spout and ergonomic handle, designed for comfortable use. This model also incorporates American Standard's advanced flow control technology, which allows users to set their preferred water flow rate, promoting water conservation without sacrificing performance. Its ease of installation, thanks to the Quick Connect system, means that homeowners can set it up with minimal effort.
Both models emphasize sustainability, featuring eco-friendly components that reduce water consumption while still delivering a satisfying user experience. These faucets are designed to meet WaterSense standards, which ensure significant water savings—a vital consideration for environmentally conscious consumers.
Durability is another hallmark of these models. Made from high-quality materials that resist tarnishing and corrosion, they promise long-term use without the need for frequent replacements. Additionally, the finishes are engineered to endure daily wear and tear, maintaining their luster over time.
In terms of compatibility, both faucets fit standard sink configurations. The robust construction and the manufacturer’s limited lifetime warranty further enhance their appeal, providing peace of mind regarding quality.
In summary, the American Standard 9435.101 and 9437.100 faucets combine innovative technology with modern design, making them standout choices for homeowners looking to enhance their bathroom experience. With features that prioritize ease of use, durability, and eco-friendliness, these models reflect American Standard's commitment to excellence in bathroom fixtures.