BA500 Bass Amp Combo
The Rear Panel
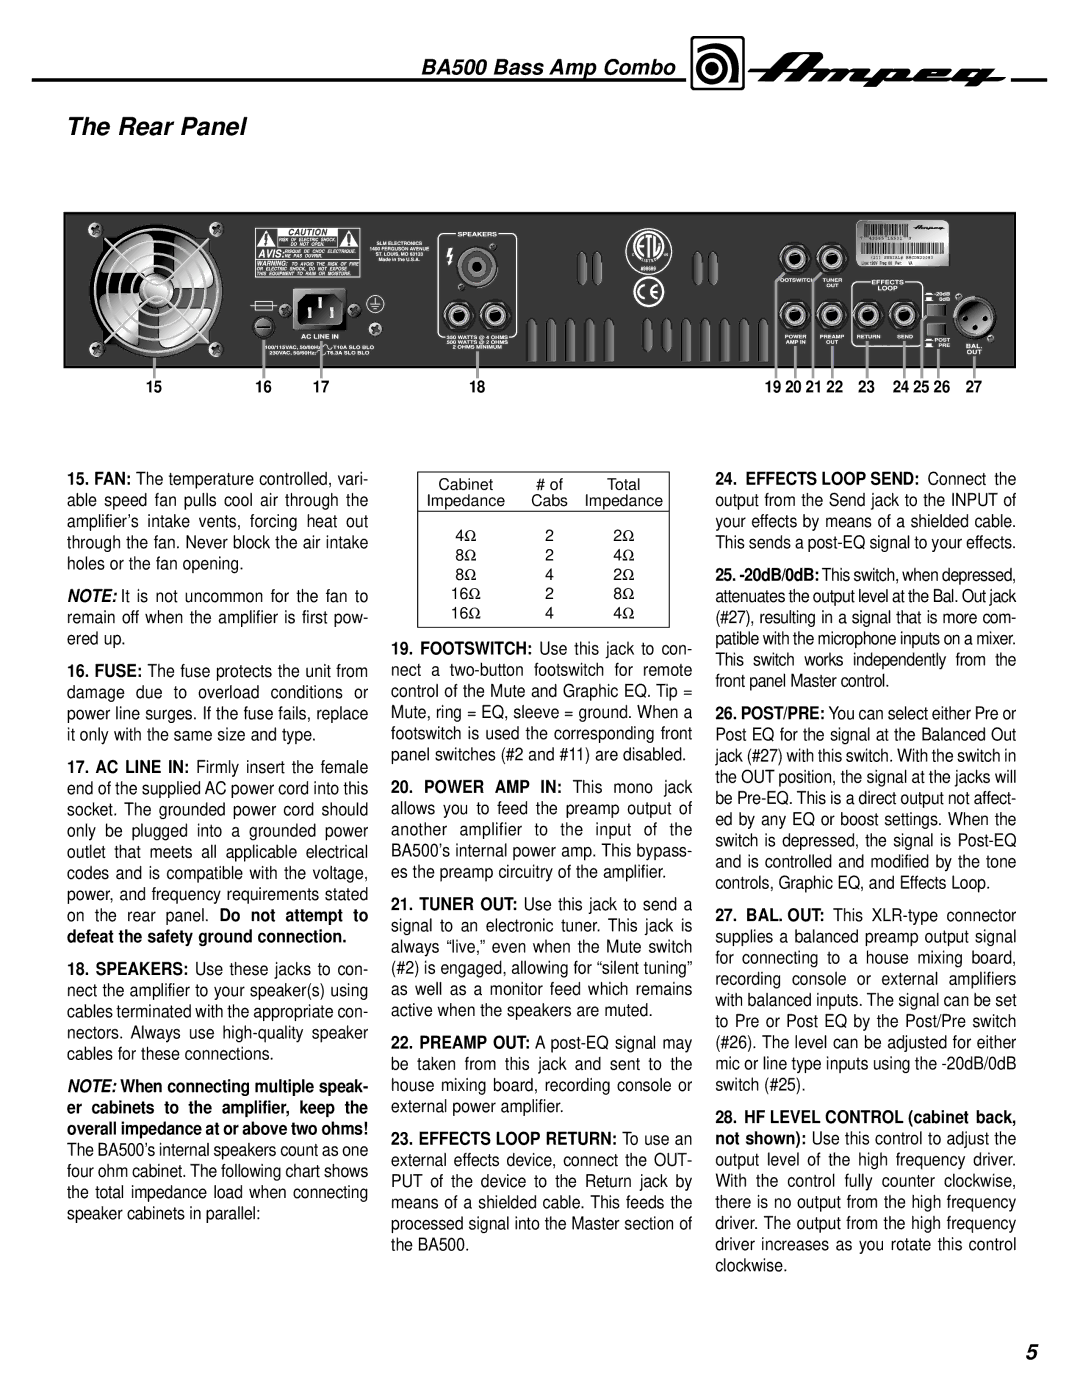
15 | 16 | 17 | 18 | 19 20 21 22 | 23 | 24 25 26 | 27 |
15.FAN: The temperature controlled, vari- able speed fan pulls cool air through the amplifier’s intake vents, forcing heat out through the fan. Never block the air intake holes or the fan opening.
NOTE: It is not uncommon for the fan to remain off when the amplifier is first pow- ered up.
16.FUSE: The fuse protects the unit from damage due to overload conditions or power line surges. If the fuse fails, replace it only with the same size and type.
17.AC LINE IN: Firmly insert the female end of the supplied AC power cord into this socket. The grounded power cord should only be plugged into a grounded power outlet that meets all applicable electrical codes and is compatible with the voltage, power, and frequency requirements stated on the rear panel. Do not attempt to defeat the safety ground connection.
18.SPEAKERS: Use these jacks to con- nect the amplifier to your speaker(s) using cables terminated with the appropriate con- nectors. Always use
NOTE: When connecting multiple speak- er cabinets to the amplifier, keep the overall impedance at or above two ohms! The BA500’s internal speakers count as one four ohm cabinet. The following chart shows the total impedance load when connecting speaker cabinets in parallel:
Cabinet | # of | Total |
Impedance | Cabs | Impedance |
4Ω | 2 | 2Ω |
8Ω | 2 | 4Ω |
8Ω | 4 | 2Ω |
16Ω | 2 | 8Ω |
16Ω | 4 | 4Ω |
|
|
|
19.FOOTSWITCH: Use this jack to con- nect a
20.POWER AMP IN: This mono jack allows you to feed the preamp output of another amplifier to the input of the BA500’s internal power amp. This bypass- es the preamp circuitry of the amplifier.
21.TUNER OUT: Use this jack to send a signal to an electronic tuner. This jack is always “live,” even when the Mute switch (#2) is engaged, allowing for “silent tuning” as well as a monitor feed which remains active when the speakers are muted.
22.PREAMP OUT: A
23.EFFECTS LOOP RETURN: To use an external effects device, connect the OUT- PUT of the device to the Return jack by means of a shielded cable. This feeds the processed signal into the Master section of the BA500.
24.EFFECTS LOOP SEND: Connect the output from the Send jack to the INPUT of your effects by means of a shielded cable. This sends a
25.
26.POST/PRE: You can select either Pre or Post EQ for the signal at the Balanced Out jack (#27) with this switch. With the switch in the OUT position, the signal at the jacks will be
27.BAL. OUT: This
28.HF LEVEL CONTROL (cabinet back, not shown): Use this control to adjust the output level of the high frequency driver. With the control fully counter clockwise, there is no output from the high frequency driver. The output from the high frequency driver increases as you rotate this control clockwise.
5