NOTE: The battery pack is designed to run the clipper for about one hour. A clean, sharp,
3.Before initial use, battery pack must be charged for a minimum of ten hours.
4.The charger base has a blue indicator light. The indicator light will remain "ON" when the battery is charging.
5.You can keep the clipper in the charger when not in use. The charger will maintain the battery at full charge and the blue light will stay on. The unit has a Nickel Metal Hydride battery that cannot be damaged by overcharging. However, we recommend that the charger be unplugged if the clipper won't be used for seven or more days.
SAFETY RULES FOR CHARGER AND BATTERY PACK
1. | Clipper motor switch must be in the “OFF” position for the |
| charger to operate properly. Do not return the clipper to the |
| charger base with the motor switch in the “ON” position. |
| If the clipper is accidentally put on the charger base in the |
| “ON” position, remove it promptly. Turn clipper off and return |
| to the charger base. |
2. | Do not insert anything metallic into the battery pocket |
| of the charger base (Diagram C). |
3. | Do not attempt to charge any other battery other than |
| the battery pack designed for your Andis AGR+ Clipper. |
4. | Do not store battery or charger where it is under 50°F |
| or over 104°F, as damage may occur (Diagram D). |
5. | Do not expose the charger base or the battery pack |
| to excessively damp conditions (Diagram E). |
6. | Avoid dropping the charger base and the battery pack. |
| Do not attempt to use a damaged battery pack or charger. |
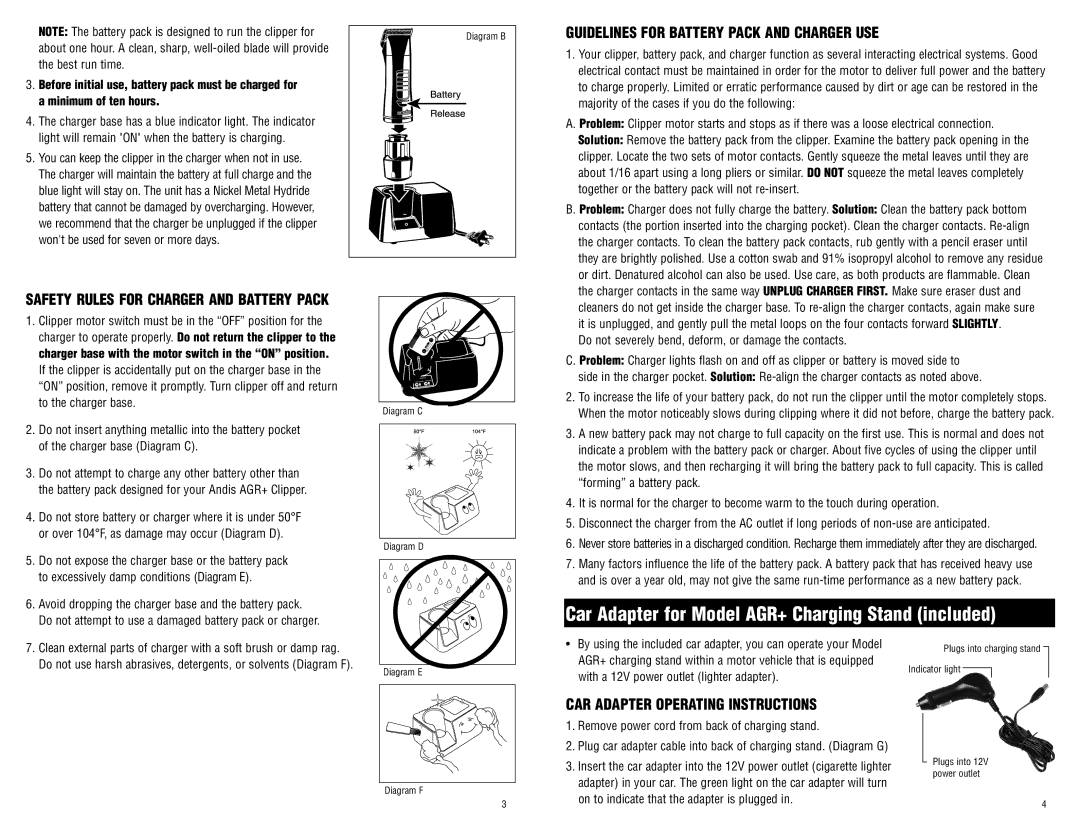
Diagram B
Battery
Fast Charge Charging
Diagram C
Diagram D
GUIDELINES FOR BATTERY PACK AND CHARGER USE
1.Your clipper, battery pack, and charger function as several interacting electrical systems. Good electrical contact must be maintained in order for the motor to deliver full power and the battery to charge properly. Limited or erratic performance caused by dirt or age can be restored in the majority of the cases if you do the following:
A. Problem: Clipper motor starts and stops as if there was a loose electrical connection. Solution: Remove the battery pack from the clipper. Examine the battery pack opening in the clipper. Locate the two sets of motor contacts. Gently squeeze the metal leaves until they are about 1/16 apart using a long pliers or similar. DO NOT squeeze the metal leaves completely together or the battery pack will not
B. Problem: Charger does not fully charge the battery. Solution: Clean the battery pack bottom contacts (the portion inserted into the charging pocket). Clean the charger contacts.
Do not severely bend, deform, or damage the contacts.
C. Problem: Charger lights flash on and off as clipper or battery is moved side to side in the charger pocket. Solution:
2.To increase the life of your battery pack, do not run the clipper until the motor completely stops. When the motor noticeably slows during clipping where it did not before, charge the battery pack.
3.A new battery pack may not charge to full capacity on the first use. This is normal and does not indicate a problem with the battery pack or charger. About five cycles of using the clipper until the motor slows, and then recharging it will bring the battery pack to full capacity. This is called “forming” a battery pack.
4.It is normal for the charger to become warm to the touch during operation.
5.Disconnect the charger from the AC outlet if long periods of
6.Never store batteries in a discharged condition. Recharge them immediately after they are discharged.
7.Many factors influence the life of the battery pack. A battery pack that has received heavy use and is over a year old, may not give the same
Car Adapter for Model AGR+ Charging Stand (included)
7. Clean external parts of charger with a soft brush or damp rag. |
Do not use harsh abrasives, detergents, or solvents (Diagram F). |
Diagram E
Diagram F
3
•By using the included car adapter, you can operate your Model
AGR+ charging stand within a motor vehicle that is equipped with a 12V power outlet (lighter adapter).
car adapter operating instructions
1.Remove power cord from back of charging stand.
2.Plug car adapter cable into back of charging stand. (Diagram G)
3.Insert the car adapter into the 12V power outlet (cigarette lighter adapter) in your car. The green light on the car adapter will turn on to indicate that the adapter is plugged in.
Plugs into charging stand
Indicator light ![]()
Plugs into 12V power outlet
4