IMPORTANT SAFEGUARDS
When using an electrical appliance, basic precautions should always be followed, including the following: Read all instructions before using the Andis clipper/trimmer.
DANGER: To reduce the risk of electric shock:
1.Do not reach for an appliance that has fallen into water. Unplug immediately.
2.Do not use while bathing or in a shower.
3.Do not place or store appliance where it can fall or be pulled into a tub or sink. Do not place in or drop into water or other liquid.
4.Always unplug this appliance from the electrical outlet immediately after using.
5.Unplug this appliance before cleaning, removing or assembling parts.
6.Keep this appliance dry.
WARNING:
To reduce the risk of burns, fire electric shock, or injury to persons:
1. | Close supervision is necessary when this appliance is used by, on or |
| near children or individuals with certain disabilities. |
2. | Use this appliance only for its intended use as described in this manual. |
| Do not use attachments not recommended by the manufacturer |
3. | Never operate this appliance if it has a damaged cord or plug, if it is not |
| working properly, if it has been dropped or damaged, or dropped into water. |
| Return the appliance to a service center for examination and repair. |
4. | Keep the cord away from heated surfaces. |
5. | Never drop or insert any object into any opening. Insert only recharging |
| transformer plug into trimmer receptacle. |
6. | Do not use outdoors or operate where aerosol (spray) products are being used |
| or where oxygen is being administered. |
| You may keep the clipper/trimmer in the charger when not in use. The charger | Fig. 1 |
| will maintain the battery at full charge and the red light will stay on. The unit | |
| has a Nickel Metal Hydride battery that cannot be damaged by overcharging. | |
| However, we recommend that the charger be unplugged if the clipper/trimmer | |
| won’t be used for seven or more days. | | |
| PLEASE NOTE: Nickel Metal Hydride batteries have less “memory effect” than | |
| Nickel Cadmium batteries. Memory effect is caused by repeated short uses of the | |
| trimmer, followed by charging. The battery never fully discharges and, therefore, | |
| “forgets” how much energy it can store. In order to maximize the performance of | |
| your Nickel Metal Hydride battery, please follow these steps: | | |
| 1) Oil the blade. Turn the trimmer on and allow it to run until | | OIL |
| the blade slows significantly. It is not necessary to let the blade | |
| | |
| stop completely. | OIL | OIL |
| 2) Turn the trimmer off. Charge overnight. |
| | |
| 3) Conduct the above exercise every sixty days. | | |
| FAILURE TO CHARGE | Fig. 2 | |
| | |
1) Make sure voltage is present at the wall outlet (confirm with an appliance | Fig. 3 |
you know is working). | |
2) Check to make sure the transformer cord is firmly plugged into the trimmer. | |
Twist the transformer connector slightly to insure good electrical | |
connection. If the trimmer still fails to charge, return the trimmer to | |
Andis or an Andis Authorized Service Station listed in this manual for | |
examination and repair or replacement. | |
ATTENTION: The product you have purchased contains a rechargeable battery. The battery is recyclable. At the end of its useful life, under various state and local laws, it may be illegal to dispose of this battery into the municipal waste stream. Check with your local solid waste officials (or call 1-800-822-8837) for details in your area for recycling options or proper disposal.
coolant. Always replace broken or nicked blades to prevent | | | |
injury. You can clean the excess hair from your blades by using | | | |
a small brush or worn out tooth brush. To clean the blades | | YOKE | ARMATURE |
we suggest to immerse only the blades into a shallow pan of | |
| BLADE | |
Andis Clipper Oil, while the clipper/trimmer is running. Any | | | PIN |
| BLADE SET HOOK | |
excess hair and dirt that has accumulated between the blades | | |
| | BLADE SLOT |
should come out. After cleaning, turn the unit off and dry blades | | |
with a dry cloth and start clipping or trimming again. | | | |
REPLACEMENT (REMOVAL) OF BLADE SET
To remove the blades, first unplug the clipper/trimmer from the electrical outlet. Hold the clipper/trimmer, so that the blade teeth are pointing up. Press forward on blade (Fig. 4). To replace the blade, line up the bottom hook of blade with the slot on the clipper/trimmer and snap into place (Fig. 5).
| | | Fig. 4 |
| Attaching The Clipper Combs | | |
| The clipper comb blade attachments mount easily. | | |
| Just snap them on. Snap them off (Fig. 6). Combs | | |
| help guide hair to cutting blades and give you precise | | |
| control of hair lengths. Each comb allows a different | | |
| length of cut which is indicated on the combs: 1/16”, | | |
| 1/8”, 1/4”, 3/8” and 1/2”. You can always set blades | | |
| for a coarser cut by attaching any of the four snap-on | Fig. 5 | Fig. 6 |
| blade attachments. Use the following chart to find the |
| | |
| approximate lengths of cut. Different blade angles in | | |
| relation to the skin, thickness and texture of the hair will | | |
| vary the cutting length. | | |
PELIGRO: A fin de reducir el riesgo de sufrir una descarga eléctrica:
1.No recoja ningún aparato eléctrico que haya caído al agua. Desenchúfelo inmediatamente.
2.No utilice este aparato mientras esté dentro de una bañera o ducha.
3.No coloque ni guarde el aparato en un lugar del que pueda caerse o del que pueda ser tirado accidentalmente a una bañera o a un lavabo. No lo coloque ni lo deje caer en agua ni en cualquier otro líquido.
4.Siempre desenchufe este aparato de la corriente eléctrica inmediatamente después de usarlo.
5.Desconecte este aparato antes de limpiarlo, o quitar o instalar alguna de sus piezas.
6.No permita que se moje este aparato.
ADVERTENCIA: A fin de eliminar el riesgo de quemaduras, incendios, descargas eléctricas o lesiones a personas:
1. | Es necesario supervisar con atención cuando este aparato sea utilizado por, con o |
| cerca de niños o personas con ciertas discapacidades. |
2. | Utilice este aparato sólo con el fin para el que ha sido diseñado, tal y como se |
| describe en este manual. No utilice accesorios que no hayan sido recomendados |
| por el fabricante. |
3. | Nunca use este aparato con el cable o el enchufe dañado, si no funciona |
| correctamente, si se ha caído o ha sufrido daños, o si se ha dejado caer en agua. |
| Devuelva el aparato a un centro de servicio para que sea revisado y reparado. |
4. | No acerque el cable a superficies calientes. |
5. | Nunca deje caer ni introduzca ningún objeto en ninguna abertura. Sólo meta el |
| enchufe macho del transformador de recarga en el enchufe hembra de la maquinilla. |
6. | No utilice el aparato al aire libre ni lo ponga en funcionamiento si se están |
transformador está enchufado. La recortadora/recortadora de acabado se cargará | | |
| Fig. 1 |
completamente al cabo de 8 horas. | | |
Puede mantener la recortadora/recortadora de acabado en el cargador cuando no | | |
esté en uso. El cargador mantendrá la batería a plena carga y la luz roja permanecerá | | |
encendida. La unidad tiene una batería de hidruro metálico y níquel que no puede ser | | |
| |
dañada por sobrecarga. No obstante ello, recomendamos desenchufar el cargador si la | |
recortadora no se va a usar durante siete días o más. | |
OBSERVE: Las pilas de hidruro de níquel-metal tienen menor “efecto de memoria” | |
que las pilas de níquel-cadmio. El efecto de memoria resulta de usar la maquinilla | |
durante periodos cortos repetidos, seguidos de recargas. La pila nunca llega a | |
descargarse por completo y, por tanto, “olvida” cuánta energía puede | |
almacenar. Para obtener el rendimiento máximo de la pila de hidruro de | ACEITE |
níquel-metal siga los siguientes pasos: | |
ACEITE | ACEITE |
|
1)Lubrique las cuchillas. Encienda la maquinilla y deje que funcione hasta que la velocidad de las cuchillas disminuya significativamente.
No es necesario que las cuchillas se detengan por completo. | | | |
| Fig. 2 |
2) Apague la maquinilla. Déjela recargar toda la noche. | | | |
| Fig. 3 |
3) Repita lo anterior cada dos meses. | |
| | |
LA PILA DE LA MAQUINILLA NO SE CARGA
1)Asegúrese de que haya corriente en el tomacorriente (confírmelo con algún aparato que usted sepa que funciona).
2)Verifique que el cable del cargador esté bien conectado a la maquinilla
Gire un poco el conector del cargador para asegurarse de tener una buena conexión eléctrica. Si aún así no se carga la maquinilla, devuélvala a Andis o a un centro de servicio de reparación autorizado de Andis que aparezca en este manual. Ahí
será revisada y reparada o reemplazada.
de su maquinilla si dejan mechones o funcionan a baja velo- cidad. La maquinilla cortadora/recortadora debe mantenerse
en la posición que se muestra en la figura D para impedir que el aceite entre en el motor. Ponga unas cuantas gotas de aceite para maquinilla Andis en el frente y en los lados de las cuchillas
(figura E). Limpie el aceite sobrante de las cuchillas con un paño
seco suave. Los lubricantes en spray no contienen suficiente aceite para lubricar bien, pero son un excelente refrigerante para la maquinilla. Siempre cambie las cuchillas rotas o en mal estado para evitar que causen lesiones. Puede limpiar los restos de pelo de las cuchillas con un cepillo pequeño o con un cepillo de dientes viejo.
Para limpiar las cuchillas sugerimos que sumerja solamente las cuchillas en un recipiente poco profundo de aceite para maquinilla Andis, mientras la maquinilla está funcionando. La suciedad y los restos de pelo acumulados entre las cuchillas deben salir de esta forma. Apague la maquinilla después de limpiarla, seque las cuchillas con un paño seco y comience a cortar o arreglar el pelo de nuevo.
CAMBIO DE LAS CUCHILLAS
Para sacar las cuchillas, primero desconecte la maquinilla de la toma de corriente de la pared. Sos- tenga la maquinilla de forma que los dientes de las cuchillas apunten hacia arriba. Oprima el juego de cuchillas hacia delante (figura F). Para instalar el juego de cuchillas, alinee el gancho inferior del juego de cuchillas con la ranura de la maquinilla y y meta el juego de cuchillas a presión en su lugar (figura G).
| Colocación de los peines accesorios | |
| (Algunos modelos no incluyen peines de accesorio.) | |
| Los peines accesorios de la maquinilla se colocan con facilidad, con sólo | |
| meterlos a presión. También se sacan a presión (figura H). Estos peines le | |
| ayudan a guiar el pelo hacia las cuchillas y le permiten controlar la longitud | |
| de corte. Cada uno de estos peines produce un corte a cierta longitud, que | Fig. 4 |
| está indicada en los peines: 1,6 mm, 3,2 mm, 6,4 mm, 9,5 mm y 12,7 mm. Los |
| |
7. | Do not use this appliance with a damaged or broken blade or comb as injury to |
| the skin may occur. |
8. | Always attach plug to appliance first, then to outlet. To disconnect, turn all |
| controls to OFF then remove plug from the outlet. |
SAVE THESE INSTRUCTIONS
THIS PRODUCT INTENDED FOR PROFESSIONAL USE
OPERATING INSTRUCTIONS
Please read the following instructions before using your new Andis cordless clipper/trimmer. Give it the care that a fine precision built instrument deserves and it will give you years of service.
FOR USE IN NORTH AMERICA:
CHARGING UNIT - READ THE FOLLOWING BEFORE CHARGING THIS TRIMMER.
•The battery must be removed from the appliance before it is discarded
•The appliance must be disconnected from the supply mains when removing the battery
•The battery is to be disposed of safely
TO REMOVE BATTERY
1.Remove the mounting screws that are located on the back of the trimmer (Figure A).
2.Turn trimmer over and remove the front cover.
3.Clip the wires on the front and back of the battery (Figure B).
4.Please dispose of this battery in a responsible manner.
5.You can now dispose of the rest of the trimmer.
USER MAINTENANCE
Fig. A
Fig. B
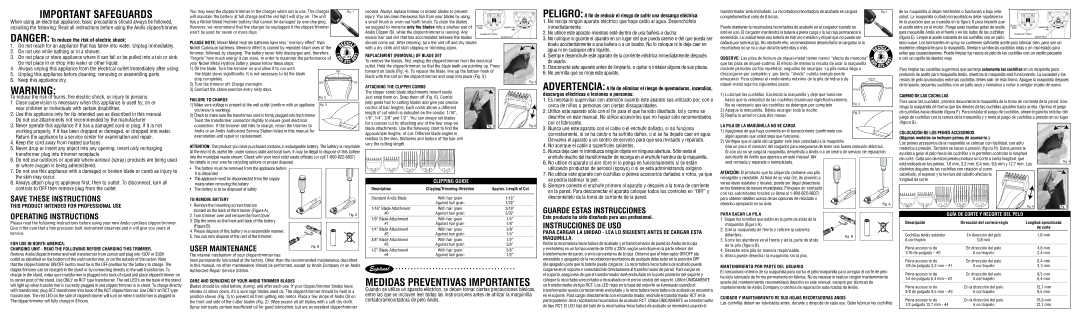
CLIPPING GUIDE
Description | Clipping/Trimming Direction | Approx. Length of Cut |
| | |
Standard Andis Blade | With hair grain | 1/16” |
| Against hair grain | 1/32” |
1/16” Blade Attachment | With hair grain | 3/16” |
#0 | Against hair grain | 3/32” |
1/8” Blade Attachment | With hair grain | 1/4” |
#1 | Against hair grain | 1/8” |
1/4” Blade Attachment | With hair grain | 3/8” |
#2 | Against hair grain | 1/4” |
3/8” Blade Attachment | With hair grain | 1/2” |
#3 | Against hair grain | 3/8” |
1/2” Blade Attachment | With hair grain | 5/8” |
| utilizando productos de aerosol (sprays) o si se está administrando oxígeno. |
7. | No utilice este aparato con cuchillas o peines accesorios dañados o rotos, ya que |
| se podría lastimar la piel. |
8. | Siempre conecte el enchufe primero al aparato y después a la toma de corriente |
| en la pared. Para desconectar el aparato coloque todos los controles en “OFF” y |
| desconéctelo de la toma de corriente de la pared. |
GUARDE ESTAS INSTRUCCIONES
Este producto ha sido diseñado para uso profesional.
INSTRUCCIONES DE USO
PARA CARGAR LA UNIDAD - LEA LO SIGUIENTE ANTES DE CARGAR ESTA MAQUINILLA.
Retire la recortadora/recortadora de acabado y el transformador de pared de Andis de la caja y enchúfelos en un tomacorriente de 120V o 230V, según se indique en la parte inferior del
ATENCIÓN: El producto que ha adquirido contiene una pila | |
recargable y reciclable. Al final de su vida útil, de acuerdo a | |
varias leyes estatales y locales, puede ser ilegal desecharla | |
en los tiraderos de basura municipales. Póngase en contacto | |
con las autoridades locales (o llame al 1-800-822-8837) | |
para obtener detalles acerca de las opciones de reciclado o | |
desecho apropiado en su área. | Fig. A |
Para sacar la pila
1.Saque los tornillos que están en la parte de atrás de la maquinilla (figura A).
2.Gire la maquinilla de frente y retírele la cubierta
| delantera. | Fig. B |
| 3. Corte los alambres en el frente y en la parte de atrás |
| |
| de la pila (figura B). | |
| 4. Deseche esta pila de manera responsable. | |
distintos ángulos de las cuchillas con relación al cuero cabelludo, el espesor y la textura del cabello afectan la longitud de corte.
| | Fig. 6 | Fig. 5 |
| GUÍA DE CORTE Y RECORTE DEL PELO | | |
Descripción | Dirección del corte/arreglo | Longitud aproximada |
| | | de corte |
Cuchillas Andis estándar | En dirección del pelo | | 1,6 mm |
A contrapelo | 0,8 mm | | |
Peine accesorio de | En dirección del pelo | | 4,8 mm |
1/16 de pulgada – #0 | A contrapelo | | 2,4 mm |
Remove Andis clipper/trimmer and wall transformer from carton and plug into 120V or 230V outlet as identified on the bottom of the wall transformer, or on the outside of the carton. Note that the clipper/trimmer ON/OFF switch must be in the OFF position for the battery to charge. The clipper/trimmer can be charged in the stand or by connecting directly to the wall transformer. To charge in the stand, make sure transformer is plugged into back of stand and place clipper/trimmer on to center post of the stand. Use ONLY an RCT type transformer. The red LED’s on the base of the stand will light up when transformer is correctly plugged in and clipper/trimmer is in stand. To charge directly with transformer, plug RCT transformer into back of the RCT clipper/trimmer. Use ONLY an RCT type transformer. The red LED on the side of clipper/trimmer will turn on when transformer is plugged in. The clipper/trimmer will fully charge in 8 hours.
The internal mechanism of your clipper/trimmer has
been permanently lubricated at the factory. Other than the recommended maintenance described in this manual, no other maintenance should be performed, except by Andis Company or an Andis Authorized Repair Service Station.
CARE AND SERVICING OF YOUR ANDIS TRIMMER BLADES
Blades should be oiled before, during, and after each use. If your clipper/trimmer blades leave streaks or slows down, it’s a sure sign blades need oil. The clipper/trimmer should be held in a position shown (Fig. 3) to prevent oil from getting into motor. Place a few drops of Andis Oil on the front and side of the cutter blades (Fig. 2). Wipe excess oil off blades with a soft dry cloth.
Spray lubricants contain insufficient oil for good lubrication, but are an excellent clipper/trimmer
Espãnol
MEDIDAS PREVENTIVAS IMPORTANTES
Cuando se utiliza un aparato eléctrico, se deben tomar ciertas precauciones básicas, entre las que se incluyen leer todas las instrucciones antes de utilizar la maquinilla cortadora/recortadora de pelo Andis.
transformador de pared, o en la cara externa de la caja. Observe que el interruptor ON/OFF (de encendido y apagado) de la recortadora/recortadora de acabado debe estar en la posición OFF (de apagado) para que la batería pueda cargarse. La recortadora/recortadora de acabado puede cargarse en el soporte o conectándola directamente al transformador de pared. Para cargar en el soporte, asegúrese de que el transformador esté enchufado en la parte posterior del soporte y coloque la recortadora/recortadora de acabado en el perno central del soporte. Utilice ÚNICAMENTE un transformador de tipo RCT. Los LED rojos en la base del soporte se iluminarán cuando el transformador queda correctamente enchufado y la recortadora/recortadora de acabado se encuentra en el soporte. Para cargar directamente con el transformador, enchufe el transformador RCT en la parte posterior de la recortadora/recortadora de acabado RCT. Utilice ÚNICAMENTE un transformador de tipo RCT. El LED tojo del lado de la recortadora/recortadora de acabado se encenderá cuando el
5. Ahora puede desechar la maquinilla sin la pila. |
MANTENIMIENTO POR PARTE DEL USUARIO
El mecanismo interno de su maquinilla para cortar el pelo/maquinilla para arreglar el corte de pelo ha sido lubricado de forma permanente en fábrica. No es necesario realizar ningún mantenimiento aparte del mantenimiento recomendado descrito en este manual, excepto por técnicos de mantenimiento de Andis Company o centros de reparación autorizados de Andis.
CUIDADO Y MANTENIMIENTO DE SUS HOJAS RECORTADORAS ANDIS
Las cuchillas deben ser lubricadas antes, durante y después de cada uso. Debe lubricar las cuchillas
Peine accesorio de | En dirección del pelo | 6,4 mm |
1/8 de pulgada 3,2 mm – #1 | A contrapelo | 3,2 mm |
| | |
Peine accesorio de | En dirección del pelo | 9,5 mm |
1/4 de pulgada 6,4 mm – #2 | A contrapelo | 6,4 mm |
| | |
Peine accesorio de | En la dirección del pelo | 12,7 mm |
3/8 de pulgada 9,5 mm – #3 | A contrapelo | 9,5 mm |
| | |
Peine accesorio de | En la dirección del pelo | 15,9 mm |
1/2 pulgada 12,7 mm - #4 | A contrapelo | 12,7 mm |