Removing the Installed Heatsink Duct
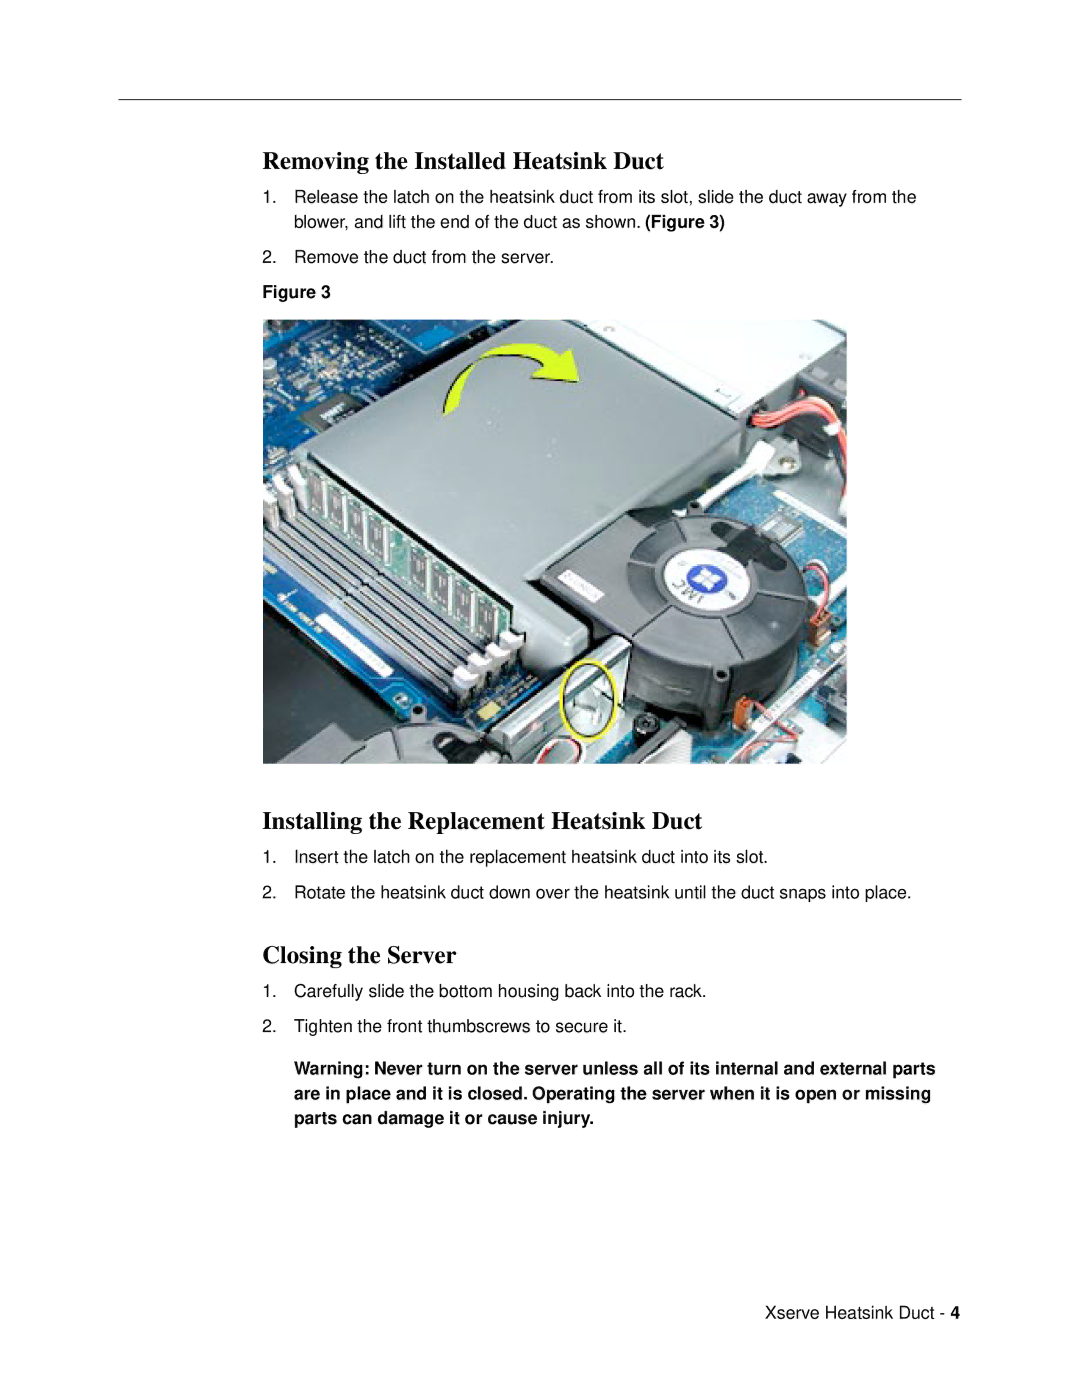
1.Release the latch on the heatsink duct from its slot, slide the duct away from the blower, and lift the end of the duct as shown. (Figure 3)
2.Remove the duct from the server.
Figure 3
Installing the Replacement Heatsink Duct
1.Insert the latch on the replacement heatsink duct into its slot.
2.Rotate the heatsink duct down over the heatsink until the duct snaps into place.
Closing the Server
1.Carefully slide the bottom housing back into the rack.
2.Tighten the front thumbscrews to secure it.
Warning: Never turn on the server unless all of its internal and external parts are in place and it is closed. Operating the server when it is open or missing parts can damage it or cause injury.
Xserve Heatsink Duct - 4