
CD36 specifications
The Arcam CD36 is a high-performance CD player that stands out in the world of digital audio reproduction. Designed with an emphasis on sonic fidelity, it embodies Arcam's commitment to delivering an exceptional listening experience. This player showcases cutting-edge features and technologies, making it a remarkable addition to any audio enthusiast's collection.At the heart of the CD36 is a high-precision CD transport mechanism that minimizes vibration and ensures accurate playback of CDs. The player is equipped with an advanced digital-to-analog converter (DAC) that converts the digital audio signals into analog waveforms with exceptional clarity and detail. Arcam has selected high-quality components for the CD36, ensuring high performance across the entire audio spectrum.
One of the standout features of the Arcam CD36 is its ability to upsample audio signals. This function allows the device to enhance playback quality by converting standard CD audio resolution into a higher sampling rate, resulting in a more detailed and refined sound. Users can enjoy richer soundscapes with improved spatial imaging and depth, which are vital attributes for critical listening.
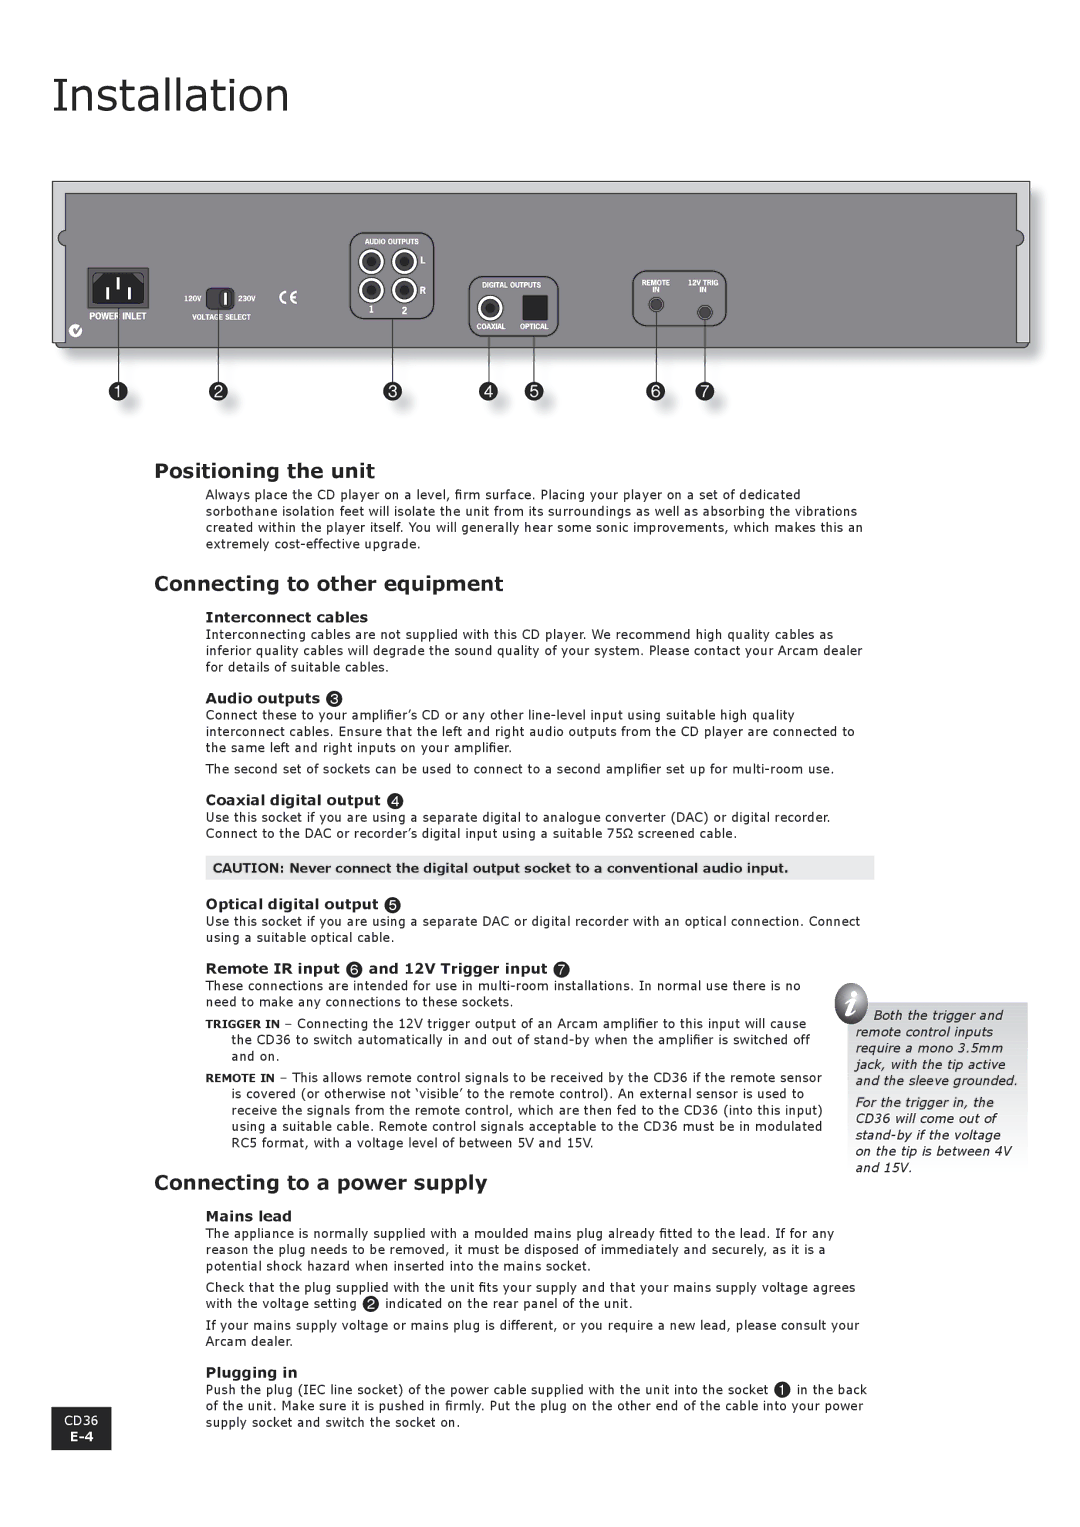
The CD36 is also equipped with multiple digital outputs, including coaxial and optical connections, making it versatile in terms of integration with other devices in a modern audio system. This allows users to connect the CD player to a variety of external digital-to-analog converters, enabling further customization of their audio experience.
Additionally, the Arcam CD36 features a user-friendly interface with a bright display that provides clear information about the currently playing track and status. The remote control allows for convenient operation from a distance, making it easy to navigate through albums and playlists.
Connectivity extends to the inclusion of both balanced and unbalanced outputs, allowing audiophiles to connect the player to a wide range of amplifiers and audio systems. With a solid build quality, the CD36 is designed not only for durability but also for minimal interference, ensuring pure audio playback.
In summary, the Arcam CD36 is a sophisticated CD player that combines advanced technologies with meticulous engineering. Its precision playback capability, upsampling feature, versatile connectivity options, and user-centered design make it a standout choice for those who value high-quality audio. Whether you’re a casual listener or a serious audiophile, the CD36 promises to enhance your listening experience significantly.