AV 500 series specifications
The Archos AV 500 series, launched in the mid-2000s, marked a significant step in portable multimedia players, setting the stage for how we consume media on the go. This innovative series stood out for its combination of storage capacity, multimedia capabilities, and user-friendly interface, making it a favorite among tech enthusiasts and casual users alike.One of the hallmark features of the Archos AV 500 series was its sizeable hard drive, available in various capacities ranging from 20GB to 100GB. This ample storage allowed users to carry thousands of songs, hundreds of videos, and a variety of pictures. The player supported multiple formats, including MP3 and WMA for audio, as well as AVI and MPEG for video playback. The versatility in supported formats contributed significantly to its user appeal, enabling seamless playback of various media types.
The Archos AV 500 series was equipped with a 4-inch color LCD screen, delivering a sharp and vibrant viewing experience for videos and images. The device also supported a resolution of 480 x 272 pixels, ensuring that video playback was both smooth and visually pleasing. This emphasis on screen quality made it a popular choice for users looking to enjoy their media content on the move.
In terms of connectivity, the AV 500 series featured USB 2.0 for rapid file transfers, allowing users to quickly upload and download their favorite media. It also included an SD card slot, enabling users to expand storage capacity easily, a great advantage for those who needed more space for their content.
The Archos AV 500 series boasted an intuitive interface, featuring an easy-to-navigate menu that catered to users of all ages. The touchscreen operation facilitated quick access to media libraries, settings, and playback options, ensuring that the user experience was both efficient and enjoyable.
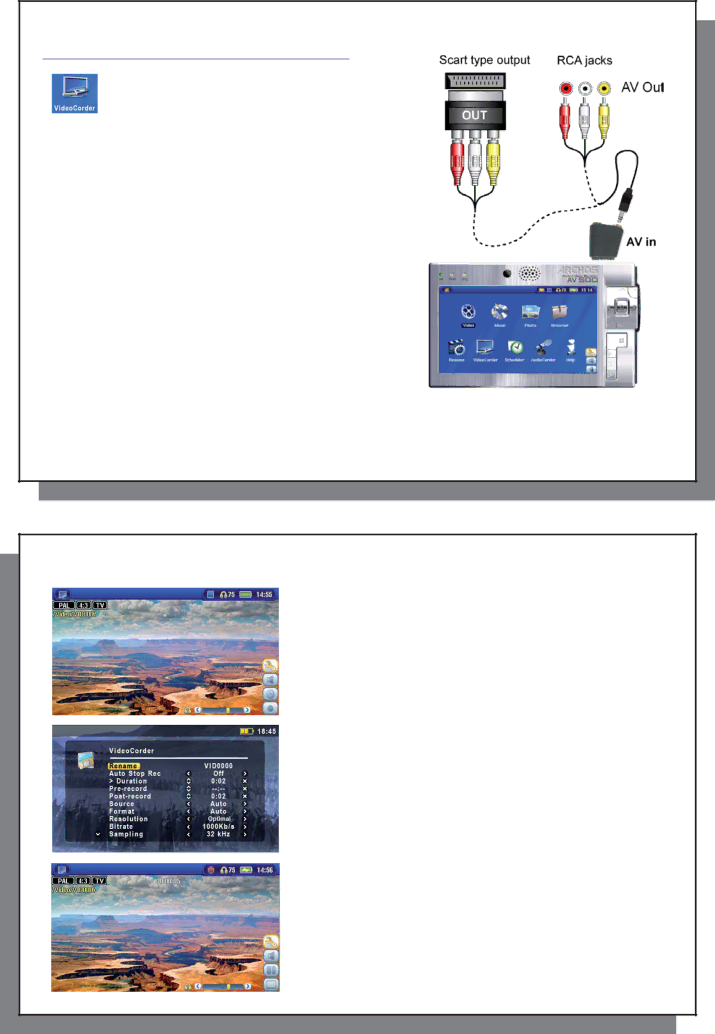
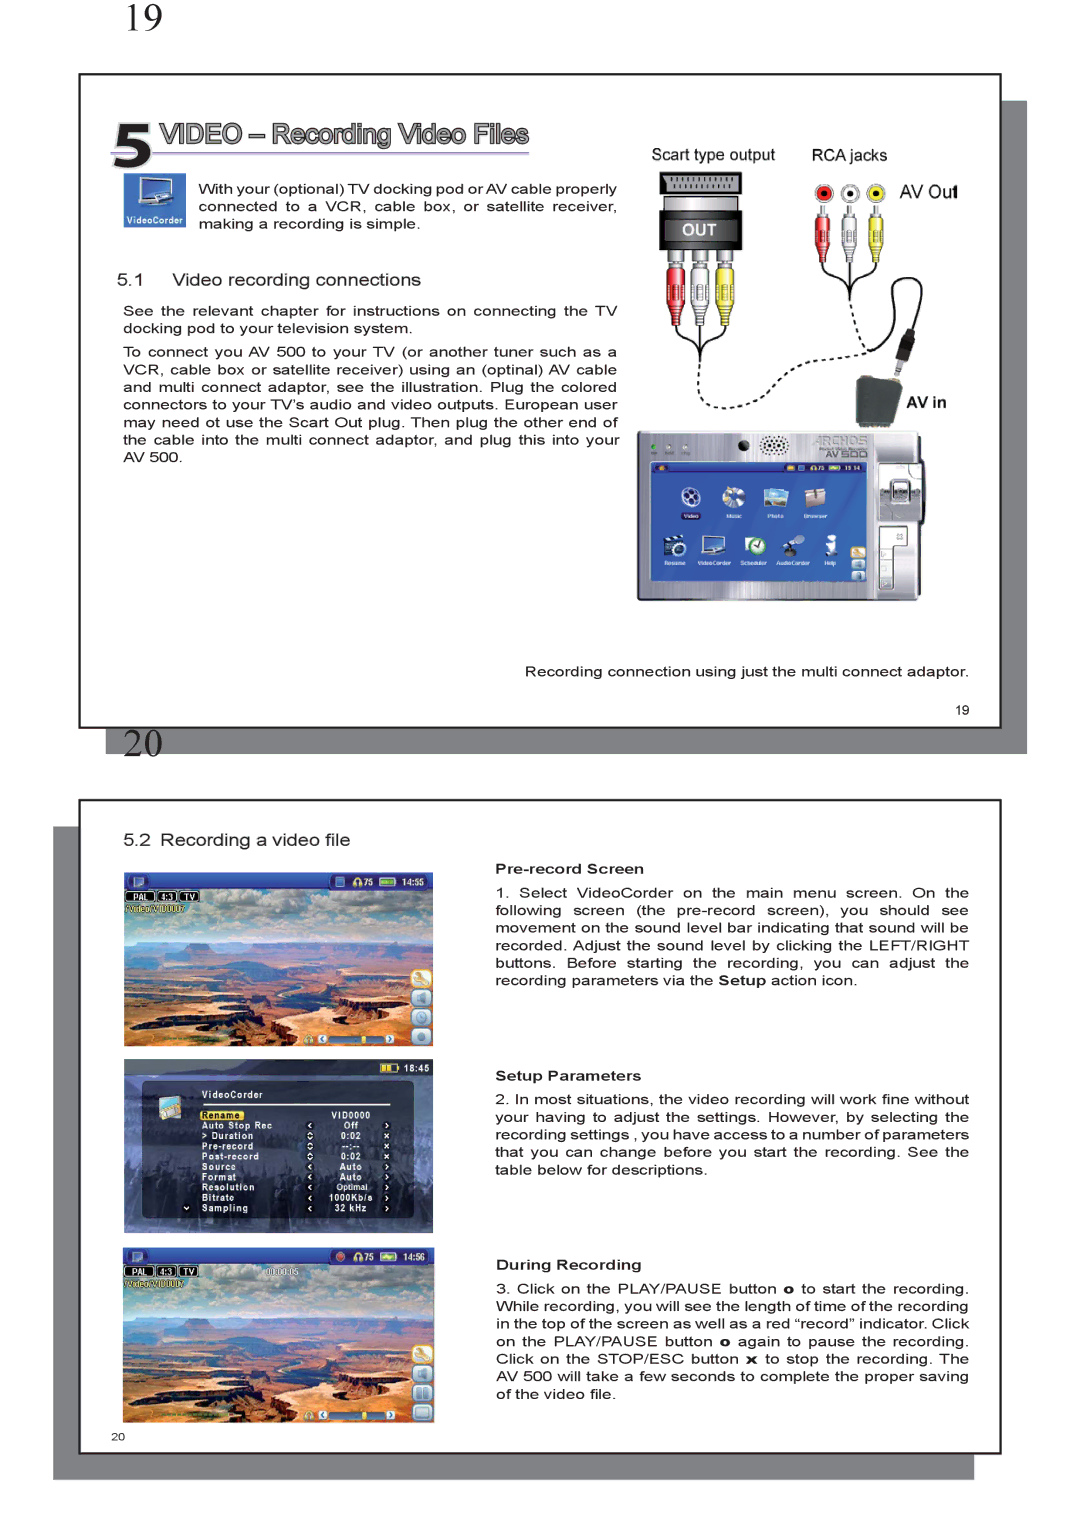
Moreover, the series included features such as video recording capabilities, allowing users to capture live events or personal moments directly onto the device. This recording function combined with the playback features created an all-in-one multimedia hub.
In conclusion, the Archos AV 500 series was a groundbreaking device in the portable media player market, offering an impressive combination of storage, versatility, and user-friendly technology. Its innovations paved the way for future developments in multimedia devices, leaving a lasting impact on how we engage with digital content.

