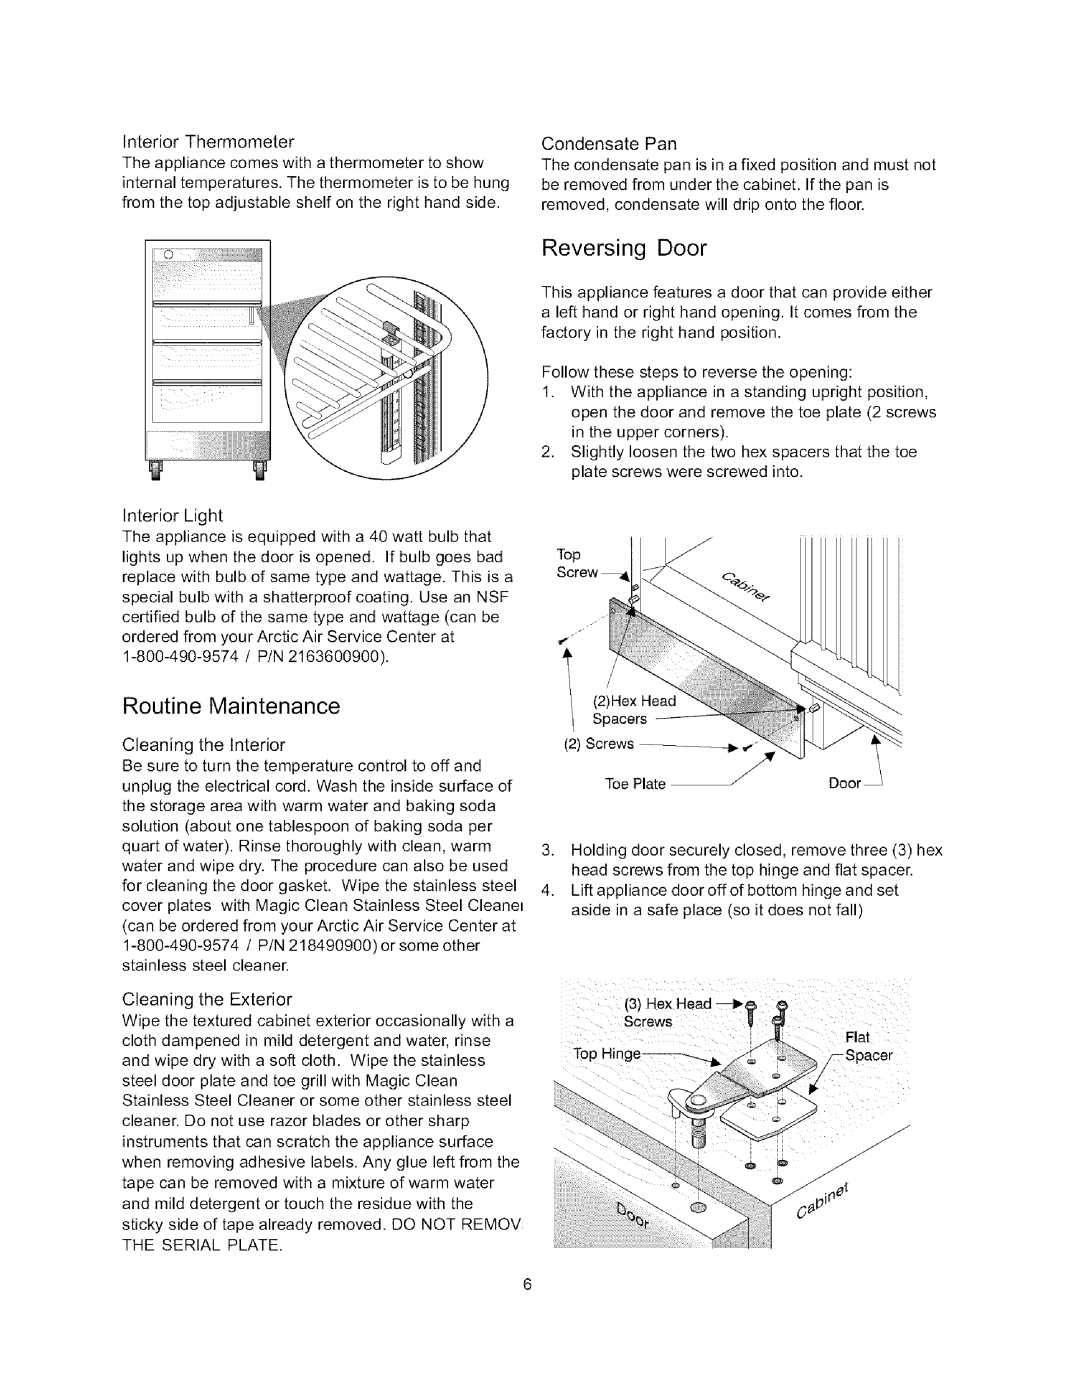
Refrigerator specifications
The Arctic Air Refrigerator is a popular choice in both commercial and residential settings, known for its reliability, efficient cooling technology, and user-friendly features. Designed to cater to the needs of various industries such as food service, supermarkets, and home use, Arctic Air refrigerators showcase a robust blend of performance and functionality.One of the main features of Arctic Air refrigerators is their advanced cooling system, which utilizes a high-efficiency refrigeration system. This system not only ensures optimal temperature control but also promotes energy efficiency, helping users save on electricity costs. The refrigerators are capable of maintaining temperatures consistently between 32°F and 41°F, making them ideal for preserving perishable goods.
In addition to the efficient cooling mechanism, Arctic Air refrigerators also boast durable construction. They are typically constructed with high-quality stainless steel, ensuring longevity and resistance to rust and corrosion. This makes them suitable for environments where durability is crucial, such as commercial kitchens and laboratories.
Another standout characteristic is the user-friendly design. Many models come equipped with adjustable shelves, allowing for easy customization of space to accommodate various items. The shelves are often made from sturdy materials that can support heavy loads, further enhancing the refrigerator's versatility.
Arctic Air refrigerators also feature advanced temperature control systems, including digital control panels that allow users to monitor and adjust the settings with precision. This technology provides visual feedback, ensuring that the optimal temperature is maintained without constant manual adjustments.
Additionally, the refrigerators are designed with energy efficiency in mind, often surpassing strict energy regulations. Many models incorporate environmentally friendly refrigerants that contribute to lower emissions, making Arctic Air a sustainable choice for the eco-conscious consumer.
The ease of maintenance is another significant advantage. With removable gaskets and easy-to-clean surfaces, routine upkeep is straightforward, ensuring that the units remain hygienic and efficient over long periods of use.
Finally, Arctic Air refrigerators often come with advanced ventilation systems to promote air circulation, preventing hot spots and ensuring uniform cooling throughout the unit. This characteristic not only enhances food safety but also extends the shelf life of perishable products.
In summary, Arctic Air refrigerators stand out for their efficiency, durability, and user-friendly features, making them an excellent choice for anyone seeking a reliable refrigeration solution.