Note: Support the mower deck on blocks or jack stands before disconnecting links from mower lift arms to prevent the deck from falling.
2.Remove hardware retaining foot plate and remove.
3.Raise the deck to the transport position and disconnect the lift assist springs (6) from the mower lift arms (1) on each side of the deck.
4.Slowly lower the deck to its lowest position.
5.Remove hardware retaining all four mower lift links
(2) from mower lift arms.
6.Remove the rear mower mounting pins (4) connecting the mower mounting arms (3) to the deck.
7.Slide mower deck out from under unit.
6
2 1
5
4
3
1.Mower Lift Arm
2.Mower Lift Link
3.Mower Mounting Arm
4.Mower Mounting Pin
5.Mounting Hardware
6.Lift Assist Spring
Figure 2
8.Remove front right and left lift arms.
9.From below front foot plate loosely install cradle plate (item 1) using two 1/2 bolts (item 2) and two flange nuts (item 4).
10.Using cradle plate as a template, mark off an area at least 3/4" from the edge of the cradle plate in all areas to be welded (see Weld Guide on page 4).
11.Remove the cradle plate and hardware.
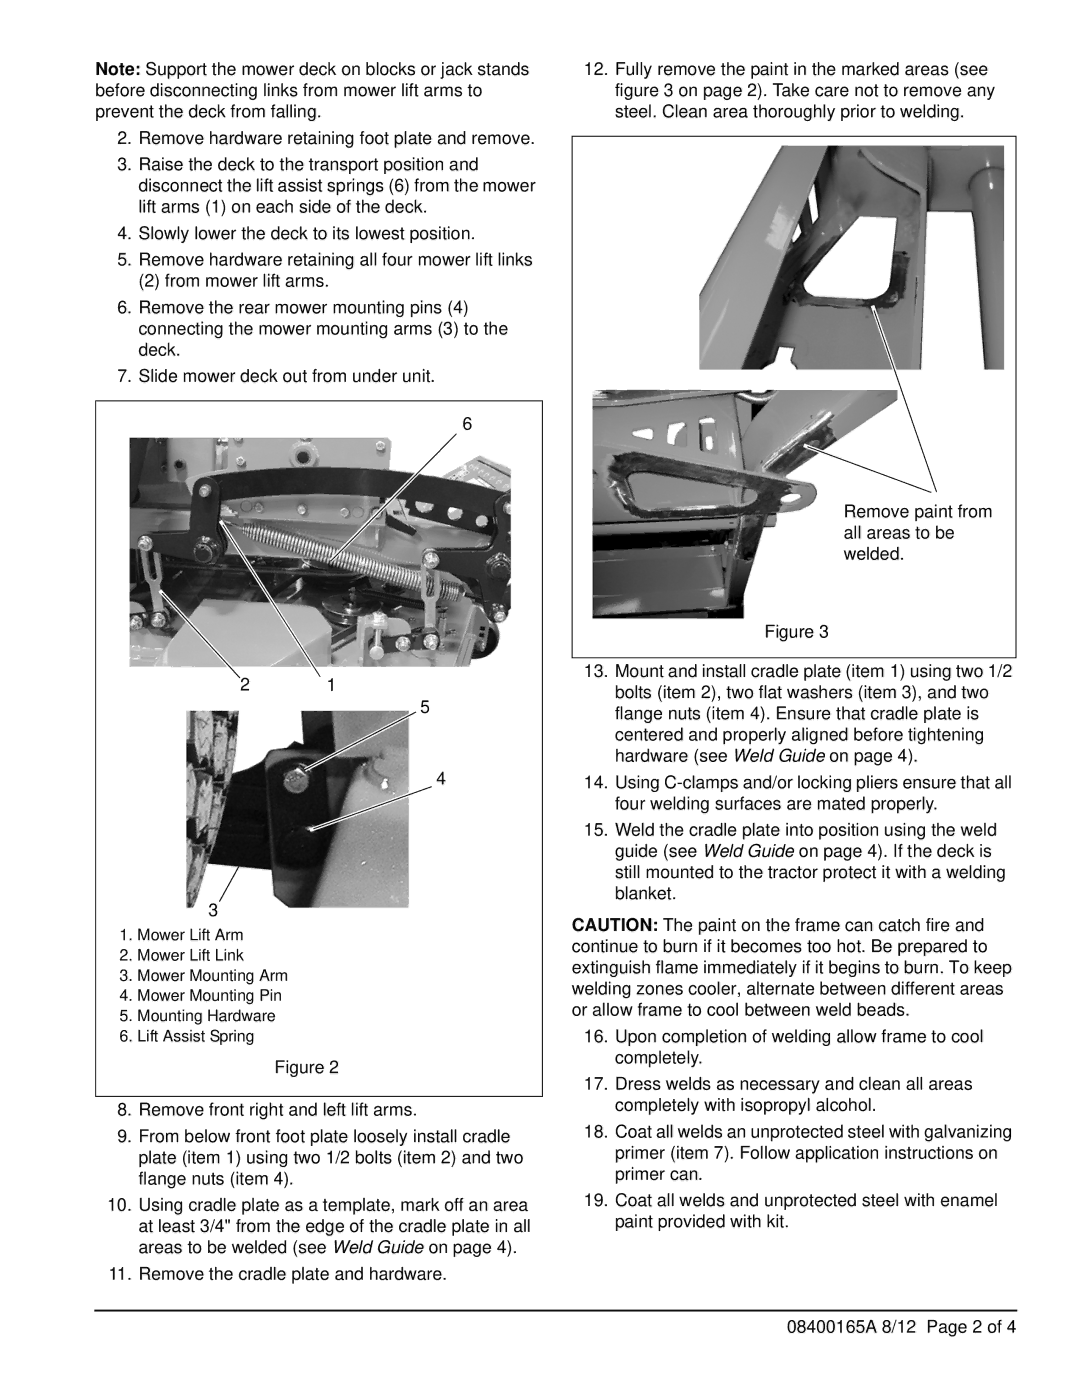
12.Fully remove the paint in the marked areas (see figure 3 on page 2). Take care not to remove any steel. Clean area thoroughly prior to welding.
Remove paint from all areas to be welded.
Figure 3
13.Mount and install cradle plate (item 1) using two 1/2 bolts (item 2), two flat washers (item 3), and two flange nuts (item 4). Ensure that cradle plate is centered and properly aligned before tightening hardware (see Weld Guide on page 4).
14.Using
15.Weld the cradle plate into position using the weld guide (see Weld Guide on page 4). If the deck is still mounted to the tractor protect it with a welding blanket.
CAUTION: The paint on the frame can catch fire and continue to burn if it becomes too hot. Be prepared to extinguish flame immediately if it begins to burn. To keep welding zones cooler, alternate between different areas or allow frame to cool between weld beads.
16.Upon completion of welding allow frame to cool completely.
17.Dress welds as necessary and clean all areas completely with isopropyl alcohol.
18.Coat all welds an unprotected steel with galvanizing primer (item 7). Follow application instructions on primer can.
19.Coat all welds and unprotected steel with enamel paint provided with kit.
08400165A 8/12 Page 2 of 4