Changing the Bearings and Seal
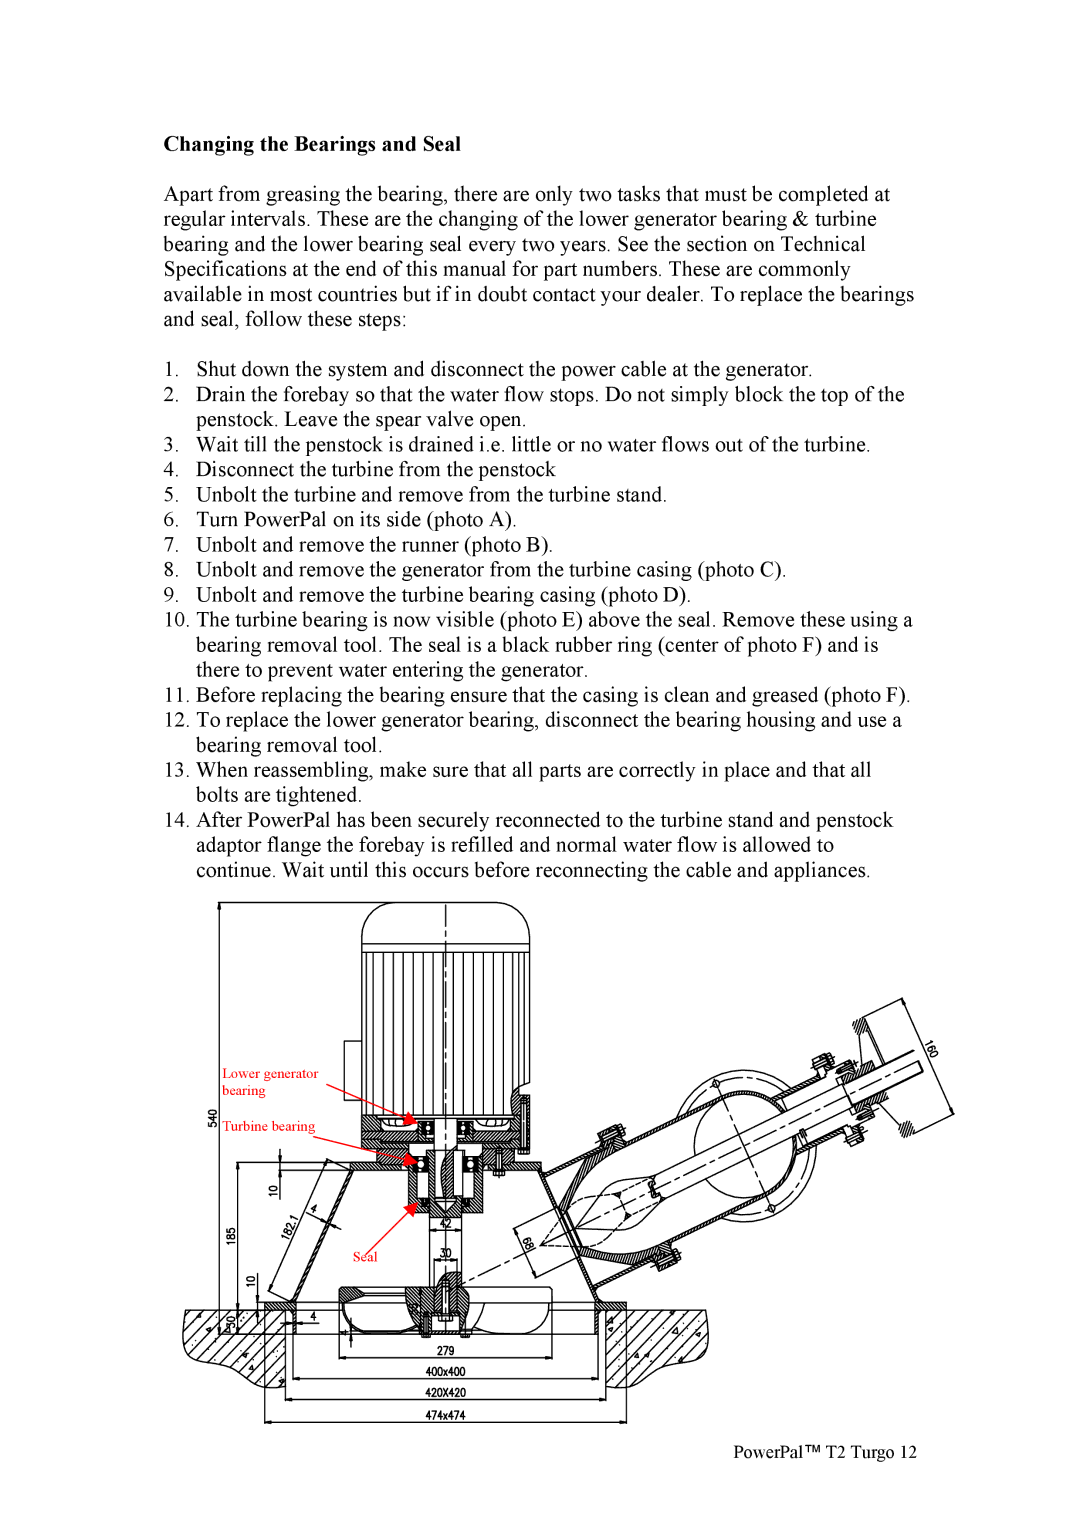
Apart from greasing the bearing, there are only two tasks that must be completed at regular intervals. These are the changing of the lower generator bearing & turbine bearing and the lower bearing seal every two years. See the section on Technical Specifications at the end of this manual for part numbers. These are commonly available in most countries but if in doubt contact your dealer. To replace the bearings and seal, follow these steps:
1.Shut down the system and disconnect the power cable at the generator.
2.Drain the forebay so that the water flow stops. Do not simply block the top of the penstock. Leave the spear valve open.
3.Wait till the penstock is drained i.e. little or no water flows out of the turbine.
4.Disconnect the turbine from the penstock
5.Unbolt the turbine and remove from the turbine stand.
6.Turn PowerPal on its side (photo A).
7.Unbolt and remove the runner (photo B).
8.Unbolt and remove the generator from the turbine casing (photo C).
9.Unbolt and remove the turbine bearing casing (photo D).
10.The turbine bearing is now visible (photo E) above the seal. Remove these using a bearing removal tool. The seal is a black rubber ring (center of photo F) and is there to prevent water entering the generator.
11.Before replacing the bearing ensure that the casing is clean and greased (photo F).
12.To replace the lower generator bearing, disconnect the bearing housing and use a bearing removal tool.
13.When reassembling, make sure that all parts are correctly in place and that all bolts are tightened.
14.After PowerPal has been securely reconnected to the turbine stand and penstock adaptor flange the forebay is refilled and normal water flow is allowed to continue. Wait until this occurs before reconnecting the cable and appliances.
Lower generator bearing
Turbine bearing
Seal
