
6080A specifications
The Associated Equipment 6080A is a versatile piece of machinery known for its robust design and remarkable functionality in various industrial applications. This model is integral in enhancing productivity and efficiency across multiple working environments, particularly in construction, landscaping, and manufacturing sectors.One of the standout features of the 6080A is its powerful engine, which provides impressive torque and horsepower. This engine is engineered for optimal performance, capable of handling heavy loads and challenging tasks with ease. The durability of the engine is complemented by a high-quality transmission system, ensuring smooth operation and reliable gear shifts, which contribute to the machine's overall efficiency.
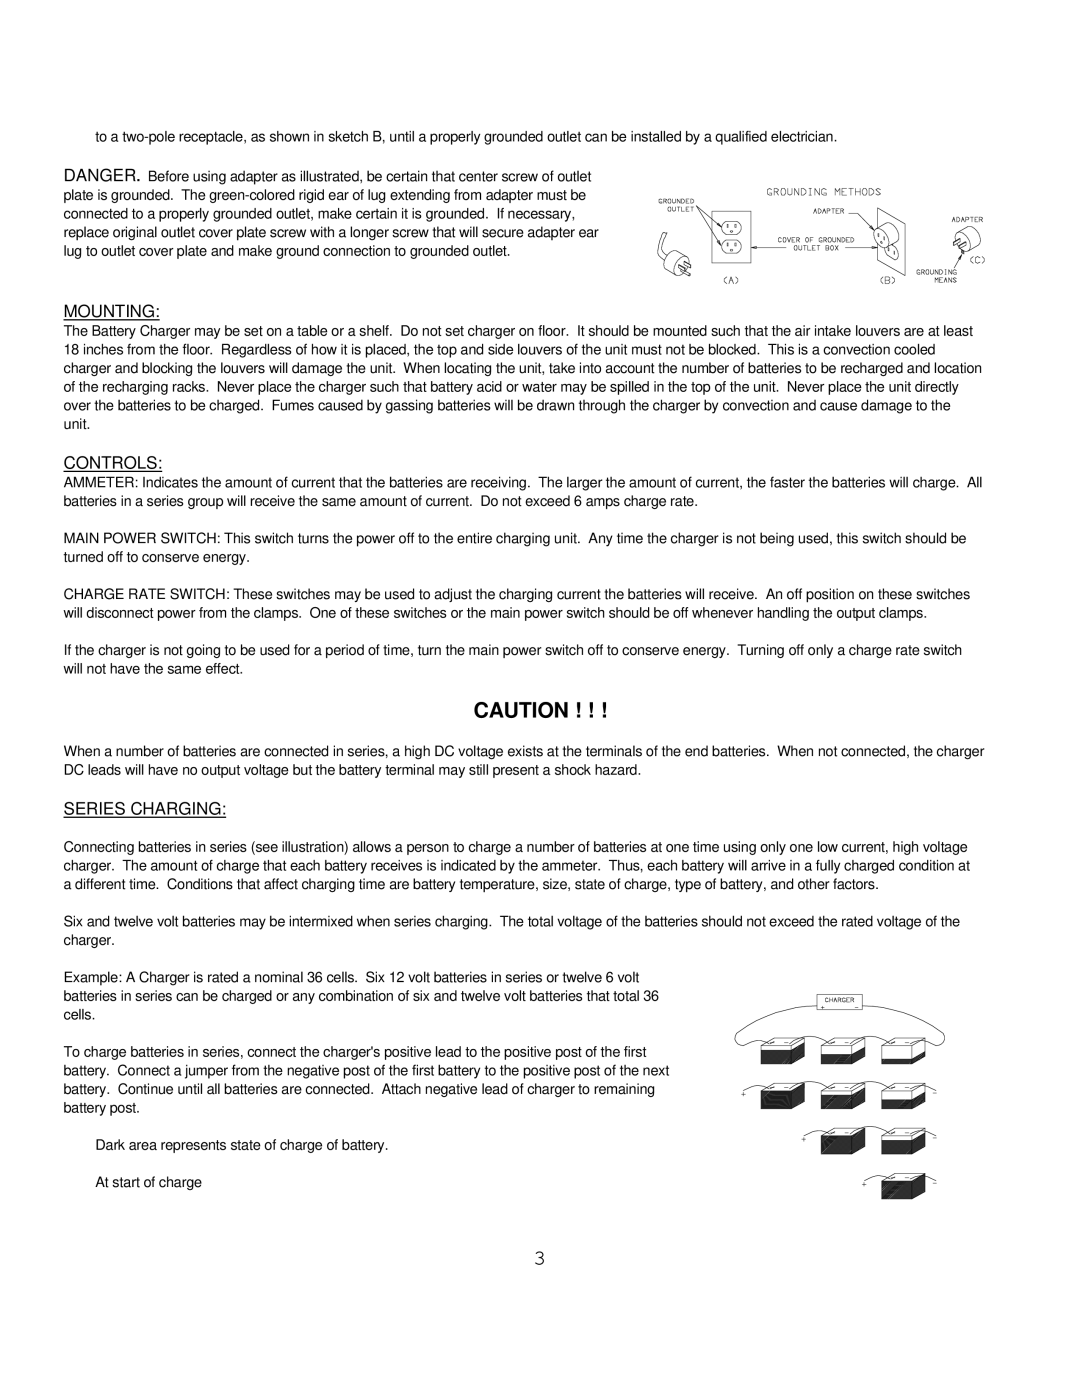
The 6080A is designed with user comfort and safety in mind. It incorporates an ergonomic cabin that is spacious and equipped with advanced control systems, allowing operators to navigate and control the equipment with minimal strain. Furthermore, the cabin features enhanced visibility, ensuring that the operator has a clear line of sight to the work area, which is crucial for safe operation.
In terms of technological advancements, the Associated Equipment 6080A integrates state-of-the-art hydraulic systems that enhance its lifting capabilities and maneuverability. This hydraulic system facilitates quick and responsive actions, making it an invaluable tool for tasks requiring precision and speed. Additionally, the machine is equipped with various attachments that can be easily interchanged, increasing its versatility for diverse applications such as digging, lifting, and material handling.
Another important characteristic of the 6080A is its fuel efficiency, which helps reduce operational costs while minimizing environmental impact. Its design incorporates systems that maximize fuel usage, making it a more sustainable choice for businesses looking to lower their carbon footprint.
Maintenance is also a key consideration in the design of the 6080A. It features accessible service points, making routine inspections and upkeep straightforward. This accessibility not only prolongs the lifespan of the machine but also ensures that it operates at peak performance consistently.
Overall, the Associated Equipment 6080A stands out due to its combination of power, versatility, and user-friendly features. Its advanced technologies, robust build quality, and design innovations make it a reliable choice for professionals across various industries, providing excellent value and performance in demanding environments.