20.GROUNDING AND AC POWER CORD CONNECTION INSTRUCTIONS
The charger should be grounded to reduce the risk of electric shock. This charger is equipped with an electric cord having an equipment grounding conductor and a grounding plug. The plug must be plugged into an outlet that is properly installed and grounded in accordance with all local codes and ordinances.
DANGER. Never alter the AC cord or plug provided - if it will not fit the outlet, have a proper outlet installed by a qualified electrician. Improper connection can result in a risk of an electric shock. This battery charger is for use on a nominal
DANGER. Before using an adapter as illustrated, be certain that the center screw of the outlet plate is grounded. The
NOTE: USE OF AN ADAPTER IS NOT ALLOWED IN CANADA. IF A GROUNDING TYPE RECEPTACLE IS NOT AVAILABLE, DO NOT USE THIS APPLIANCE UNTIL THE PROPER OUTLET IS INSTALLED BY A QUALIFIED ELECTRICIAN.
21.LENGTH OF CHARGE
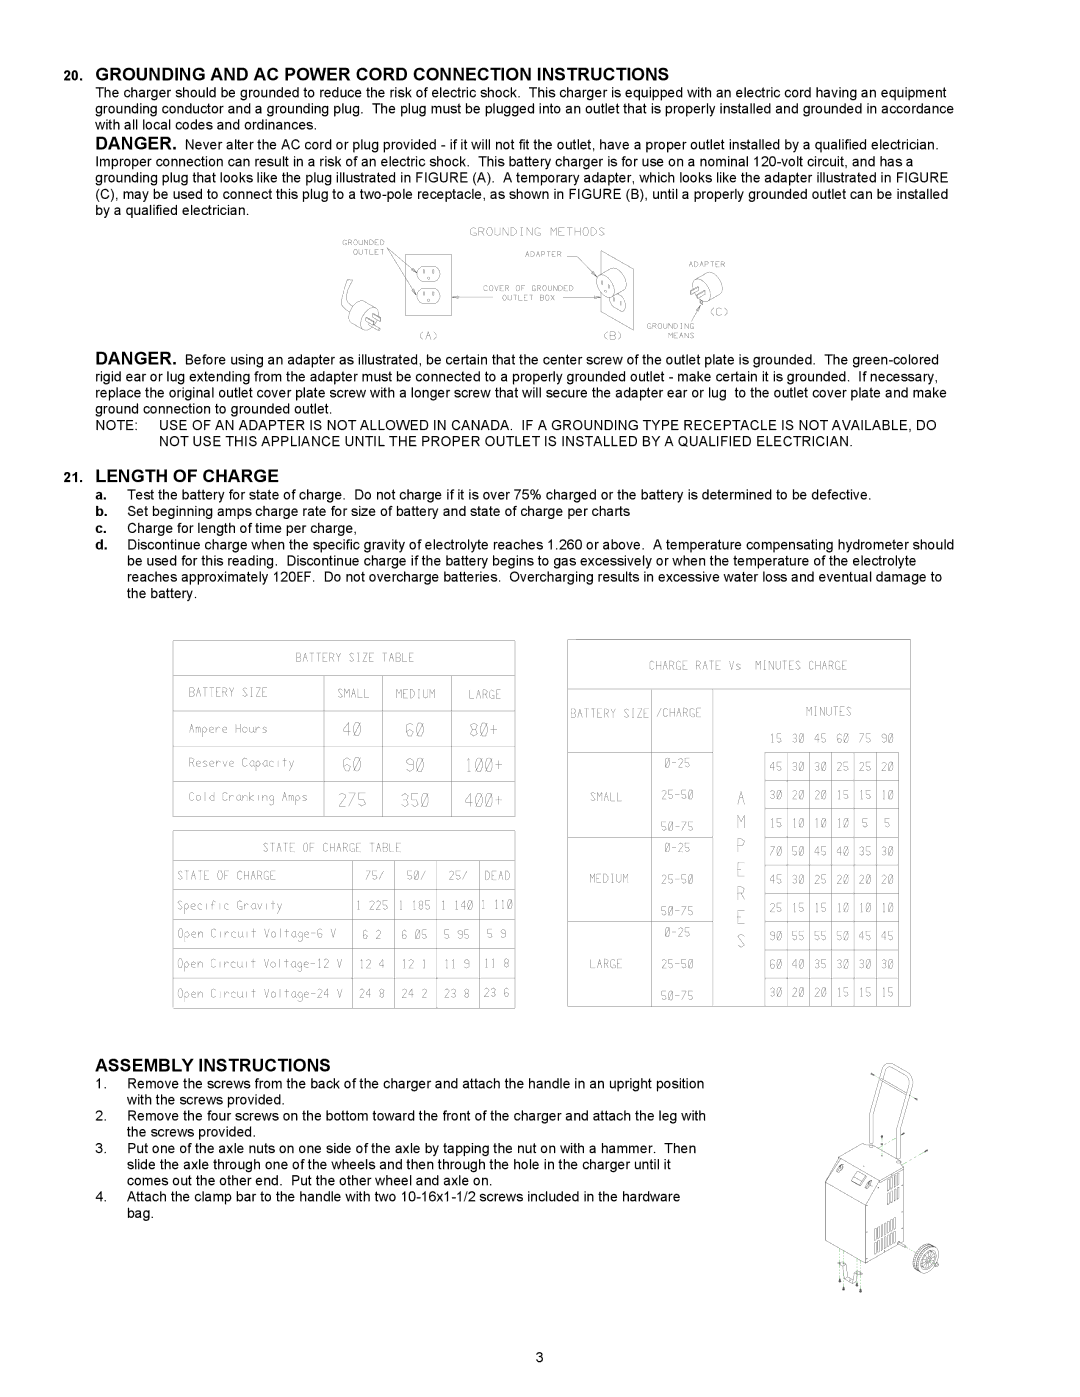
a.Test the battery for state of charge. Do not charge if it is over 75% charged or the battery is determined to be defective.
b.Set beginning amps charge rate for size of battery and state of charge per charts
c.Charge for length of time per charge,
d.Discontinue charge when the specific gravity of electrolyte reaches 1.260 or above. A temperature compensating hydrometer should be used for this reading. Discontinue charge if the battery begins to gas excessively or when the temperature of the electrolyte reaches approximately 120EF. Do not overcharge batteries. Overcharging results in excessive water loss and eventual damage to the battery.
ASSEMBLY INSTRUCTIONS
1.Remove the screws from the back of the charger and attach the handle in an upright position
with the screws provided.
2.Remove the four screws on the bottom toward the front of the charger and attach the leg with the screws provided.
3.Put one of the axle nuts on one side of the axle by tapping the nut on with a hammer. Then slide the axle through one of the wheels and then through the hole in the charger until it comes out the other end. Put the other wheel and axle on.
4.Attach the clamp bar to the handle with two
bag.
3
