20.GROUNDING AND AC POWER CORD CONNECTION INSTRUCTIONS
The charger should be grounded to reduce the risk of electric shock. This charger is equipped with an electric cord having an equipment grounding conductor and a grounding plug. The plug must be plugged into an outlet that is properly installed and grounded in accordance with all local codes and ordinances.
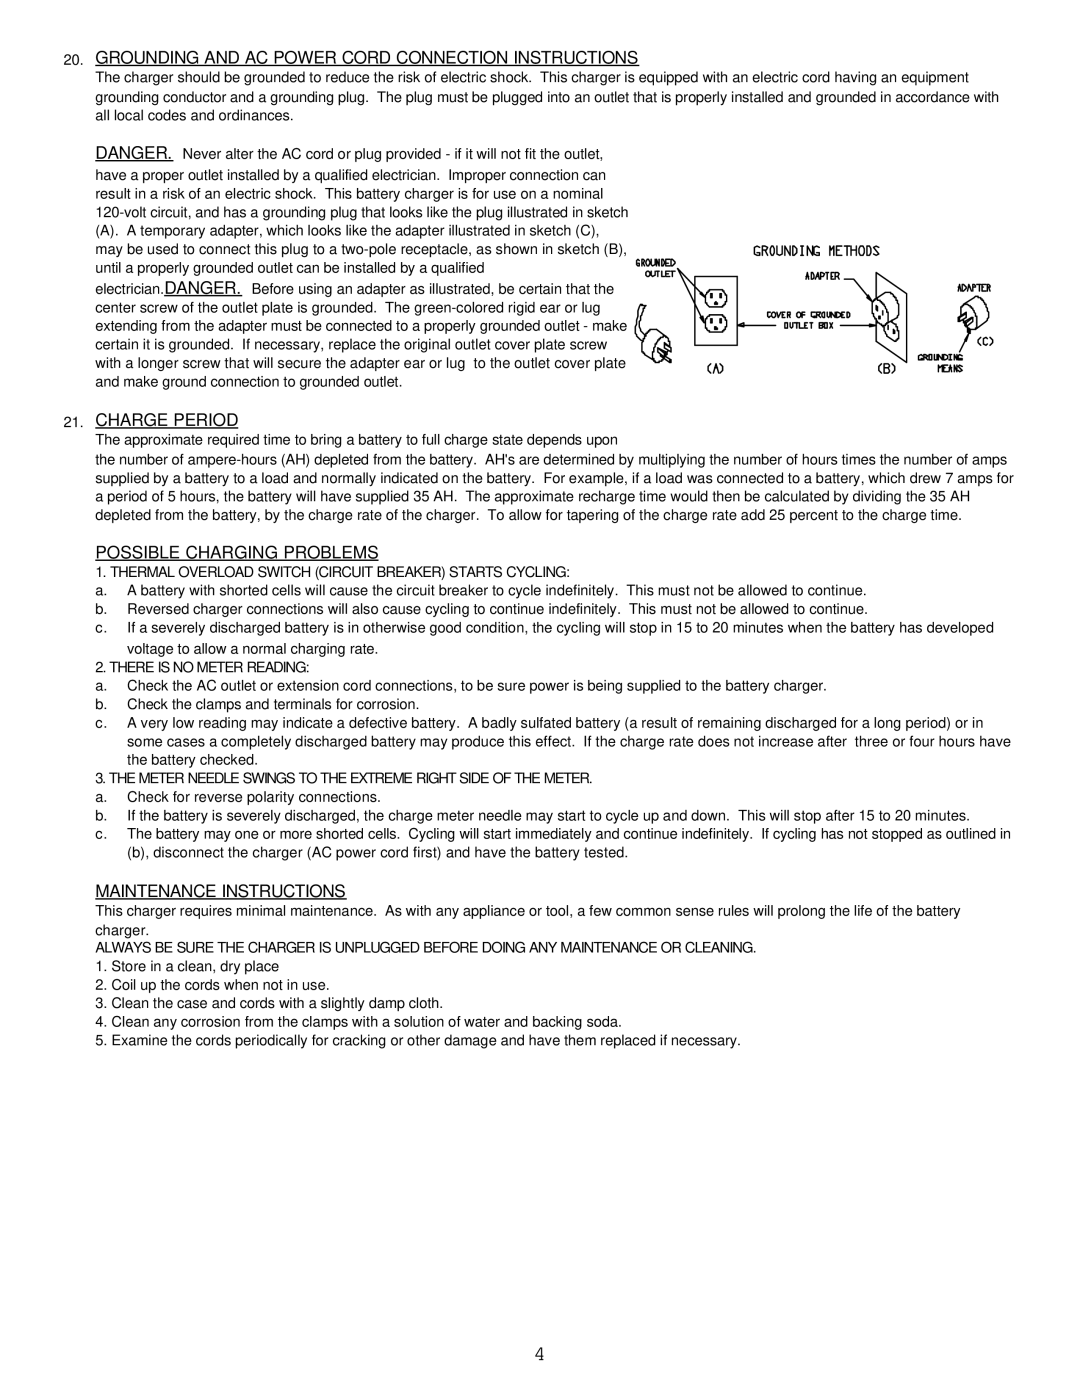
DANGER. Never alter the AC cord or plug provided - if it will not fit the outlet, have a proper outlet installed by a qualified electrician. Improper connection can result in a risk of an electric shock. This battery charger is for use on a nominal
(A). A temporary adapter, which looks like the adapter illustrated in sketch (C), may be used to connect this plug to a
until a properly grounded outlet can be installed by a qualified electrician.DANGER. Before using an adapter as illustrated, be certain that the
center screw of the outlet plate is grounded. The
21.CHARGE PERIOD
The approximate required time to bring a battery to full charge state depends upon
the number of
POSSIBLE CHARGING PROBLEMS
1. THERMAL OVERLOAD SWITCH (CIRCUIT BREAKER) STARTS CYCLING:
a.A battery with shorted cells will cause the circuit breaker to cycle indefinitely. This must not be allowed to continue.
b.Reversed charger connections will also cause cycling to continue indefinitely. This must not be allowed to continue.
c.If a severely discharged battery is in otherwise good condition, the cycling will stop in 15 to 20 minutes when the battery has developed
voltage to allow a normal charging rate.
2. THERE IS NO METER READING:
a.Check the AC outlet or extension cord connections, to be sure power is being supplied to the battery charger.
b.Check the clamps and terminals for corrosion.
c.A very low reading may indicate a defective battery. A badly sulfated battery (a result of remaining discharged for a long period) or in some cases a completely discharged battery may produce this effect. If the charge rate does not increase after three or four hours have the battery checked.
3. THE METER NEEDLE SWINGS TO THE EXTREME RIGHT SIDE OF THE METER.
a.Check for reverse polarity connections.
b.If the battery is severely discharged, the charge meter needle may start to cycle up and down. This will stop after 15 to 20 minutes.
c.The battery may one or more shorted cells. Cycling will start immediately and continue indefinitely. If cycling has not stopped as outlined in (b), disconnect the charger (AC power cord first) and have the battery tested.
MAINTENANCE INSTRUCTIONS
This charger requires minimal maintenance. As with any appliance or tool, a few common sense rules will prolong the life of the battery charger.
ALWAYS BE SURE THE CHARGER IS UNPLUGGED BEFORE DOING ANY MAINTENANCE OR CLEANING.
1.Store in a clean, dry place
2.Coil up the cords when not in use.
3.Clean the case and cords with a slightly damp cloth.
4.Clean any corrosion from the clamps with a solution of water and backing soda.
5.Examine the cords periodically for cracking or other damage and have them replaced if necessary.
4