
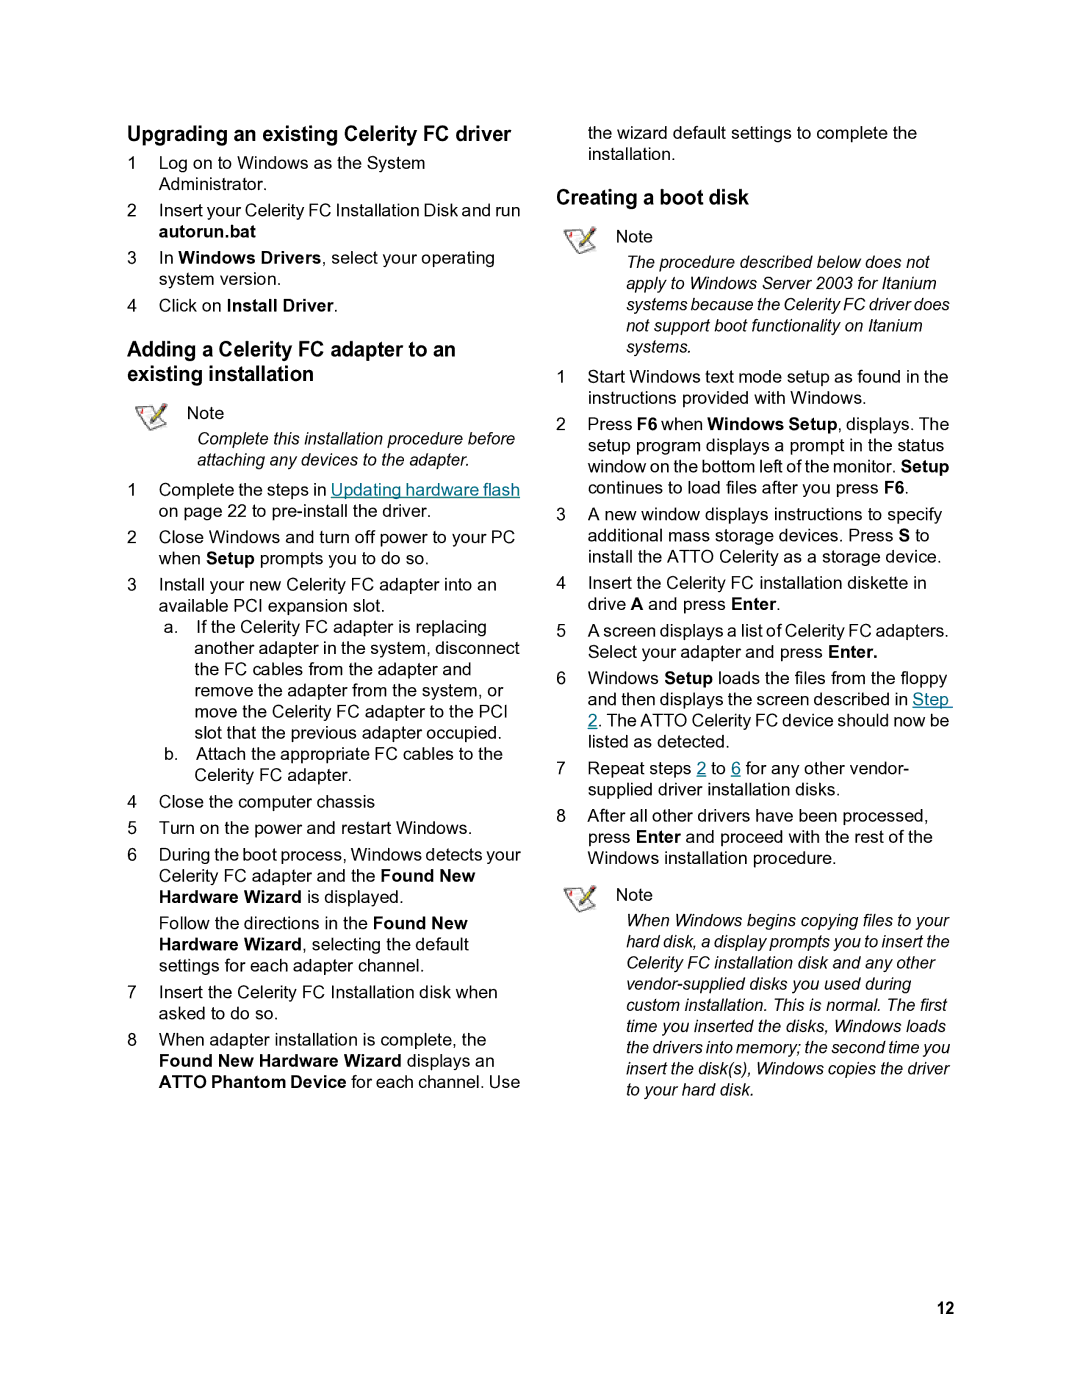
FC-41ES, FC-41EL, FC-21PS specifications
ATTO Technology is a leader in the world of storage connectivity and network solutions, and its products are specifically designed to enhance the performance of data-intensive workloads. Among their lineup, the ATTO FC-41ES, FC-41EL, and FC-21PS stand out as powerful Fibre Channel host bus adapters (HBAs), tailored for environments that require reliable, high-speed data transfer.The ATTO FC-41ES is known for its ability to maximize the performance of high-bandwidth applications, such as video editing, virtualization, and large-scale data storage. It features dual-port 16Gb/s Fibre Channel connections, which ensure that it can handle intensive data transactions efficiently. The FC-41ES is designed with low-latency architecture to provide a significant boost to I/O operations, making it ideal for time-sensitive applications.
On the other hand, the FC-41EL is designed for enterprise use, emphasizing energy efficiency without compromising on performance. This model also offers dual-port 16Gb/s connectivity, allowing for seamless integration into existing storage networks while providing an eco-friendly solution. The FC-41EL’s lower power consumption translates into reduced operating costs for data centers, which is a critical factor for organizations seeking to maximize their return on investment.
The FC-21PS, a SCSI-based host bus adapter, is tailored for applications that may not require the speed of 16Gb/s but still require robust performance and reliability. With its advanced technology, the FC-21PS delivers 8Gb/s speeds while maintaining compatibility with older SCSI systems. This makes it an excellent choice for organizations that are gradually upgrading their infrastructure while still needing to support legacy storage solutions.
All three adapters feature ATTO’s proprietary Advanced Data Streaming (ADS) technology, which optimizes data flow to ensure consistent performance even in highly loaded environments. This technology minimizes latency and maximizes throughput, making it invaluable for applications where every millisecond counts.
The FC-41ES, FC-41EL, and FC-21PS all come with an intuitive management software that simplifies monitoring, configuration, and troubleshooting. This ensures that IT administrators can maintain high availability and performance of their storage networks with minimal effort.
In summary, ATTO Technology’s FC-41ES, FC-41EL, and FC-21PS host bus adapters bring advanced Fibre Channel technology to the table, each tailored to meet specific performance and efficiency demands. Whether it’s high-speed video production, cost-effective enterprise storage solutions, or legacy SCSI system integration, ATTO’s HBAs are designed to deliver superior performance and reliability for all data-intensive applications.