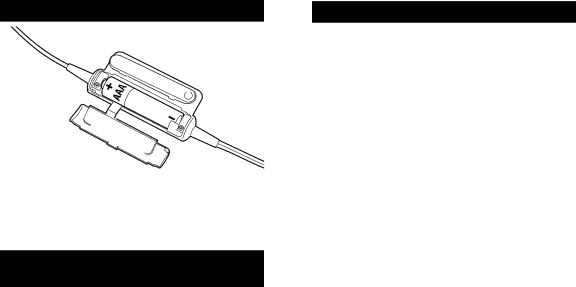
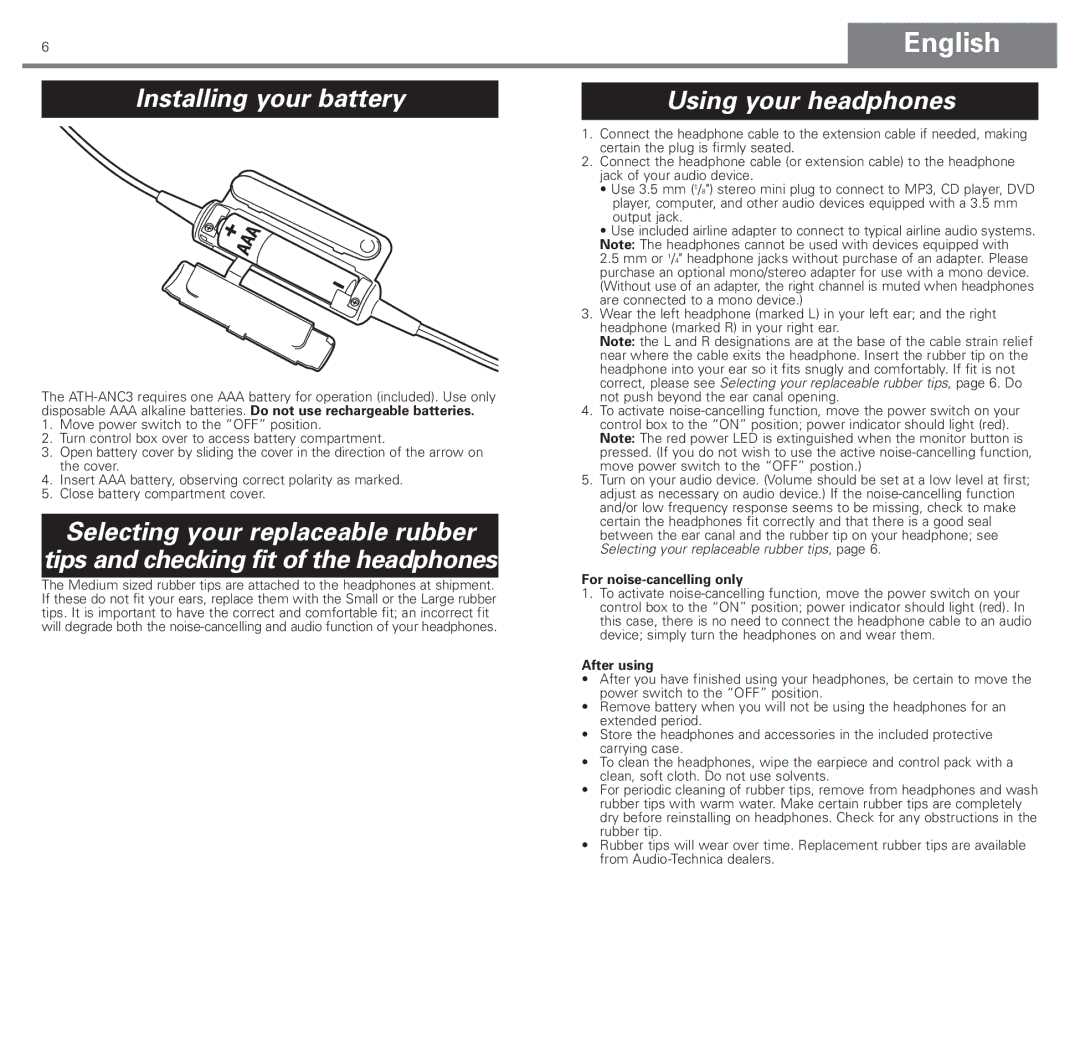
ATH-ANC3 specifications
The Audio-Technica ATH-ANC3 is a pair of premium noise-cancelling in-ear headphones designed for audiophiles and casual listeners alike. As part of Audio-Technica's renowned lineup of audio products, the ATH-ANC3 combines advanced technology and user-friendly features to provide a superior listening experience.One of the most notable features of the ATH-ANC3 is its active noise-cancelling (ANC) capability. This technology utilizes built-in microphones to detect external sounds and generate inverse sound waves to effectively cancel out ambient noise. This results in a more immersive listening experience, allowing users to enjoy their favorite music or podcasts without the interference of surrounding sounds, making them ideal for travel or busy environments.
The ATH-ANC3 is equipped with high-resolution 12 mm drivers that deliver a rich and detailed sound signature. The headphones reproduce a wide frequency range, ensuring that both the highs and lows are clear and balanced. This is complemented by the in-ear design that provides passive noise isolation, further enhancing the overall audio quality.
Another key characteristic of the ATH-ANC3 is its wireless connectivity. Featuring Bluetooth technology, users can enjoy the freedom of movement without being tethered to their devices. The headphones are compatible with most Bluetooth-enabled devices, allowing for seamless pairing and stable connections. Additionally, the ATH-ANC3 supports aptX codec for improved audio streaming quality, making it an excellent choice for high-fidelity sound.
For prolonged usage, the ATH-ANC3 includes a compact and lightweight design, providing comfort even during extended listening sessions. The in-ear tips come in multiple sizes to ensure a snug fit, further enhancing noise isolation and comfort. The battery life is also impressive, offering several hours of playback time on a single charge, with the added convenience of a quick-charge feature for those on the go.
Moreover, the ATH-ANC3 includes intuitive controls for playback and call management, allowing users to easily adjust volume, skip tracks, or answer calls with just a tap. With sweat and water-resistant construction, these headphones are also suitable for workouts or outdoor activities.
In summary, the Audio-Technica ATH-ANC3 stands out with its robust feature set, combining advanced noise-cancelling technology with high-quality audio performance and user-centric design. Whether commuting, traveling, or simply enjoying music at home, the ATH-ANC3 is a versatile audio solution that caters to a wide range of listening preferences.