The AS10SW is designed to be used with the sub output of any 5.1 or 7.1 surround receiver/amplifi er. If not using a sub output with active low pass crossover, we recom- mend using an external active crossover or a passive crossover with a minimum crossover slope of 12db per octave @ 100 Hz.
Installation Tip! Due to the high sound pressure levels subwoofers create at higher volume levels, it is possible that the drywall in the area next to the subwoofer could rattle against the wall’s 2” x 4” framing. If this occurs, it is possible to stop the rattles by:
1.Stuffi ng more insulation into the wall cavity to dampen the sheetrock. Take care to keep the insulation away from the subwoofers magnet (there is little clearance from the back of the magnet to the back sheet rock once the AS10SW is mounted).
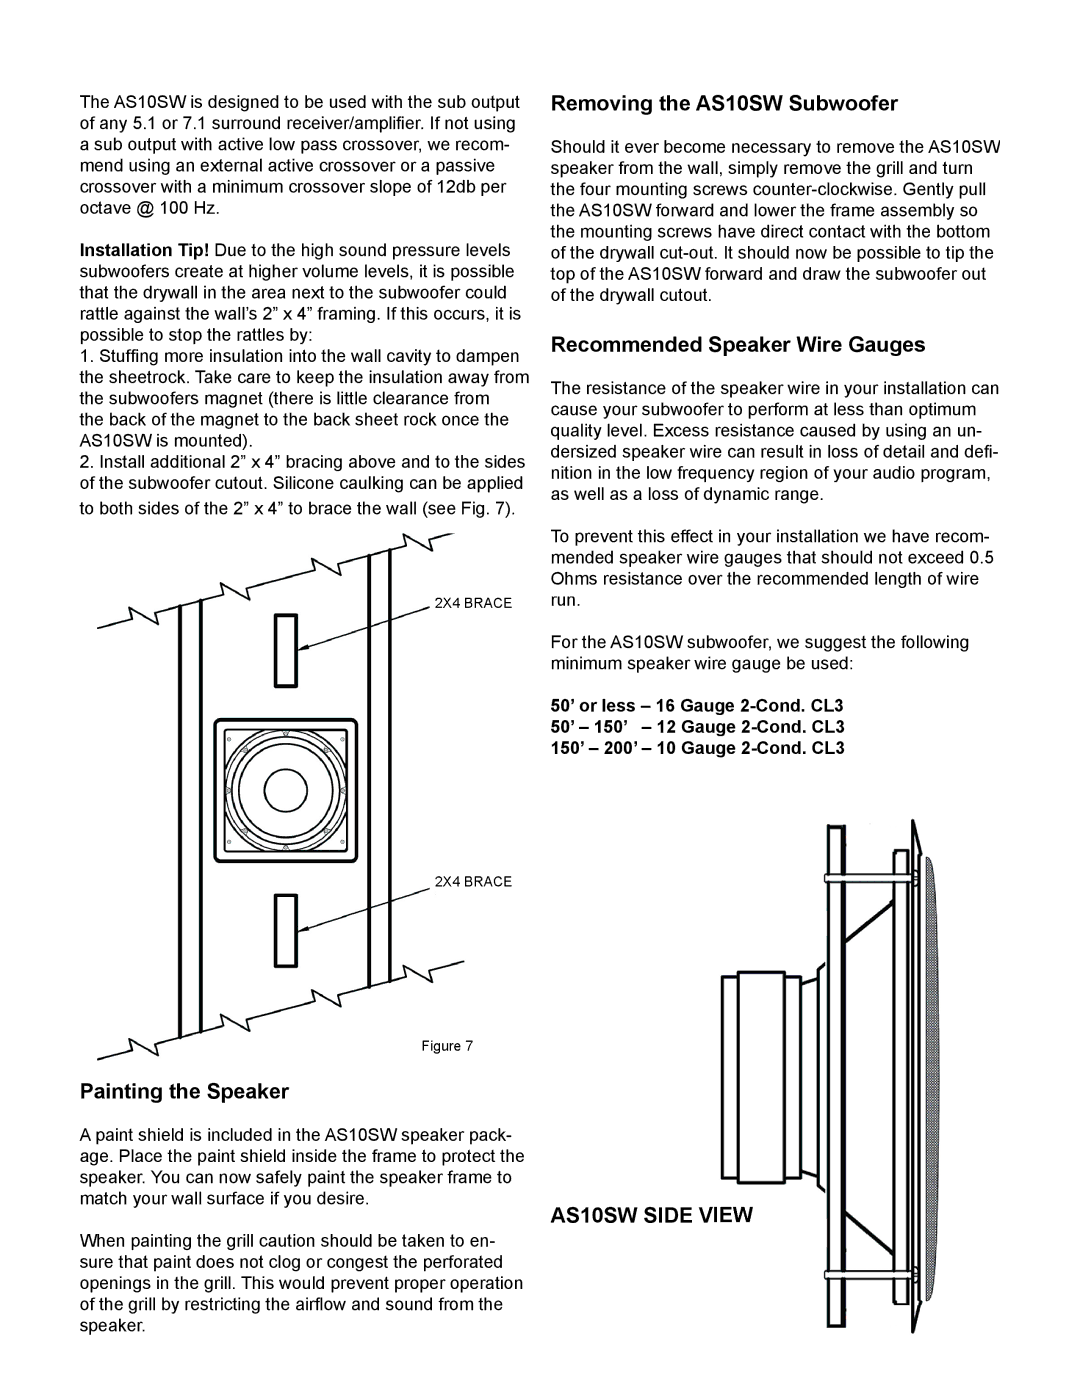
2.Install additional 2” x 4” bracing above and to the sides of the subwoofer cutout. Silicone caulking can be applied
to both sides of the 2” x 4” to brace the wall (see Fig. 7).
![]() ACE
ACE
![]() ACE
ACE
Removing the AS10SW Subwoofer
Should it ever become necessary to remove the AS10SW speaker from the wall, simply remove the grill and turn the four mounting screws
Recommended Speaker Wire Gauges
The resistance of the speaker wire in your installation can cause your subwoofer to perform at less than optimum quality level. Excess resistance caused by using an un- dersized speaker wire can result in loss of detail and defi - nition in the low frequency region of your audio program, as well as a loss of dynamic range.
To prevent this effect in your installation we have recom- mended speaker wire gauges that should not exceed 0.5 Ohms resistance over the recommended length of wire
run.
For the AS10SW subwoofer, we suggest the following minimum speaker wire gauge be used:
50’ or less – 16 Gauge
Painting the Speaker
A paint shield is included in the AS10SW speaker pack- age. Place the paint shield inside the frame to protect the speaker. You can now safely paint the speaker frame to match your wall surface if you desire.
AS10SW SIDE
When painting the grill caution should be taken to en- sure that paint does not clog or congest the perforated openings in the grill. This would prevent proper operation of the grill by restricting the airfl ow and sound from the speaker.
