Installation Guide
TRIM RING INSTALLATION:
This page only covers special installation considerations for the trim ring installation.
If the video monitor is to be installed in a vehicle with the trim ring, it may need to be trimmed to fit the contour of the vehicle headliner.
1)In this installation, the video monitor is mounted directly to the overhead
2)It is best to mount the video monitor to the roof structure without the trim ring first. There should be a gap between the headliner and the outer flange of the video monitor. The trim ring should be cut to full this gap. Apply masking tape to the outer surface of the trim ring in the areas where the cut will be made.
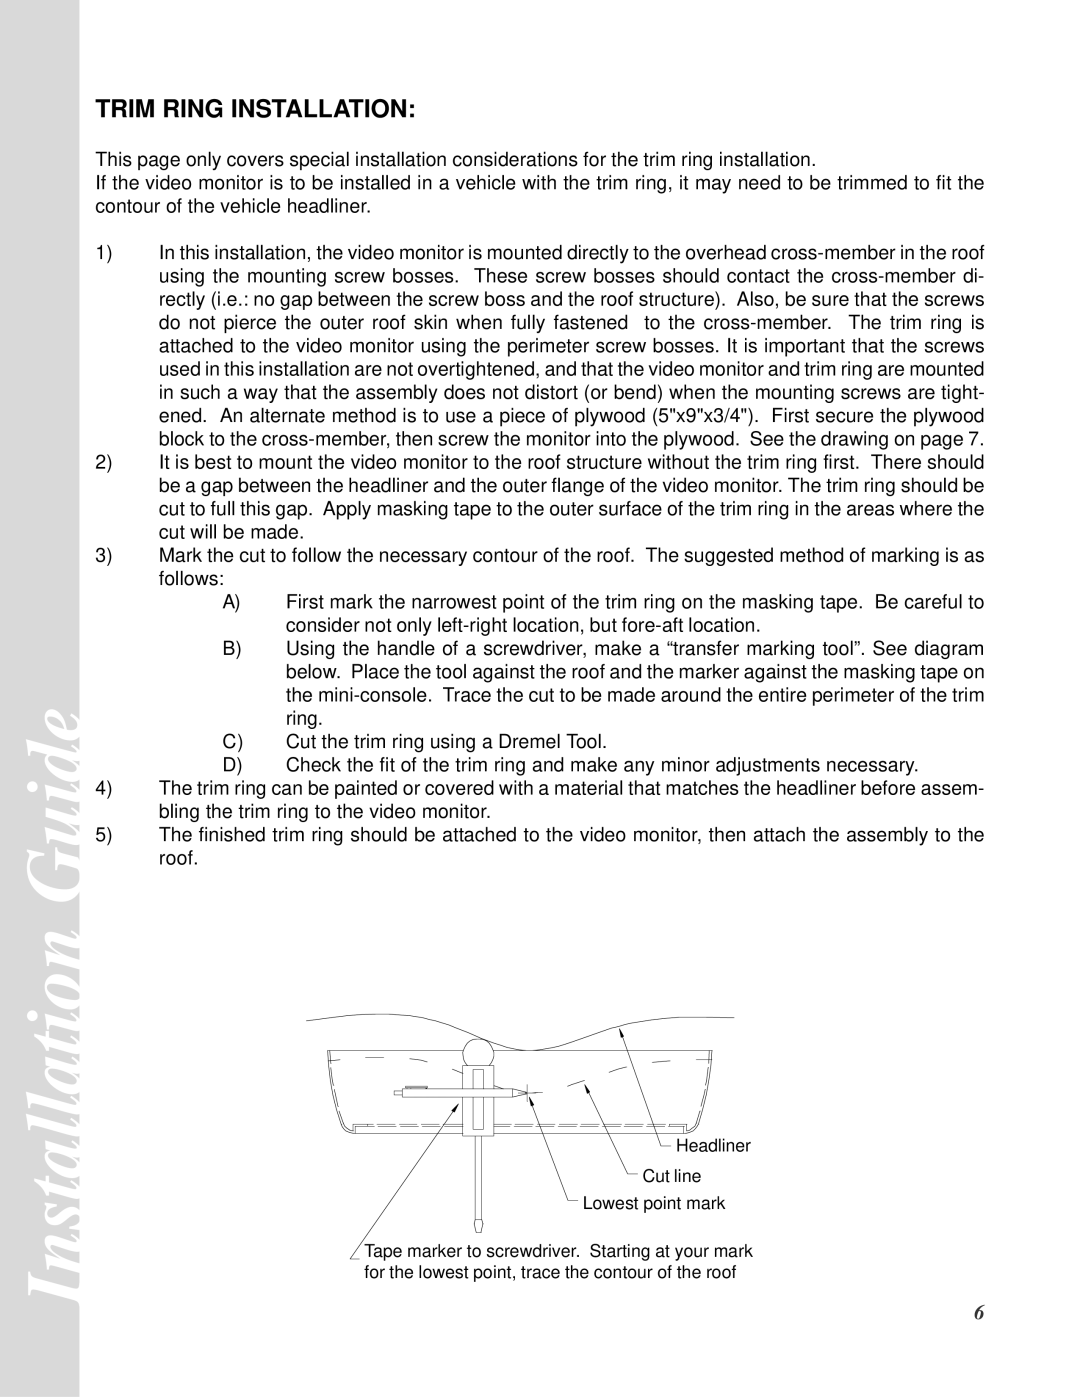
3)Mark the cut to follow the necessary contour of the roof. The suggested method of marking is as follows:
A)First mark the narrowest point of the trim ring on the masking tape. Be careful to consider not only
B)Using the handle of a screwdriver, make a “transfer marking tool”. See diagram below. Place the tool against the roof and the marker against the masking tape on the
C)Cut the trim ring using a Dremel Tool.
D)Check the fit of the trim ring and make any minor adjustments necessary.
4)The trim ring can be painted or covered with a material that matches the headliner before assem- bling the trim ring to the video monitor.
5)The finished trim ring should be attached to the video monitor, then attach the assembly to the roof.
Headliner
CutLineline
LowestPoint Markpoint mark
Figure 6
Refer to Fig 7 for detail on attaching
Tapemarkermarkerto scr wdriverto screwdrivertarting at . Startingco soleatoyourvideo podmarkand video pod to
your mark for the lowest point, then
tracefor thecontlowestur of the roofpoint, trace the contourvehicleofstructurethe roof.
6