Installation
SIRMarine Owner’s Manual
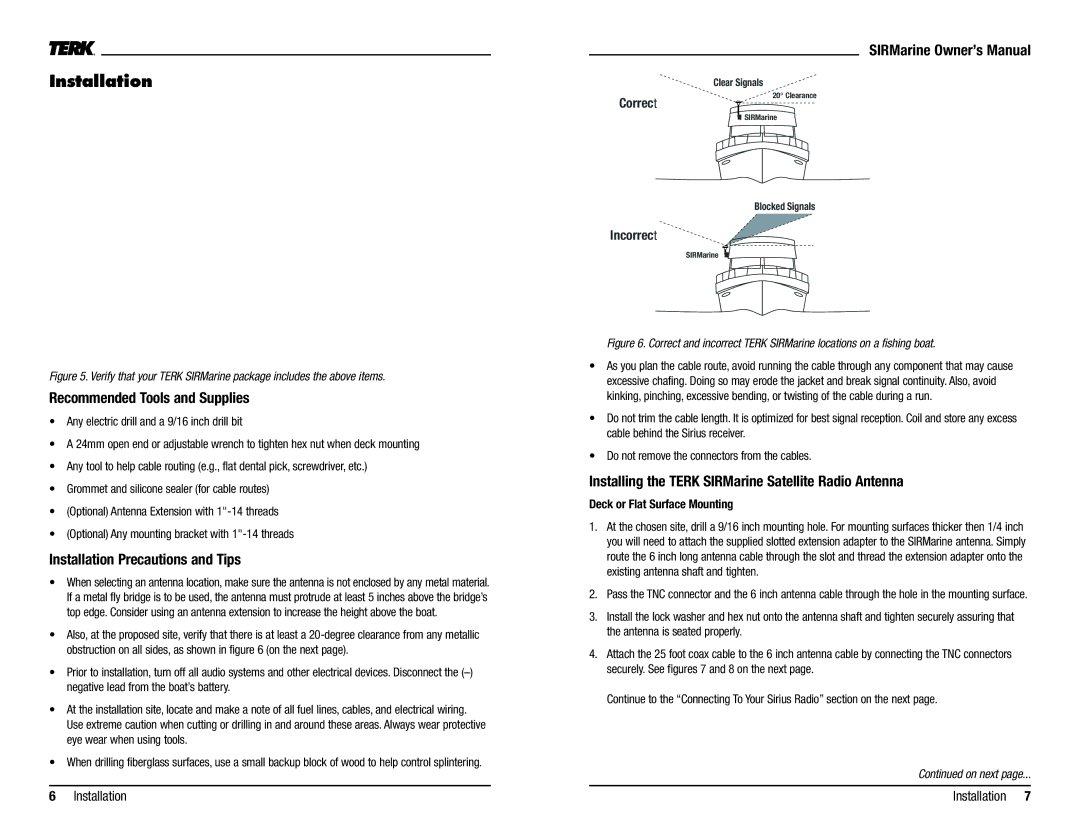
Clear Signals
Correct
20° Clearance
SIRMarine Antenna
Threaded
Flange Adapter
Slotted extension adapter
25 foot cable
Lock
Washer
Hex nut
Figure 5. Verify that your TERK SIRMarine package includes the above items.
Recommended Tools and Supplies
•Any electric drill and a 9/16 inch drill bit
•A 24mm open end or adjustable wrench to tighten hex nut when deck mounting
•Any tool to help cable routing (e.g., flat dental pick, screwdriver, etc.)
•Grommet and silicone sealer (for cable routes)
•(Optional) Antenna Extension with
•(Optional) Any mounting bracket with
Installation Precautions and Tips
•When selecting an antenna location, make sure the antenna is not enclosed by any metal material. If a metal fly bridge is to be used, the antenna must protrude at least 5 inches above the bridge’s top edge. Consider using an antenna extension to increase the height above the boat.
•Also, at the proposed site, verify that there is at least a
•Prior to installation, turn off all audio systems and other electrical devices. Disconnect the
•At the installation site, locate and make a note of all fuel lines, cables, and electrical wiring. Use extreme caution when cutting or drilling in and around these areas. Always wear protective eye wear when using tools.
•When drilling fiberglass surfaces, use a small backup block of wood to help control splintering.
6Installation
![]() SIRMarine
SIRMarine
Blocked Signals
Incorrect
SIRMarine
Figure 6. Correct and incorrect TERK SIRMarine locations on a fishing boat.
•As you plan the cable route, avoid running the cable through any component that may cause excessive chafing. Doing so may erode the jacket and break signal continuity. Also, avoid kinking, pinching, excessive bending, or twisting of the cable during a run.
•Do not trim the cable length. It is optimized for best signal reception. Coil and store any excess cable behind the Sirius receiver.
•Do not remove the connectors from the cables.
Installing the TERK SIRMarine Satellite Radio Antenna
Deck or Flat Surface Mounting
1.At the chosen site, drill a 9/16 inch mounting hole. For mounting surfaces thicker then 1/4 inch you will need to attach the supplied slotted extension adapter to the SIRMarine antenna. Simply route the 6 inch long antenna cable through the slot and thread the extension adapter onto the existing antenna shaft and tighten.
2.Pass the TNC connector and the 6 inch antenna cable through the hole in the mounting surface.
3.Install the lock washer and hex nut onto the antenna shaft and tighten securely assuring that the antenna is seated properly.
4.Attach the 25 foot coax cable to the 6 inch antenna cable by connecting the TNC connectors securely. See figures 7 and 8 on the next page.
Continue to the “Connecting To Your Sirius Radio” section on the next page.
Continued on next page...
Installation 7