
VBDV56 specifications
The Audiovox VBDV56 is a versatile and convenient multimedia device designed to enhance on-the-go entertainment experiences. This portable DVD player is perfect for families, travelers, and anyone looking for high-quality visual media playback without being tethered to a stationary setup.One of the standout features of the VBDV56 is its robust 5.6-inch LCD screen. This display offers clear visuals with decent resolution, making it suitable for watching DVDs, playing video files, or enjoying a variety of multimedia content. The screen is also designed to provide a wide viewing angle, ensuring that everyone can enjoy the content without straining their eyes.
The VBDV56 supports a wide range of disc formats, including DVD, DVD-R, DVD-RW, CD, CD-R, and CD-RW. This versatility allows users to watch their favorite movies, listen to music, and view photos seamlessly. Furthermore, the device also features a USB port, enabling playback of media directly from USB flash drives or external hard drives. This makes it easy to enjoy a plethora of content without needing to carry multiple discs.
In terms of audio capabilities, the Audiovox VBDV56 is equipped with built-in speakers that provide decent sound quality for casual listening. For a more immersive experience, it also includes a headphone jack, allowing users to connect their favorite headphones for private listening. This feature is especially convenient during travel, where distractions may interfere with the viewing experience.
The VBDV56 is designed with portability in mind. It is lightweight and compact, making it easy to carry in a bag or backpack. The device is powered by a rechargeable battery, providing the freedom to watch movies or listen to music without the need for a power outlet. The battery life is sufficient for several hours of use, making it an excellent option for long road trips or flights.
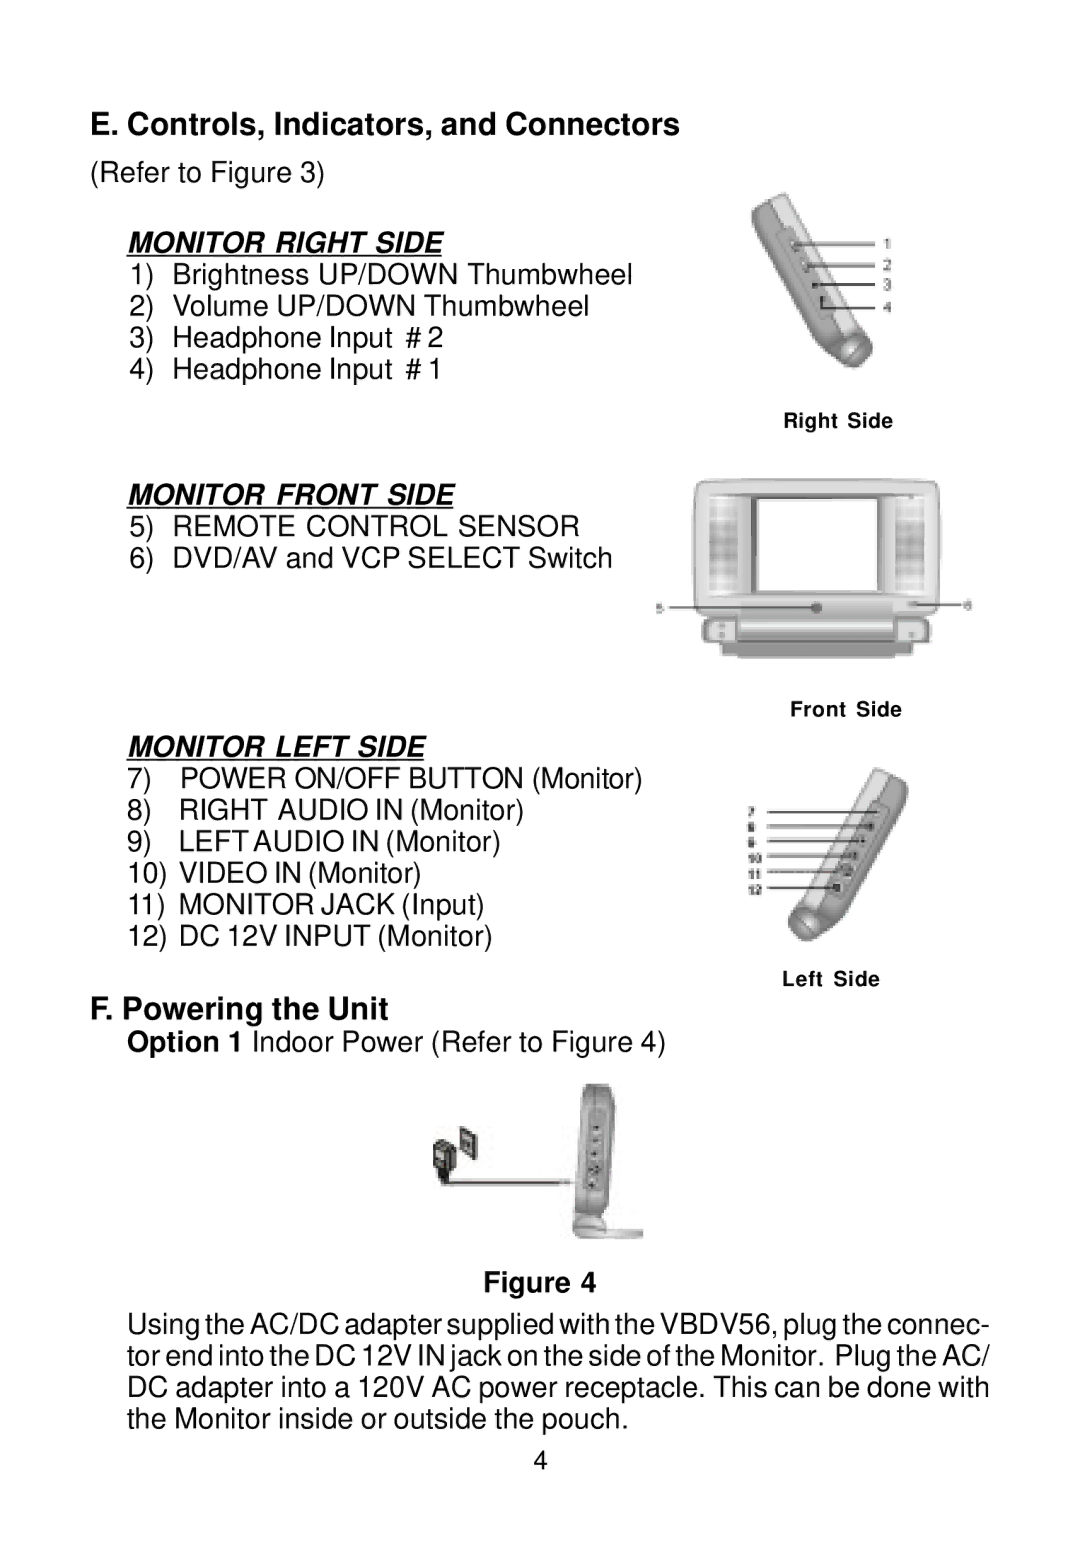
In addition to its multimedia playback capabilities, the VBDV56 comes with a user-friendly interface that simplifies navigation. The remote control that accompanies the device makes it easy to operate from a distance, allowing for convenient control of playback and settings.
Overall, the Audiovox VBDV56 is an excellent portable DVD player that combines functionality and ease of use. With its diverse media support, decent display, and convenient features, it caters to a wide audience seeking entertainment while away from home. Whether for personal enjoyment or family use, the VBDV56 stands out as a reliable companion for on-the-go media consumption.