MINI CONSOLE INSTALLATION:

This page only covers special installation considerations for the mini-console installation. If the video monitor is to be installed in a vehicle with the mini console, this console may need to be trimmed to fit the contour of the vehicle headliner.

1)In this installation, the video monitor is mounted directly to the overhead cross-member in the roof using the mounting screw bosses. These screw bosses should contact the cross-member di- rectly (i.e.: no gap between the screw boss and the roof structure). Also, be sure that the screws do not pierce the outer roof skin when fully fastened to the cross-member. The mini-console is attached to the video monitor using the perimeter screw bosses. It is important that the screws used in this installation are not overtightened, and that the video monitor and mini-console are mounted in such a way that the assembly does not distort (or bend) when the mounting screws are tightened. An alternate method is to use a piece of plywood (12"x9"x3/4"). First secure the plywood block to the cross-member, then screw the monitor into the plywood. See the drawing on page 5.

2)It is best to mount the video monitor to the roof structure without the mini-console first. There should be a gap between the headliner and the outer flange of the video monitor. The mini-console should be cut to full this gap. Apply masking tape to the outer surface of the mini-console in the areas where the cut will be made.

3)Mark the cut to follow the necessary contour of the roof. The suggested method of marking is as follows:

A)First mark the narrowest point of the mini-console on the masking tape. Be careful to consider not only vertical location, but fore-aft location.

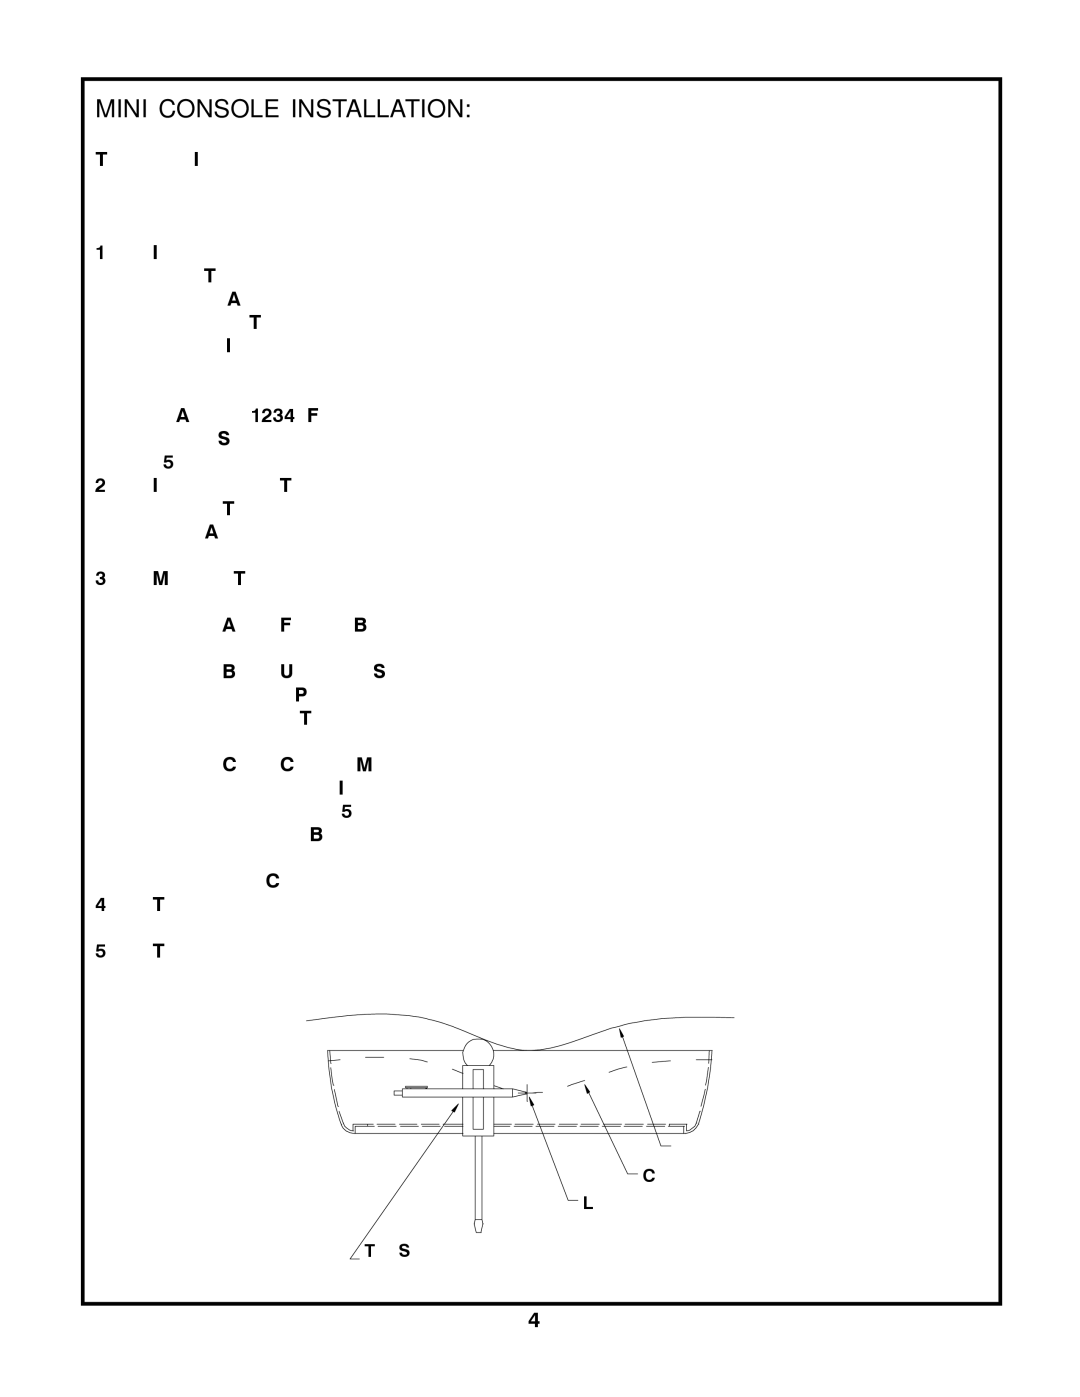
B)Using the handle of a screwdriver, make a “transfer marking tool”. See diagram below. Place the tool against the roof and the marker against the masking tape on the mini-console. Trace the cut to be made around the entire perimeter of the mini- console.

C)Cut the mini-console using a sharp utility knife or shears. Make the cut in several passes over the marked line, each time cutting a little deeper. It is not necessary to cut completely through the plastic, the cut only need be over 50% of the wall thick- ness of the plastic. By bending the cut back and forth several times, the plastic will break cleanly at the cut.

D)Check the fit of the trimmed console and make any minor adjustments necessary.

4)The mini-console can be painted or covered with a material that matches the headliner before assembling the mini-console to video monitor.

5)The finished mini-console should be attached to the video monitor, then attach the assembly to the roof.

Headliner

CutLineline

LowestPoint Markpoint mark

Figure 6

Refer to Fig 7 for detail on attaching

Tapemarkermarkerto screwdriverto startingscrewdriverat . Startingconsoleatto yourvideo podmarkand video pod to

your mark for the lowest point, then

tracefor thecontlowestur of the roofpoint, trace the contourvehicleofstructurethe roof.

-4-

Page 6
Image 6
Audiovox VOD8521P, VOD8521S manual Mini Console Installation

VOD8521P, VOD8521S, VOD8521 specifications

The Audiovox VOD8521, VOD8521S, and VOD8521P are a series of versatile and user-friendly portable DVD players that have gained popularity for their robust features and sleek design. These models are designed to enhance the way users enjoy their favorite movies and media on the go, making them ideal for long road trips or simply relaxing at home.

One of the standout features of the Audiovox VOD8521 series is its impressive 8.5-inch LCD screen, which provides vibrant visuals and a 16:9 aspect ratio for an immersive viewing experience. The screens are equipped with high-resolution technology, ensuring that images are sharp and colors are rich, making any movie or media content truly enjoyable.

All three models support a wide range of media formats, including DVD, CD, and various file types like MP3 and JPEG, allowing users to play their favorite videos, music, and photos without limitations. The inclusion of a built-in rechargeable battery provides added convenience, enabling users to watch their selected content without being tethered to a power outlet. The battery life is commendable, offering several hours of continuous playback.

Audio is another strong suit of the VOD8521 series. Each model integrates dual headphone jacks, allowing two people to enjoy the audio from the same device simultaneously. This feature is particularly useful for families traveling together or friends sharing media. Additionally, with built-in stereo speakers, viewers can also enjoy sound without the need for headphones.

The VOD8521S model features a swivel screen, which adds an extra layer of versatility by enabling users to adjust the viewing angle for optimal comfort. This is particularly beneficial when sharing the screen with multiple viewers, as it allows for a customizable experience.

All three models are designed with user-friendly controls and an intuitive interface, making it easy for anyone to navigate through menus and settings. The inclusion of a remote control in the package further enhances the convenience, allowing users to operate the player from a distance.

When it comes to connectivity, the Audiovox VOD8521 series is equipped with USB port capabilities that allow for playback from external devices. This feature opens up a world of possibilities for users, allowing them to access a plethora of additional content without the need for physical media.

In summary, the Audiovox VOD8521, VOD8521S, and VOD8521P are excellent choices for those seeking a high-quality portable DVD player. Their combination of an expansive screen, versatile media support, user-friendly design, and solid audio capabilities make them a valuable addition to any entertainment lineup, whether at home or on the move.