INSTALLATION INSTRUCTIONS
WHS200
Two Channel Automotive Infrared
Stereo Headphone System
Parts supplied
1.IR transmitter (1)
2.IR Transmitter harness (1)
3.IR headphones (2)
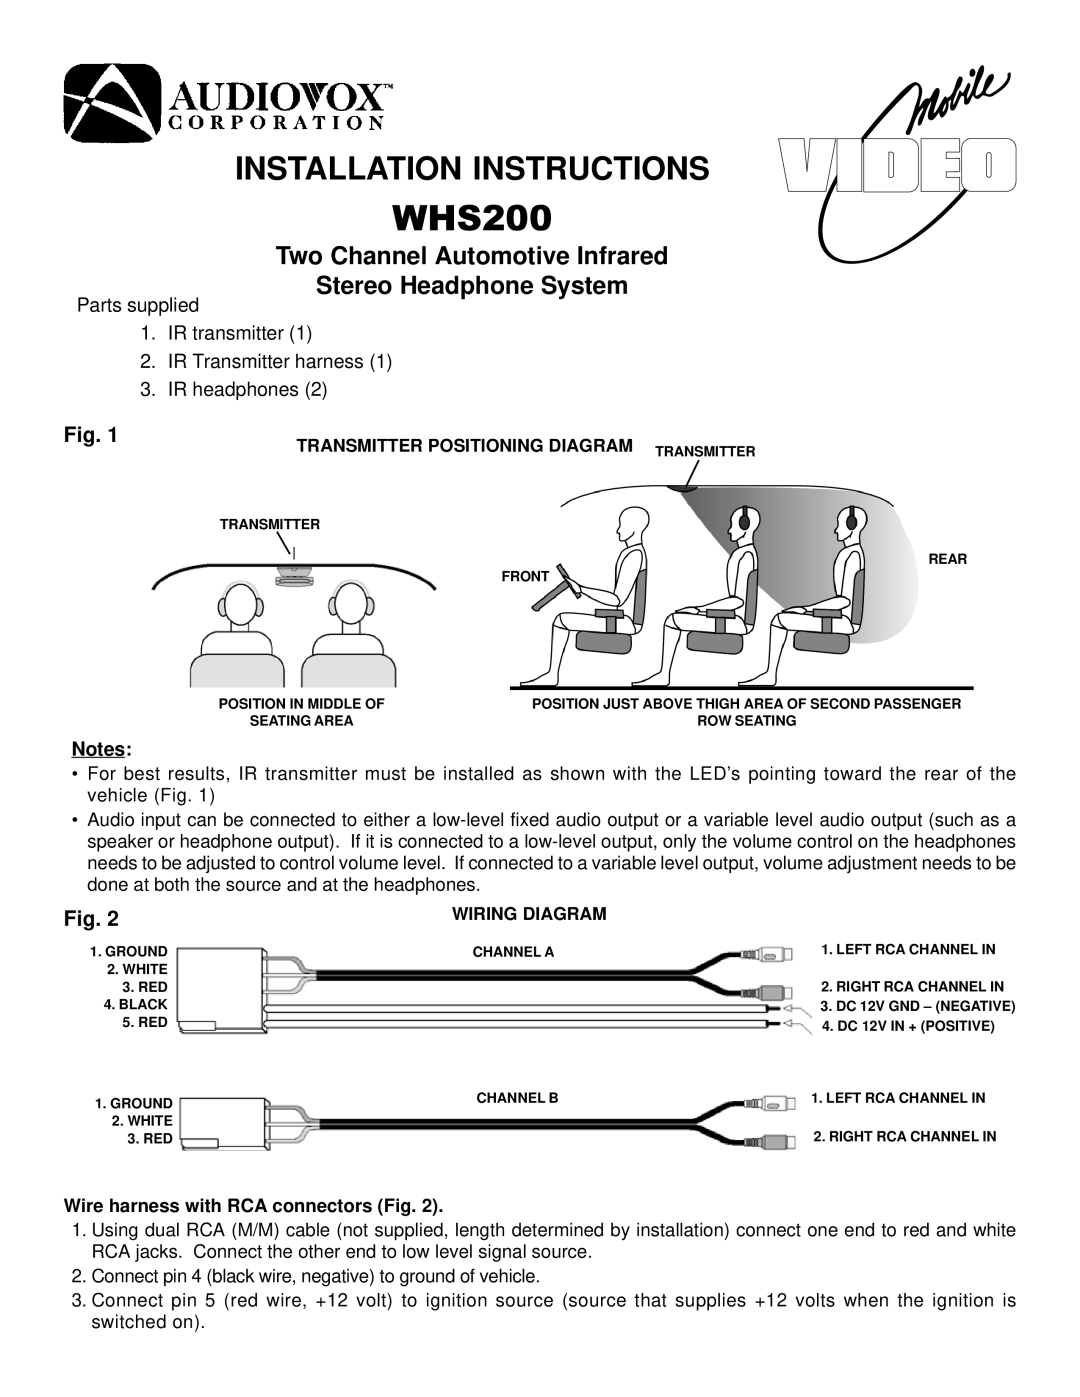
Fig. 1 | TRANSMITTER POSITIONING DIAGRAM TRANSMITTER |
|
TRANSMITTER
REAR
FRONT
POSITION IN MIDDLE OF | POSITION JUST ABOVE THIGH AREA OF SECOND PASSENGER |
SEATING AREA | ROW SEATING |
Notes:
•For best results, IR transmitter must be installed as shown with the LED’s pointing toward the rear of the vehicle (Fig. 1)
•Audio input can be connected to either a
Fig. 2 | WIRING DIAGRAM |
|
1. GROUND | CHANNEL A | 1. LEFT RCA CHANNEL IN |
2. WHITE |
|
|
3. RED |
| 2. RIGHT RCA CHANNEL IN |
4. BLACK |
| 3. DC 12V GND – (NEGATIVE) |
5. RED |
| 4. DC 12V IN + (POSITIVE) |
1. GROUND | CHANNEL B | 1. LEFT RCA CHANNEL IN |
|
| |
2. WHITE |
| 2. RIGHT RCA CHANNEL IN |
3. RED |
|
Wire harness with RCA connectors (Fig. 2).
1.Using dual RCA (M/M) cable (not supplied, length determined by installation) connect one end to red and white RCA jacks. Connect the other end to low level signal source.
2.Connect pin 4 (black wire, negative) to ground of vehicle.
3.Connect pin 5 (red wire, +12 volt) to ignition source (source that supplies +12 volts when the ignition is switched on).