MAINTENANCE (continued) | PAGE 15 | |
|
|
|
7. PUMP ASSEMBLY
CAUTION: READ THIS ENTIRE PROCEDURE BEFORE CONTINUING.
Following are
A.Thoroughly clean all parts to remove oil, grease and foreign material. Inspect for wear or damage and replace if required. Remove all parts to a clean and
B.If the impeller wear rings (17) require replacement, they are a light press fit and will be secured by one of the following methods. You should proceed as follows:
Rings Secured With Loctite: Apply a light film of Loctite No. 290 to the impeller part of the impeller/wear ring fit and install the rings.
CAUTION: BE CAREFUL NOT TO DRILL THROUGH THE IMPELLER AND BE SURE TO PRESS THE WEAR RING COMPLETELY IN PLACE. THEY SHOULD BE FIRMLY BUTTED AGAINST THE CORRESPONDING IMPELLER SHOULDER.
Rings Secured With Set Screws: Press the rings in place and drill and tap them using the same size and number of setscrews as originally provided. The new holes should be 15o to 20o from the old holes. Install and tighten the set screws.
CAUTION: IF THE SHAFT SLEEVES ON YOUR PUMP ARE SECURED WITH LOCTITE ONLY, REFER TO THE SHAFT SLEEVE INSTALLATION INSTRUCTIONS BEFORE INSTALLING THE IMPELLER.
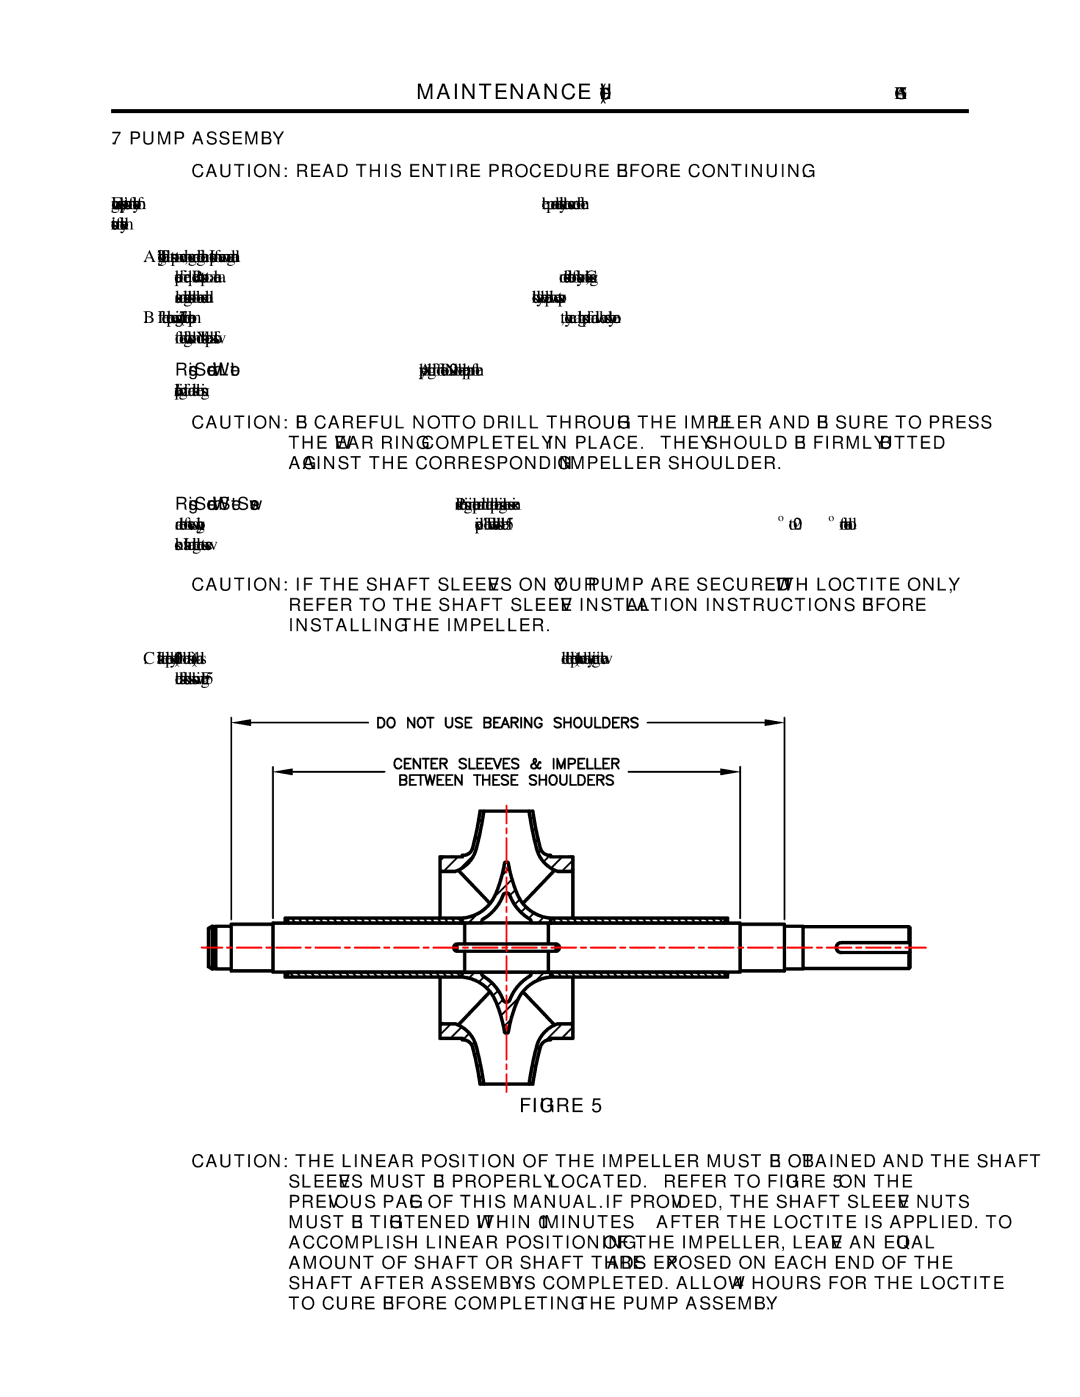
C.Install the impeller key (102) in the shaft (4) and slide the impeller (1) over the key, centering it between the shaft shoulders as shown in Figure 5.
FIGURE 5
CAUTION: THE LINEAR POSITION OF THE IMPELLER MUST BE OBTAINED AND THE SHAFT SLEEVES MUST BE PROPERLY LOCATED. REFER TO FIGURE 5 ON THE PREVIOUS PAGE OF THIS MANUAL. IF PROVIDED, THE SHAFT SLEEVE NUTS MUST BE TIGHTENED WITHIN 10 MINUTES AFTER THE LOCTITE IS APPLIED. TO ACCOMPLISH LINEAR POSITIONING OF THE IMPELLER, LEAVE AN EQUAL AMOUNT OF SHAFT OR SHAFT THREADS EXPOSED ON EACH END OF THE SHAFT AFTER ASSEMBLY IS COMPLETED. ALLOW 4 HOURS FOR THE LOCTITE TO CURE BEFORE COMPLETING THE PUMP ASSEMBLY.
